# Fonts - Simple Model
Before configuring fonts, make sure you have already set up your Pricing and Sizes sections. Fonts in the Simple Letter Model rely on these settings to accurately calculate sign dimensions and pricing.
- Source URL: https://www.signcustomiser.com/help/pricing-and-sizing/17172602-fonts-simple-model/
- Markdown URL: https://www.signcustomiser.com/help/pricing-and-sizing/17172602-fonts-simple-model.md
- Category: Pricing and Sizing Models
- Last updated: 2026-09-25
## Article
Before configuring fonts, make sure you have already set up your **Pricing** and **Sizes** sections. Fonts in the **Simple Letter Model** rely on these settings to accurately calculate sign dimensions and pricing.
## **Accessing the Font Settings**
1. Go to the **Sign Customiser** admin:
- **Universal subscribers**: Go to **Home** in your account.
- **Shopify users**: Navigate to **Shopify admin** → **Apps** and select **Sign Customiser**.
2. Click on **Customisers** in the menu.
3. Select the **customiser** you want to edit.
4. From the left-hand menu, go to **Core Setup** → **Fonts**.
## **Setting the Font Section Title and Description**
You can customise the title and description shown above the font selector on your storefront.
1. In the **Fonts** section, scroll to **Font Settings**.
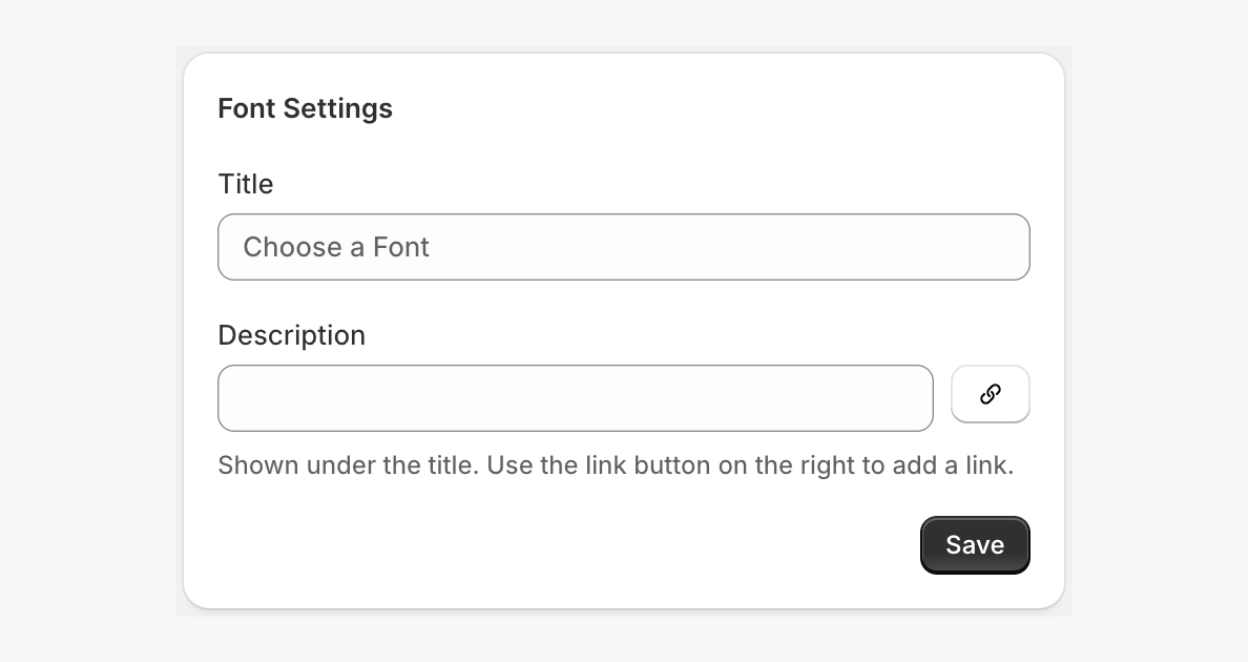
2. Enter:
- (_Optional_) **Title** – The title displayed above the Font section.
- (_Optional_) **Description** – A description displayed below the title. You can also add a link to an external page.
3. Click **Save**.
## Add and Assign Fonts to Your Pricing
### Step 1: Add a font
1. Whilst still in the **Fonts** section, click on the **Add new font** or edit an existing one.
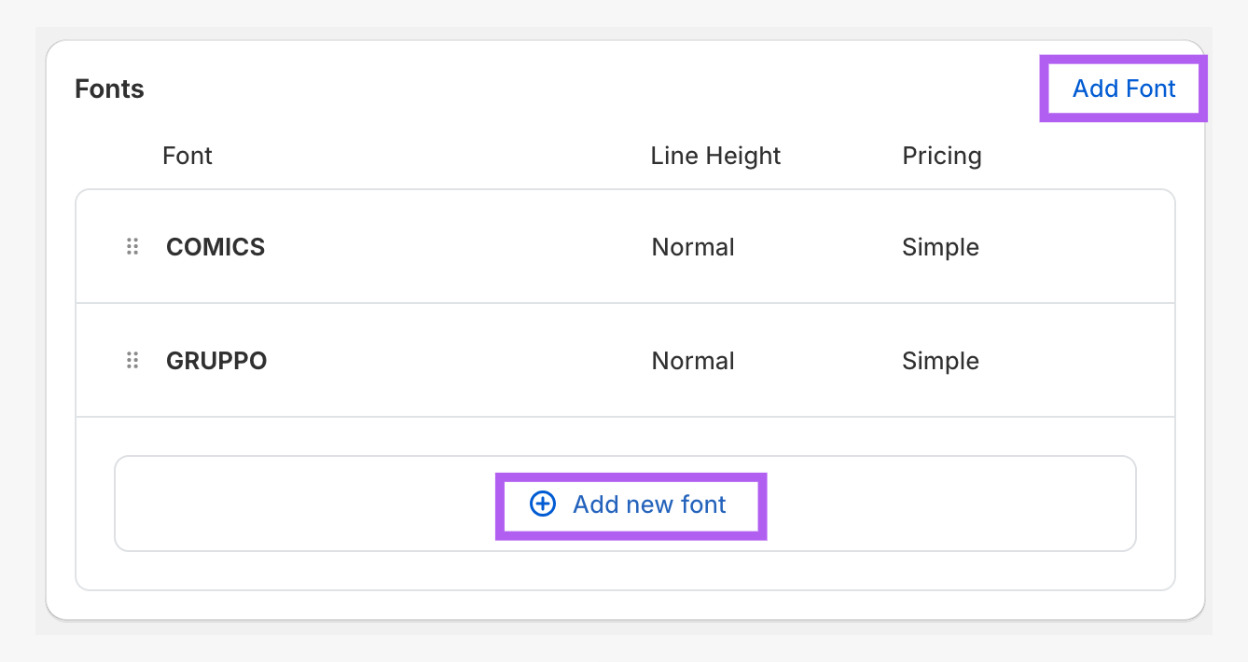
2. In the **Label** field, enter the font name.
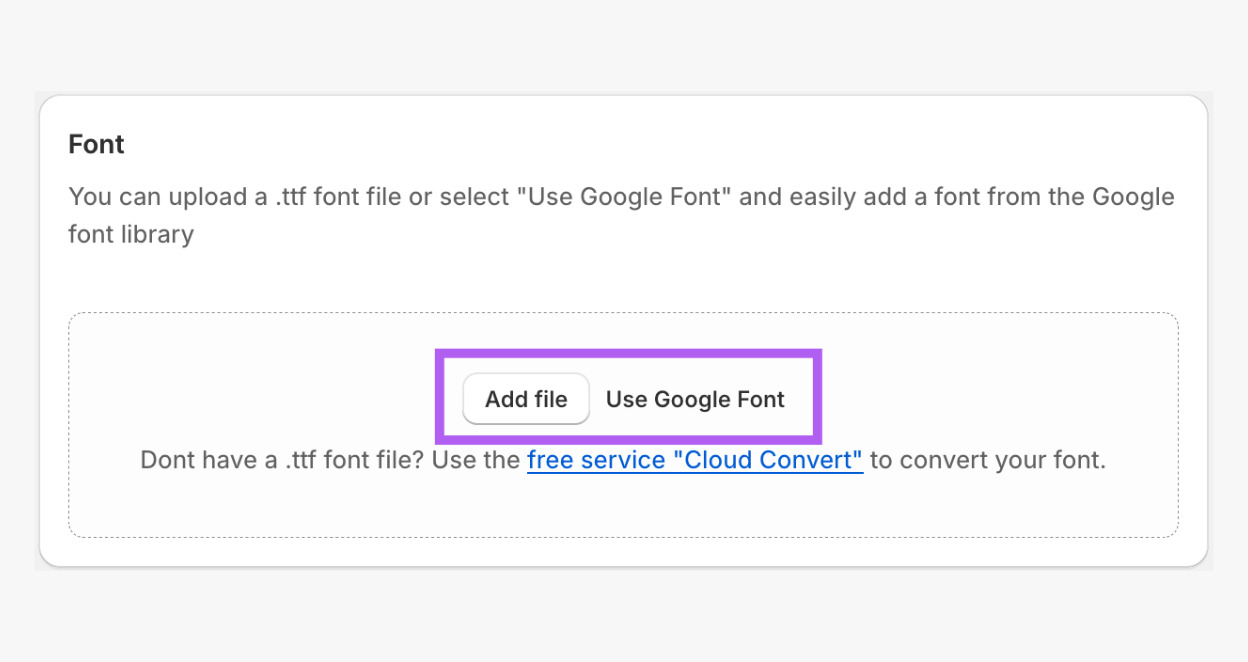
3. Under **Font**, choose one of the follwoing:
- **Add file** – to upload a **.ttf** font file.
- Use **Google Font** – select a font from **Google Fonts**.
### **Step 2: Assign a Pricing Model**
1. While still in **Fonts**, scroll to **Assign a pricing** section.
2. Select a pricing model you want to use for the font.
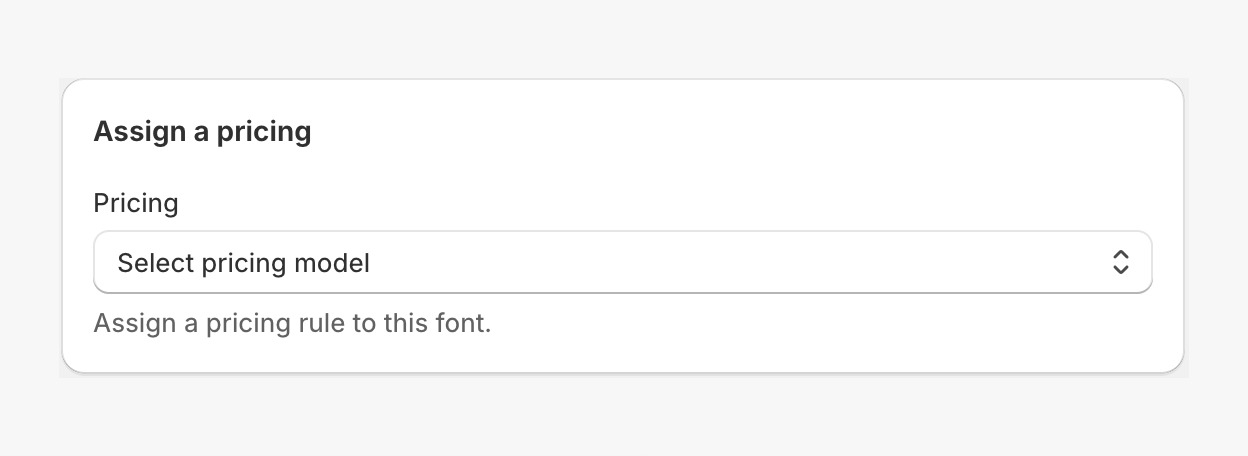
Haven’t configured your pricing? Follow the Pricing - Simple Letter Model guide first.
3. Click **Save.**
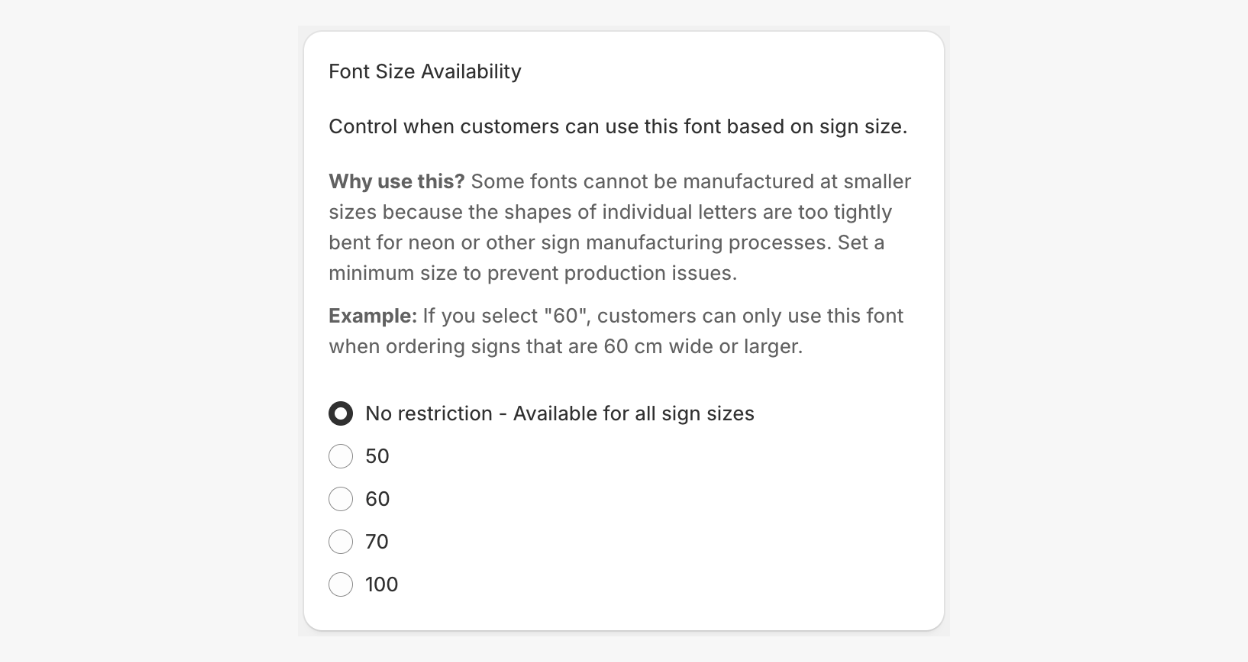
### Step 3: Set Font Size Availability
You can restrict a font so that it is only available from a specific sign size.
1. While still in **Fonts**, scroll to the **Font Size Availability**.
2. Choose whether the font should be restricted from a particular size.
### Step 4: Configure Font Style
#### Line Height
Different fonts naturally have different spacing between lines. Some fonts appear to spread out, while others may overlap vertically. You can adjust the line height for each font.
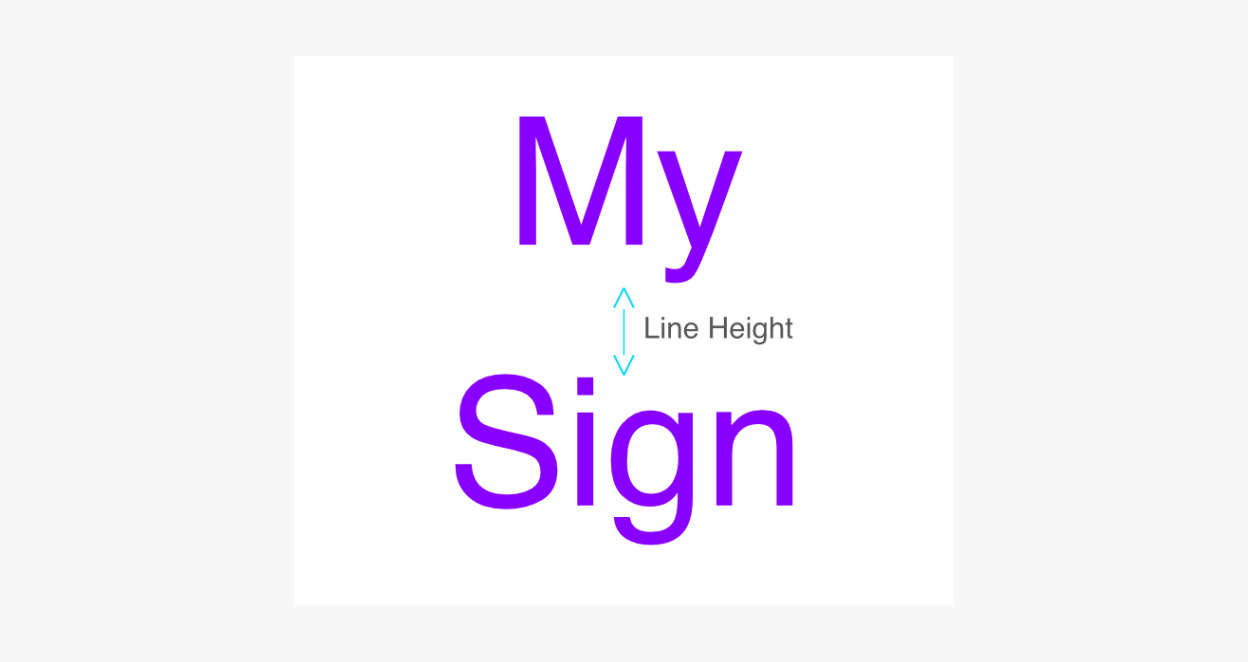
**To adjust the line height:**
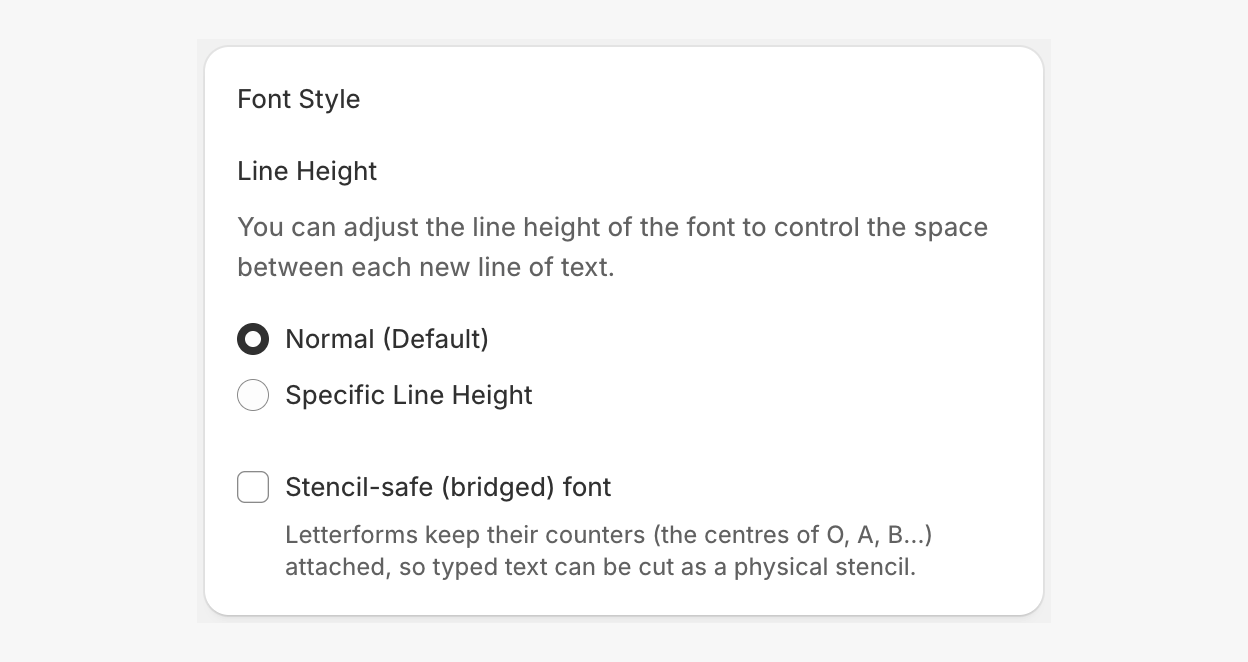
1. Whilst still in **Fonts**, scroll to the **Font Style** section.
2. Under **Line** **Height**, Select one of the following:
- **Normal** – Uses the font’s default line spacing.
- **Specific Line Height** – Lets you manually control the spacing between lines.
- Values **less than 1** reduce spacing and create tighter lines.
- Values **greater than 1 i**ncrease spacing between lines.
#### Stencil-Safe Fonts
Enable or disable **Stencil-safe (bridged) font** depending on the type of font you are using.
Check or uncheck the **Stencil-safe (bridged) font** option:
- **Checked** – If using fonts whose letterforms are designed with those bridges/counters attached.
- **Unchecked** – If using fonts that would shed their letter centres when cut.
These are the core steps to help you get started with the **Simple Letter Model**.
You can continue configuring additional features such as **Backboard**, **Mounting** and more. See our **Features** section for further setup guides.
## Best Practices: How to Best Utilize the Simple Letter Model Effectively
## Organising Your Fonts
Organising your fonts into clear groups helps you manage pricing tiers more efficient. Each group will determine how expensive each line and price per letter should be for the font in that category.
## 1\. Align Font Height in Adobe Illustrator
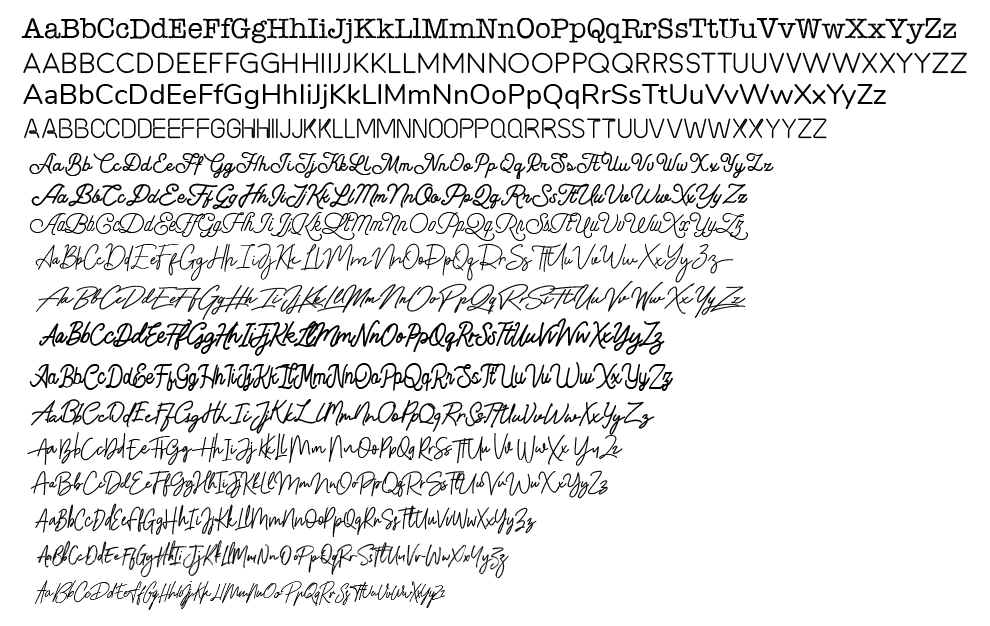
Add all the fonts you plan to use in a single Adobe Illustrator (or similar program) file and make sure their font heights are the same. This gives you a clear comparison between fonts. You will end up with a result like this:
[https://sign-customiser-867d24591517.intercom-attachments-1.com/i/o/v93avo87/1372601472/1e3994ce1553d94f9c37e81f2dc7/file-lKA1Xv5OAw.png?expires=1762272000&signature=5004da933216d75e1d14b4d8cc2236541ac60f0a57101147ad894af90f6ea0f8&req=dSMgFM9%2BnIVYW%2FMW1HO4zfZK9wEBKcYsQ1qoOgdMbMGga8UhFlw48NLFlSyl%0AmNo9%0A](https://sign-customiser-867d24591517.intercom-attachments-1.com/i/o/v93avo87/1372601472/1e3994ce1553d94f9c37e81f2dc7/file-lKA1Xv5OAw.png?expires=1790424000&signature=56015645f6fa7e684997aa9095a1672eef646203f6ec124379eb73b8c234bdae&req=dSMgFM9%2BnIVYW%2FMW3Hu4gY6TErLjAJJBZHkFQSygLFiZ9%2Fo6%2BqR6%2BRwBBrwr%0AaA%3D%3D%0A)"/>
## 2\. Group Fonts By Width
**Thinner** or **narrower fonts** tend to produce taller signs in the Simple Letter Model, resulting in a sign that may require more material. Using the illustrator file above, group these fonts separately and assign them to higher pricing tiers in your app.
## 3\. Test and Measure Maximum Heights
Refer back to your [shipping cost matrix](../../pricing-and-sizing/configure-your-simple-letter-model-customiser-core-setup/), for each width in your shipping cost matrix. To determine the max height that could be produced for that given width, use Illustrator to test each font by:
- Adding a certain number of lines (e.g three lines) of text (this should be the same for each width size you test).
- Set a line height
- Adjusting text size to match the width you are testing, e.g. 60cm.
You will now have the **maximum height** for each font for the chosen width.
## 4\. Determine Your Pricing Tiers
Based on your tests, assign each font group to a pricing tier according to its maximum height. Fonts that create taller signs should belong to higher pricing tiers in your app.
## Additional Tips
- Experiment with font and character settings. Try different font combinations and min/max character limits per size to find what works best within your defined size boundaries. In some cases, switching to another font may yield better results.
- Limit certain fonts so they are only available only for larger sizes, where they are most suitable.