Quick Start
Last updated:
After installing the app on your platform, you are ready to create your first customiser!
This guide walks you through the steps to get up and running smoothly.
Step 1: Before You Create Your First Customiser
How you set up your customiser depends on how you source your signs.
If You Are a Dropshipper
We provide a list of recommended sign manufacturers who offer ready-to-use templates. These templates come preconfigured with options and pricing that match their manufacturing costs.
Even though these templates allow you to start selling immediately, we recommend familiarising yourself with the different sign types and pricing models we offer. This will help you better understand how your customiser works and make it easier to manage or adjust it in the future.
If You Manufacture Signs or Work Directly With a Supplier
If you manufacture signs in-house or already have a trusted manufacturing partner, this guide will help you enter your own sizes, pricing, and options into your customiser.
Before continuing, gather the following information:
-
Pricing structure
-
Available sizes
-
Sign types
-
Fonts and colours
-
Optional components (e.g., backboards, mounting options)
Step 2: Decide Sign Type
Decide which sign types you want to offer.
Supported sign types include:
Step 3: Choosing the Right Pricing Model for Your Sign
Start by reviewing how your manufacturer prices signs. Consider whether pricing is based on:
-
Number of characters
-
Amount of material used
-
Total sign area
-
Fixed dimensions
-
Custom sizing
Available Letter Pricing Models
We currently offer three Letter Pricing models that you can choose to set pricing:
The key difference between these models is how size and price are calculated. All other features are shared across models.
Need help choosing a model?
If you are unsure which pricing model is right for your business, contact our support team for help or book a call. We are happy to help.
Step 4: Create Your First Customiser
Once you have selected the right pricing model, you can create your first customiser.
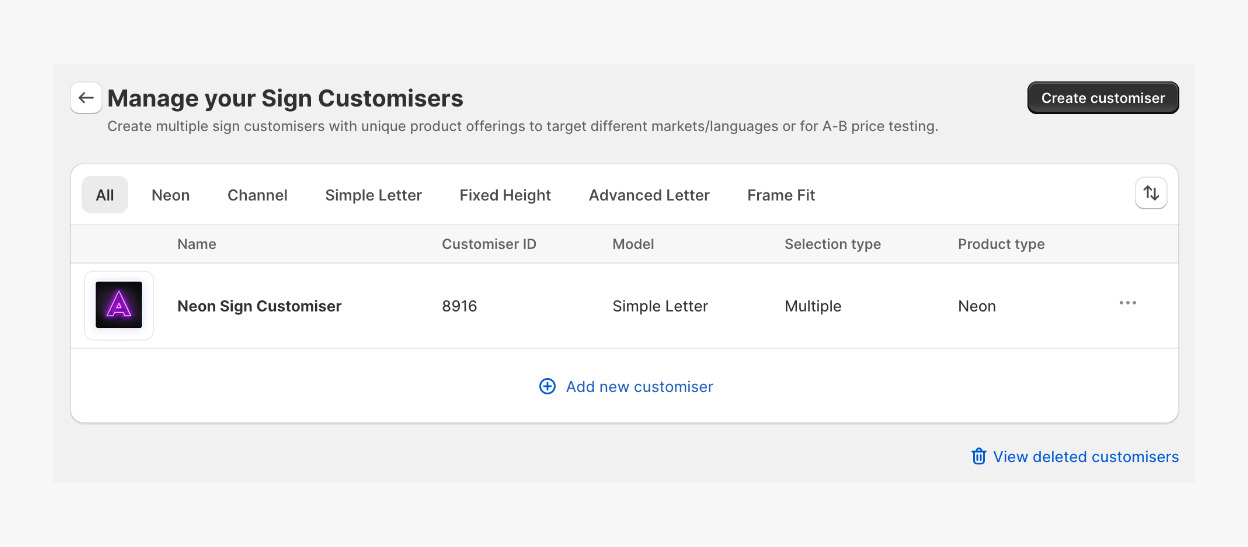
-
Go to the Sign Customiser Admin:
-
Universal subscribers: Go to Home in your account.
-
Shopify users: Go to Shopify admin → Apps and select Sign Customiser.
-
-
Click Create new customiser.
-
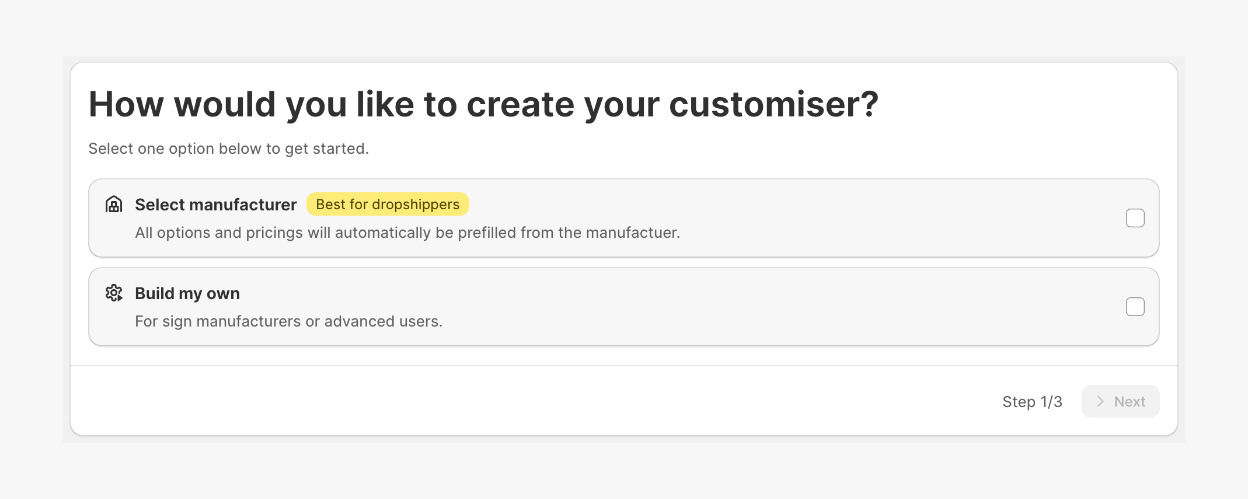
Choose one of the options:
-
Select manufacturer – choose a preconfigured manufacturer template. Note: If selected, follow the next steps in the Manufacturer Template guide.
-
Build my own – set up a customiser using your own supplier
-
-
Choose your Sign Type.
-
Choose your Pricing model.
-
Click Create.
You are all set! Your customiser will appear under Customiser in the app menu.
Step 5: Populate Your Customiser With Data
Core setup
You are now ready to configure sizes, pricing, and fonts. The setup process depends on the pricing model you selected.
Choose the relevant letter model guide for further instructions.
Step 6: Other Sign Components and Features
Depending on your sign type, you may need to configure additional features such as:
-
Backboards
-
Mounting options
-
Lightboxes
-
Forms
-
Jackets
-
Fonts
Refer to the relevant guides in our Features section: Features.
Step 7: Understand How Order Fulfilment Works
Once you have configured your customiser, it is important to understand how orders are created, processed and fulfilled.
See our order fulfilment guides here:
Step 8: Add the Customiser to Your Website
How you add the customiser depends on your platform.
-
Shopify users: You can add the customiser directly to a page or product page.
-
Universal users: You will first need to connect the app to your platform and then add it to a page.
Follow the appropriate guide:
Step 9: Hide Generated Sign Products From Appearing On Your Storefront
Each time a customer adds a customised sign to the cart, the app creates the sign as a “product” in your backend. This is required for order processing and checkout, just as with other products in your store.
Since these are customised products, you may wish to prevent them from appearing publicly on your storefront.
Follow the relevant guide for your platform.
For Shopify:
For WordPress/WooCommerce: