How to Hang a Neon Sign (5 Easy Steps)
- Choose your location - Select a wall near a power outlet, ensuring the surface can support your sign’s weight
- Mark the mounting holes - Hold the sign in place, use a spirit level, and mark screw positions with a pencil
- Install wall anchors - Drill holes and insert appropriate anchors for your wall type (drywall, brick, or concrete)
- Attach mounting hardware - Drive screws through the sign’s mounting points into the wall anchors
- Hang and connect - Place sign on mounting points, route cables neatly, and plug in to test
For damage-free installation, use Command strips (supports up to 3-5kg) or consider a freestanding display.
The ultimate guide to hanging neon signs: Tips and tricks for a stunning installation
When it comes to installing neon signs, there are many things to consider. Depending on the type of surface and location, the sign needs to be securely attached. Attaching a sign to a wall can take the form of screws, nails or adhesive strips. Alternatively, command hooks or other adhesive products can be used to hang the sign without needing to drill. Furthermore, managing any electrical wires or cords is essential to ensure safety and avoid any hazardous situations.
This article provides a comprehensive guide on how to hang neon signs. We will cover the various methods of attaching neon signs to walls, using command hooks or other adhesive products, concealing or managing wires and cords and placing neon signs in a home or business. After reading this article, you will have all the information necessary to install a neon sign fast and safely.
This is chapter 7 in the neon sign library
Attaching neon signs to walls
When it comes to the task of fastening neon signs to walls, there exist myriad techniques at your disposal. The most widespread methodologies encompass the utilization of screws, nails, and adhesive strips.
It is imperative to note that each of these methods harbors its own unique set of pros and cons, and it is thus imperative to discern the optimal technique contingent upon the nature of the wall’s surface. As an illustration, adhesive strips may prove efficacious on smooth surfaces such as painted walls, whereas screws and nails are deemed superior for walls boasting greater textural depth or thickness.
How to safely drill holes in a wall to hang a neon sign?
Should one intend to rely on screws or nails for this endeavor, it is of utmost significance to have an understanding of the safe and secure drill-hole process. This encompasses selecting the appropriate size for the drill bit and ensuring that the depth of the hole suffices to confer adequate stability and fixation for the screw or nail.
Alternatively, if one intends to suspend a weighty neon sign, then the utilization of anchors or toggle bolts represents a judicious choice, providing supplementary reinforcement and ideal for walls that may not adequately sustain the weight of a sign unsupported.
How to attach a neon sign to a brick wall?
When dealing with brick walls, a distinct set of specialized hardware is required to facilitate the attachment of the neon sign. This may encompass specialized screws or anchors that are designed explicitly to function harmoniously with brick or concrete surfaces. It is imperative to select the optimal hardware and conscientiously adhere to the manufacturer’s stipulations to ensure an installation that is both secure and safe.
How to hang a neon sign on a wall without drilling?
At times, the process of drilling holes into a wall may not be feasible or desired. As an illustration, in instances where one is leasing a space or is averse to damaging the wall, it may become necessary to seek out alternative techniques to fasten the neon sign.**
In such instances, one feasible option is the use of adhesive products such as Command strips that, if employed correctly, can support a rather substantial amount of weight. Alternatively, one could opt for a freestanding or portable sign holder that precludes any attachment to the wall whatsoever.
How to attach a neon sign to a wedding wall?
Lastly, in the event that one seeks to suspend a neon sign for an occasion such as a wedding or some other special event, it may become necessary to attach the sign to a temporary wall or backdrop. This can be accomplished by deploying specialized hardware such as pipe and drape kits that permit the establishment of a sturdy backdrop, which can support the neon sign. Alternatively, one could elect to utilize a freestanding sign holder or explore other innovative means to showcase the neon sign in a temporary setting.
Learn more: Looking for unique decor? Try these 30+ NEON SIGN IDEAS!
Using command hooks or other adhesive products
Utilizing command snares or other cement items may be a well-known and helpful way to hang a neon sign, particularly in the event that you need to dodge penetrating gaps in your divider. One question that regularly emerges is whether you’ll hang a neon sign with command snares. The reply is yes, but it’s critical to select the proper sort of snare and to form beyond any doubt that the weight of the sign is inside the hook’s weight constraint.
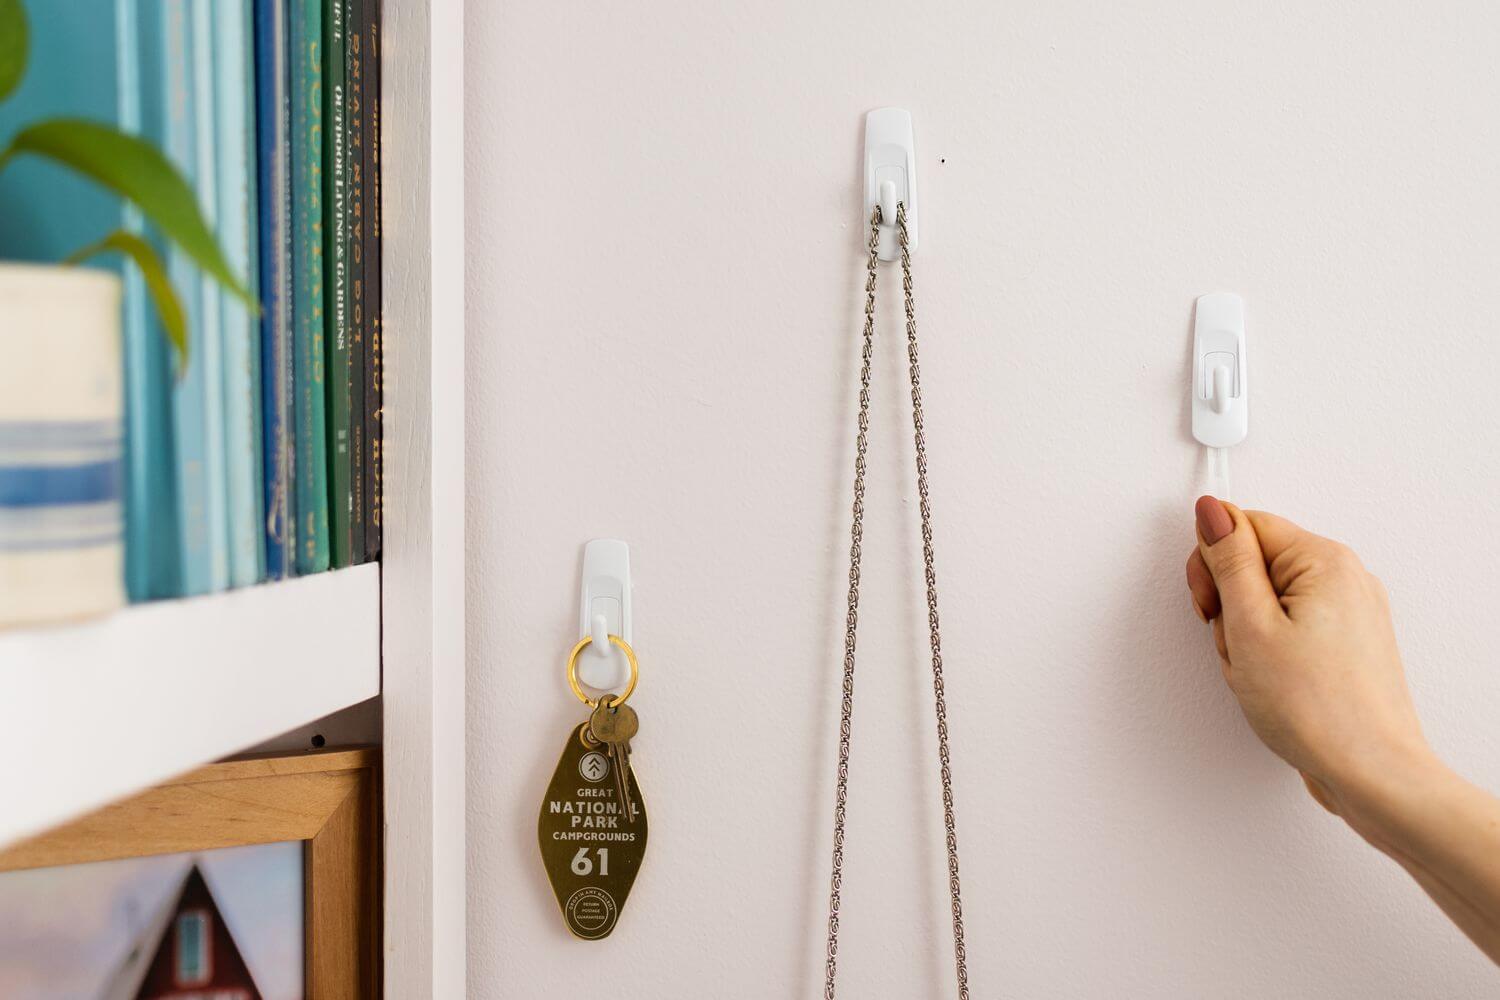
Command snares are accessible in an assortment of sizes and weight capacities, so it’s basic to select the correct one for your neon sign. As a common run the show, a little command snare can hold up to 1 pound, whereas a medium snare can hold up to 3 pounds, and an expansive hook can hold up to 5 pounds. In case your neon sign weighs more than the weight constraint of a single snare, you’ll utilize numerous snares or consider employing a diverse strategy to hang your sign.
Other sorts of cement items can too be utilized to hang a neon sign, such as double-sided tape or mounting squares. These items are regularly planned to hold a certain weight restrain and can be an incredible elective to penetrating gaps in your divider. When utilizing cement products, it’s critical to take after the manufacturer’s lighting carefully and to guarantee that the surface is clean and dry sometime recently when applying the cement.
To utilize cement items securely and viably, it’s critical to select an area that’s suitable for your neon sign and to guarantee that the surface is smooth and clean. It’s too great a thought to test the cement sometime recently hanging the sign to guarantee that it can hold the weight of the sign. By taking after these tips and choosing the proper cement item, you’ll securely and successfully hang your neon sign without boring any gaps in your divider.
Concealing or managing wires and cords
When it comes to the installation of neon signs, there are a multitude of factors to take into account. However, one of the most important considerations is the management of wires and cords. Not only can tangled wires be a visually unpleasant eyesore, but they can also present safety hazards if left unchecked. Fortunately, there are a variety of tips and tricks that can be employed to effectively conceal or manage neon sign wires and cords.

One effective method for hiding wires and cords is to route them through the walls. While this option may require a bit of do-it-yourself expertise, it can result in a clean and streamlined installation. Alternatively, one could opt for the use of conduit or raceway systems, which come in a variety of colors and styles to match any decor. These systems can be mounted on walls or ceilings and provide a discreet channel for wires and cords.
For those who prefer a simpler approach, there are a number of adhesive products on the market specifically designed for managing wires and cords. Cable clips and ties are an excellent option for keeping wires organized and tidy, while cord covers can be used to conceal any unsightly cords. These products are both user-friendly and widely available at most hardware or home improvement stores.
In addition to managing wires and cords, it’s important to carefully consider the placement of electrical outlets when installing neon signs. Ideally, outlets should be located near the sign to avoid the need for lengthy cords or unsightly extension cords. If this is not a feasible option, it may be worth considering the installation of a new outlet or hiring an electrician to do so.
Learn more: Is your neon sign broken? Discover EXPERT REPAIR TIPS now!
Placing neon signs in a home or business
When it comes to putting neon signs in a domestic or trade, there are a couple of key variables to consider. One of the foremost critical is where to put the sign. In a domestic setting, neon signs can be set in an assortment of areas, such as a room, living room, or indeed a domestic bar. In a commercial setting, neon signs are regularly utilized to pull into consideration commerce or advertise a particular item or benefit.

To select the most excellent area for a neon sign, it’s critical to consider the reason for the sign and the general stylishness of the space. For case, in the event that the sign is aiming to be a central point in a room, it ought to be set in an area where it can be effectively seen and acknowledged. On the off chance that the sign is being utilized to publicize an item or benefit, it ought to be placed in an area where it’ll be unmistakable to potential clients.
In order to choose the proper area for a neon sign, it’s also important to guarantee that the sign is unmistakable and successful in its arrangement. This may include altering the lighting or other components of the space to make the sign stand out more. You can visualize how your neon sign will look in space using our sign customizer app. It may moreover include choosing a sign that’s the appropriate estimate and shape for the space, which can be effectively examined from a separate.
Learn more: What are THE BEST NEON SIGN QUOTE IDEAS? Find Out Now!
Hanging methods comparison: Which is right for you?
Choosing the best method to hang your neon sign depends on several factors including wall type, sign weight, whether you’re renting, and how permanent you want the installation to be. Here’s a comprehensive comparison:
| Method | Best For | Weight Limit | Wall Damage | Skill Level | Cost |
|---|---|---|---|---|---|
| Screws & wall plugs | Permanent installations, heavy signs | Up to 25kg+ | Yes (repairable) | Intermediate | £5-15 |
| Command strips | Rentals, light signs, temporary displays | Up to 3kg | None | Easy | £5-10 |
| Picture hanging wire | Medium signs, adjustable height | Up to 10kg | Minimal | Easy | £5-15 |
| Adhesive hooks | Smooth surfaces, medium signs | Up to 5kg | Minimal | Easy | £3-8 |
| Freestanding display | No wall mounting, flexibility | Any weight | None | Easy | £20-100 |
| Ceiling suspension | Dramatic effect, window displays | Up to 15kg | Minimal | Intermediate | £15-30 |
Step-by-step: How to hang a neon sign with screws
This is the most secure method for permanent installations, especially for heavier signs.
Tools and materials you’ll need
- Electric drill with appropriate drill bit
- Wall plugs (rawl plugs) suitable for your wall type
- Screws (usually 40-50mm)
- Spirit level
- Pencil
- Tape measure
- Screwdriver
- Safety goggles
Step-by-step instructions
Step 1: Plan your placement Hold the sign against the wall in your desired position. Use a spirit level to ensure it’s straight. Mark the screw hole positions with a pencil through the sign’s mounting holes.
Step 2: Check for cables and pipes Before drilling, use a stud finder or cable detector to ensure there are no electrical cables or water pipes behind your drill points.
Step 3: Drill the holes Put on safety goggles. Drill holes at your marked points, making them slightly deeper than your wall plugs. For masonry, use a masonry bit; for plasterboard, use a standard wood/metal bit.
Step 4: Insert wall plugs Tap wall plugs gently into the holes with a hammer until they’re flush with the wall surface.
Step 5: Mount the sign Hold the sign in position, align the mounting holes with the wall plugs, and drive the screws through until secure. Don’t overtighten.
Step 6: Connect power and test Route the power cable neatly (see wire hiding tips below), plug in, and test the sign.
Step-by-step: How to hang a neon sign without nails or drilling
Perfect for renters or those who want to avoid wall damage.
Using Command strips
Step 1: Clean the wall Wipe the wall surface with isopropyl alcohol to remove dust and oils. Let it dry completely.
Step 2: Prepare the strips Click pairs of Command strips together. Remove one liner and press the strip firmly onto the back of your sign’s mounting points.
Step 3: Apply to wall Remove the remaining liner, position the sign on the wall using a spirit level, and press firmly for 30 seconds on each strip.
Step 4: Wait before loading Wait at least one hour before plugging in the sign to allow the adhesive to bond properly.
Important tips:
- Check the weight rating of your Command strips
- Use multiple strips for heavier signs
- Don’t use on textured or wallpapered surfaces
- Temperature extremes can affect adhesion
Using a freestanding display
For maximum flexibility, consider a floor-standing or table-top display:
- Purchase or create a sturdy stand (acrylic, metal, or wooden)
- Attach the sign to the stand using the provided mounting hardware
- Position wherever you like - no wall attachment needed
- Easily move for events, cleaning, or room rearrangement
Surface-specific hanging guides
Different wall surfaces require different approaches. Here’s how to hang a neon sign on each:
Drywall (plasterboard)
Best methods: Toggle bolts (for heavy signs), wall anchors, or Command strips (for light signs)
Tips:
- Standard screws alone will pull out of drywall under weight
- For signs over 5kg, use toggle bolts or find a stud
- Spread weight across multiple mounting points
Brick walls
Best methods: Masonry screws (Tapcon), masonry anchors, or brick clips
Tips:
- Use a masonry/hammer drill bit
- Drill into the brick, not the mortar (mortar is weaker)
- Clean out dust from holes before inserting anchors
- Brick clips can work for lighter signs without drilling
Concrete walls
Best methods: Concrete anchors, sleeve anchors, or masonry screws
Tips:
- Requires a hammer drill for best results
- Use anchors rated for concrete, not just masonry
- Allow extra time for drilling - concrete is tough
- Clean holes thoroughly before inserting anchors
Glass surfaces
Best methods: Suction cups, adhesive hooks designed for glass, or hanging from above
Tips:
- Glass must be clean and smooth
- Only suitable for lighter signs (under 2kg)
- Suction cups may lose grip over time
- Consider hanging from ceiling in front of glass instead
Tiled walls
Best methods: Adhesive hooks, suction cups, or drilling through grout lines
Tips:
- If drilling, drill through grout, not tiles (tiles crack easily)
- Strong adhesive hooks work well on smooth tiles
- Clean surface thoroughly before applying adhesive
How to hide neon sign wires
Exposed wires can ruin the aesthetic of your beautiful neon sign. Here are effective ways to hide them:
Cable management solutions
Cable channels/raceways:
- Plastic channels that stick to walls and conceal wires
- Paint them to match your wall colour
- Available in various sizes from hardware stores
- Cost: £5-20 depending on length
In-wall routing:
- Most professional but requires DIY skills
- Route cable through wall cavity to nearest outlet
- Requires cutting holes in drywall
- Best done during installation
Cable clips:
- Small adhesive clips that hold wire against the wall
- Inexpensive and easy to apply
- Best for short runs
- Can be painted to match wall
Creative concealment ideas
- Behind furniture: Position the sign so cables run down behind a bookshelf, cabinet, or plant
- Decorative elements: Use artificial vines, fairy lights, or fabric to disguise cable runs
- Picture rail: Run cables along existing picture rails or crown moulding
- Behind the sign: Some signs have rear cable exits - route cable straight back through the wall
Tips for neat cable runs
- Plan your cable route before mounting the sign
- Keep cables as short as possible - coil excess neatly behind the sign
- Use white cables on white walls (or spray paint them)
- Bundle multiple cables together with cable ties
- Consider a nearby outlet to minimise cable length
Weight considerations for hanging neon signs
Getting the weight capacity right is crucial for a secure installation.
Typical neon sign weights
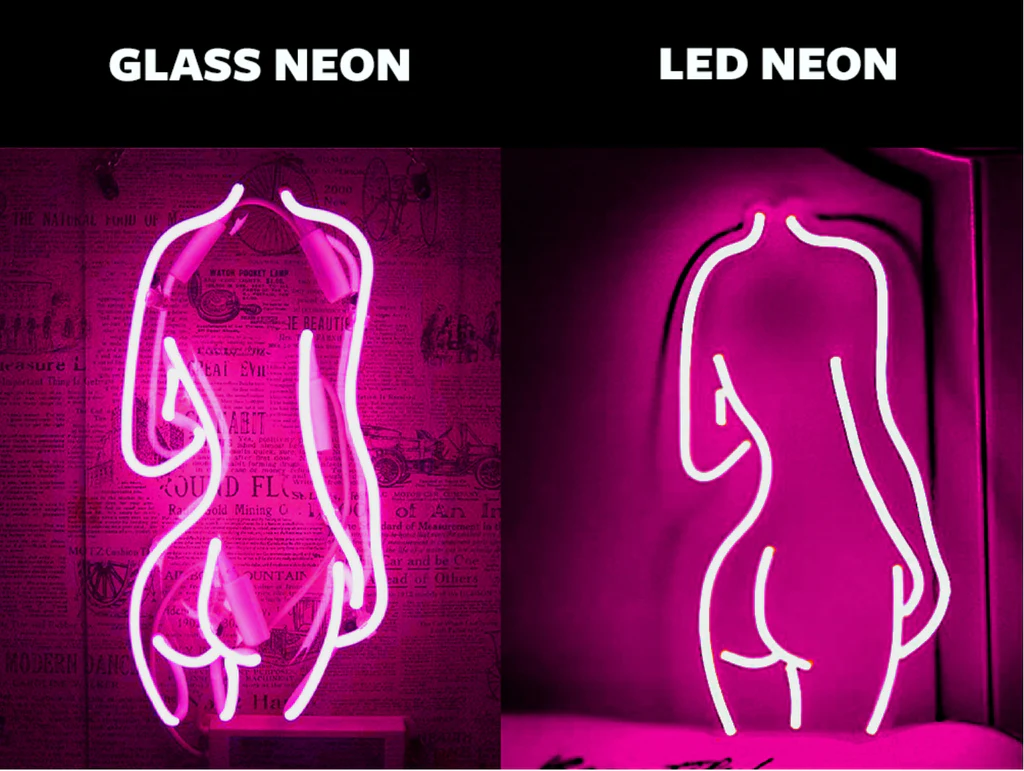
| Sign Size | LED Neon Weight | Glass Neon Weight |
|---|---|---|
| Small (30-50cm) | 0.5-1.5kg | 2-4kg |
| Medium (50-80cm) | 1.5-3kg | 4-8kg |
| Large (80-120cm) | 3-6kg | 8-15kg |
| Extra large (120cm+) | 6-10kg | 15-25kg+ |
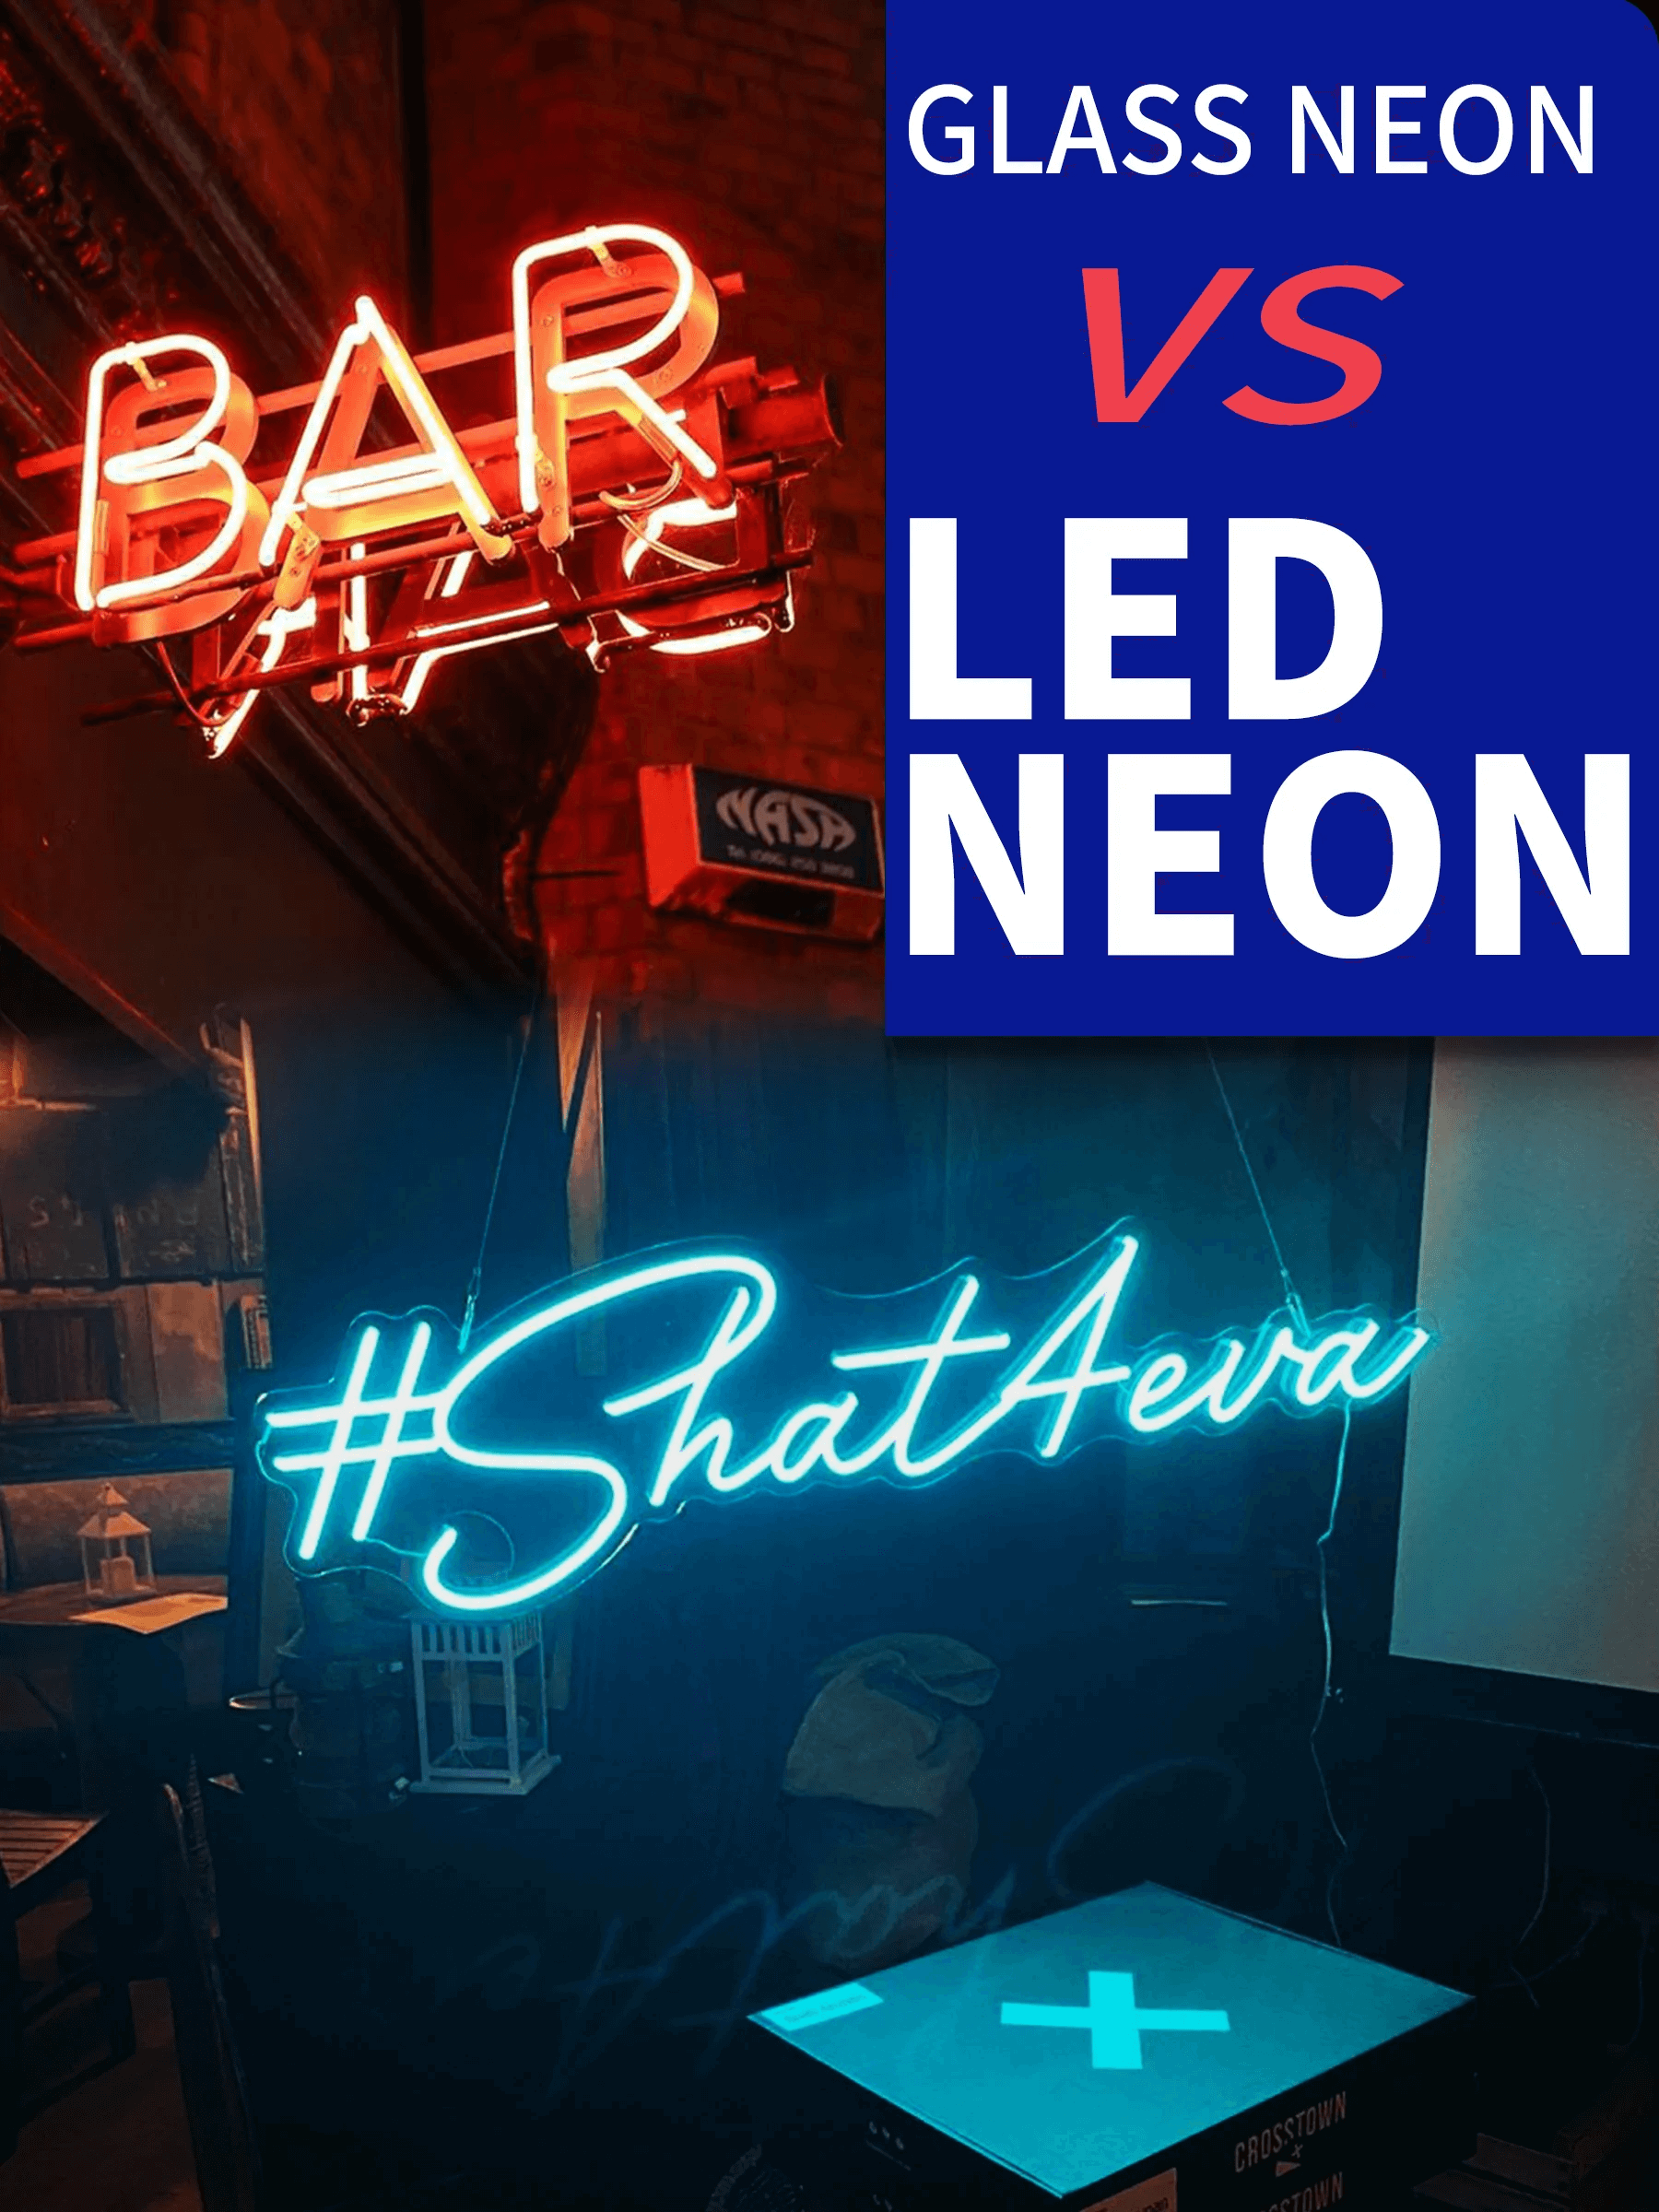
Note: LED neon (flex neon) is significantly lighter than traditional glass neon.
Calculating mounting requirements
As a rule of thumb, your mounting hardware should support at least 3x the weight of your sign. This provides a safety margin and accounts for any movement or vibration.
Example: A 4kg sign needs mounting hardware rated for at least 12kg total capacity.
Wall damage prevention tips
Protect your walls while still enjoying your neon sign:
Before installation
- Test adhesive products on a hidden area first
- Use felt pads between mounting hardware and the wall
- Choose the minimum number of mounting points needed
- Consider freestanding options for rental properties
During installation
- Use the correct drill bit for your wall type
- Don’t over-drill holes (making them too big)
- Vacuum dust from holes before inserting plugs
- Don’t overtighten screws
When removing
- Follow Command strip removal instructions exactly
- Fill screw holes with filler before painting
- Use a hairdryer to soften stubborn adhesive
- Pull adhesive strips slowly at an angle, not straight out
FAQs about hanging neon signs
How do I hang a neon sign without damaging the wall?
Use Command strips or adhesive hooks for the most damage-free installation. These work best on smooth, clean surfaces with signs weighing under 3-5kg. For heavier signs, a freestanding display avoids wall mounting entirely.
Can you hang a neon sign with Command strips?
Yes, Command strips work well for LED neon signs weighing up to 3-5kg. Clean the wall with alcohol first, use multiple strips to distribute weight, and wait an hour before powering on. Not recommended for traditional glass neon signs which are much heavier.
How do you hang a neon sign on a brick wall?
Use masonry screws (Tapcon) or masonry anchors. Drill into the brick itself (not the mortar) using a masonry drill bit. Insert appropriate anchors, then screw in mounting hardware. For lighter signs, brick clips offer a no-drill alternative.
Where is the best place to hang a neon sign in a bedroom?
Popular bedroom placements include above the headboard, on the wall opposite the bed, or in a reading nook. Consider visibility from the bed, proximity to power outlets, and whether you want the sign on while sleeping (some have dimmers).
How do I hide the wires from my neon sign?
Use cable raceways/channels that can be painted to match your wall, route cables behind furniture, or run them through the wall cavity for invisible installation. Cable clips also help keep wires neat against the wall surface.
Do neon signs need to be plugged in all the time?
No, neon signs can be turned on and off as needed. LED neon signs are particularly efficient and can be left on 24/7 if desired. Many signs include dimmers or remote controls for convenience.
Ready to design your own neon sign? Try our free neon sign maker to create and preview custom designs online.
Conclusion
All in all, by adhering to these methodologies and techniques, you can create a visually stunning and captivating neon sign installation that will undoubtedly elevate any residential or commercial environment. Whether your objective is to infuse some character into your living room, cultivate a distinctive atmosphere in your bedroom, or draw attention to your enterprise, a well-positioned and securely fastened neon sign can truly make a world of difference.
Above everything else, when embarking on the process of hanging neon signs, it is vital to prioritise safety and ensure that the installation is firmly secured and stable. By following the guidelines and recommendations highlighted in this article, you can achieve both a breathtaking and secure neon sign installation that will bring joy and awe for many years to come.
Related guides: