Sizing - Advanced model
Last updated:
This guide explains how to configure Sizes for the Advanced letter Model. Sizes in this model are based on a Scale Multiplier that dynamically adjusts the sign’s dimensions according to the selected font.
This section covers everything you need to configure within the Sizes settings in the Advanced Letter Model.
Accessing the Sizes Settings
-
Go to the Sign Customiser Admin:
-
Universal subscribers: Go to Home in your account.
-
Shopify users: Navigate to Shopify admin → Apps and select Sign Customiser.
-
-
Click on Customisers in the menu.
-
Select your customiser.
-
From the left-hand menu, go to Core Setup.
-
Click Sizes.
Step 1: Create a New Size (Scale Multiplier)
In the Advanced Letter Model, each size is defined by a Size Scale Multiplier. This means that the sign scales proportionally according to the font’s baseline letter height. The width is calculated automatically using the natural scaling of the height.
Example
Assume the following font properties:
-
Smallest lowercase letter height: 6 cm
-
Smallest uppercase letter height: 10 cm
Defined sizes:
-
Small - assigned multiplier: 1.0
-
Medium - assigned multiplier: 1.5
Note: You can customise the smallest lowercase and uppercase letter heights in your font settings. See the Adding Fonts guide for full details.
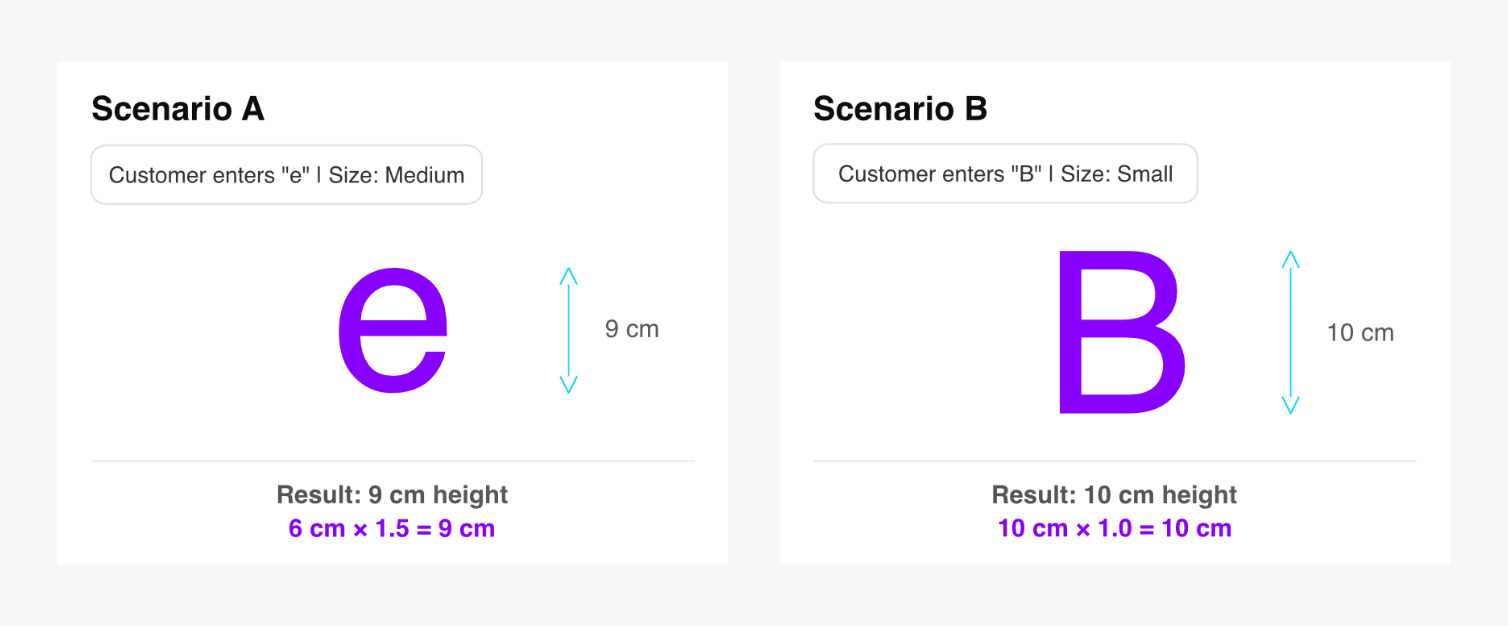
Scenario A
Customer enters “e” and selects the Medium size.
Result: 6 cm × 1.5 = 9 cm height
Scenario B:
Customer enters “B” and selects the Small size.
Result: 10 cm × 1.0 = 10 cm height
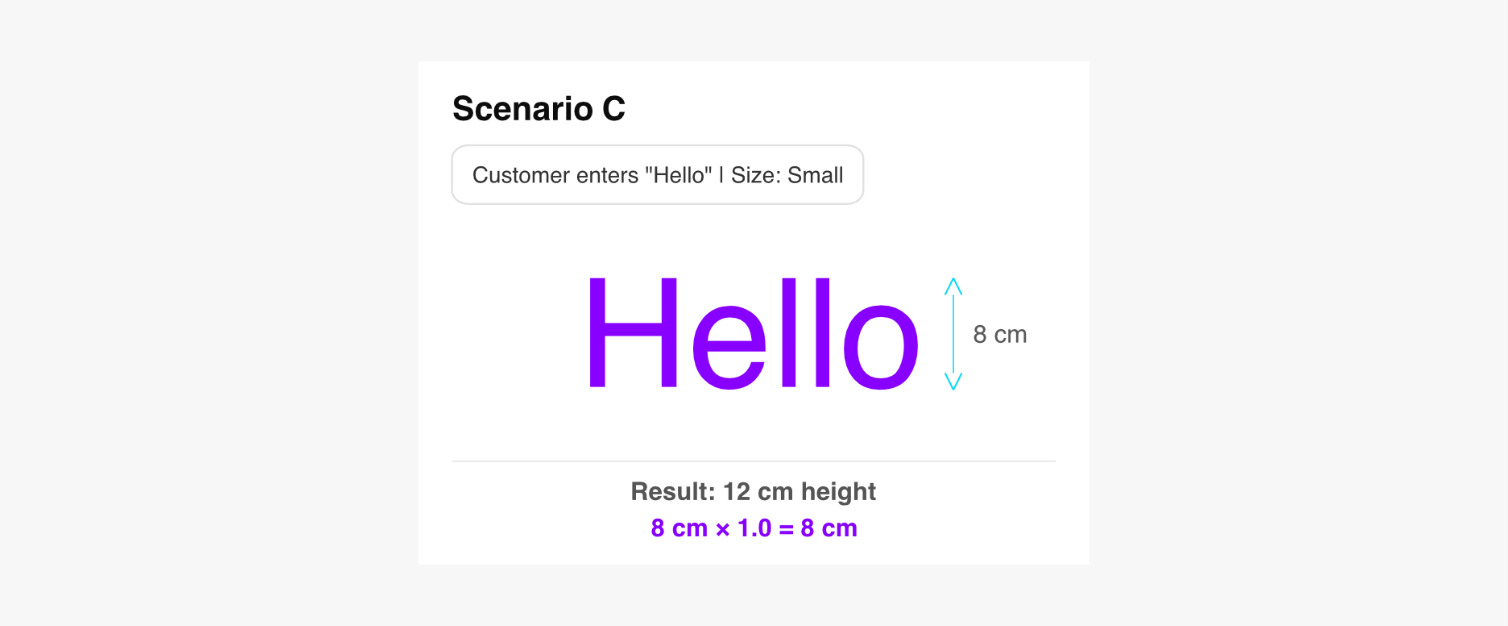
Scenario C:
Customer enters “Hello” and selects the Small size.
Result: 8 cm × 1.0 = 8 cm height
How the System Calculates Sign Dimensions
Let’s break down how the sign “Hello” becomes 24 cm wide and 8 cm tall.
-
The system analyses all the characters in the sign and finds the letter with the smallest height in pixels. In this case, it is “o”.
-
The letter o’s pixel height is measured and compared to the cm value configured in the font settings. With the “Hello” example: If the “o” is approximately 28.85 px tall, and your configured lowercase height is 6 cm, then, 28.85 px = 6 cm 1 px ≈ 0.208 cm
-
This ratio is then used to convert the entire sign’s pixel dimensions into centimetres. If the full sign height measures 38.47 px, then: 38.47 × (6 ÷ 28.85) = 8 cm For width, the same ratio applies: 115.4 px × (6 ÷ 28.85) = 24 cm
Important
The system uses the lowercase height value (e.g. 6 cm, as in the example above) unless the entire sign is written in uppercase (e.g. “HELLO”).
Only when all characters are uppercase will the configured uppercase value (e.g. 10 cm, as the example above) be used.
Create a Size
-
In the Size section, click Add new size (or edit an existing size).
-
Under Size Details, enter:
-
Label – e.g. Small
-
Size Scale Multiplier – e.g., 1.5
-
-
Click Save.
Step 2: Add a Title and Description for the Sizes Section
The title and description entered here appear on the storefront.
-
While still in Sizes, scroll to Language Settings.
-
Enter:
-
Title - section heading shown to customers
-
Description (optional)
-
-
Click Save.
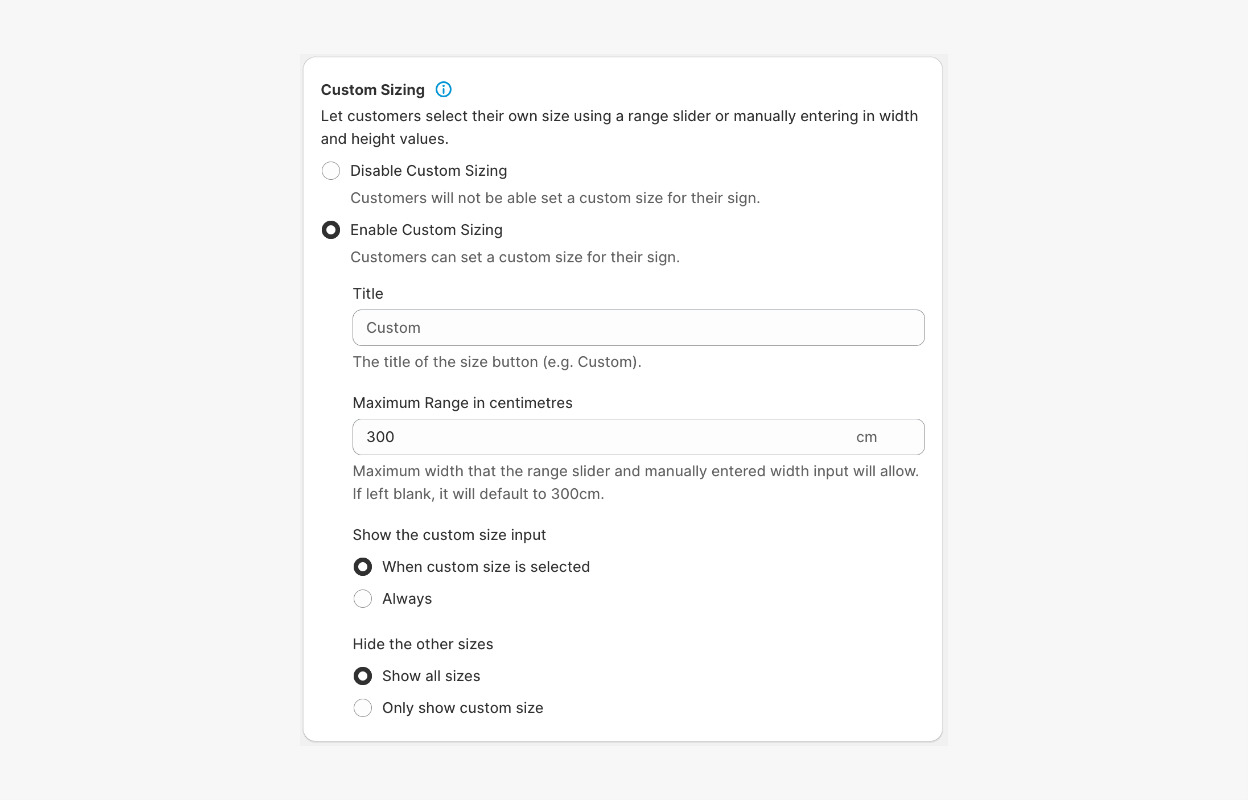
Step 3: Enable Custom Sizing (Optional)
Custom Sizing allows customers to choose a size using a range slider rather than preset size options. The custom size option appears at the end of the size list (if enabled) and lets customers choose a width between the smallest preset size and a defined maximum range (default 300 cm).

-
While still in Sizes, scroll to Custom Sizing.
-
Choose one of the following:
-
Disable Custom Sizing – prevents customers from setting a custom size.
-
Enable Custom Sizing – allows customers to set a custom size for their sign.
If Enable Custom Sizing is selected, set:
-
Title – label shown above the slider
-
Maximum Range (cm) – maximum width allowed for custom size
-
Show the custom size input – always show the slider or only after clicking the Custom button.
-
Hide the other sizes – display all sizes or only the custom size.
-
-
Click Save.
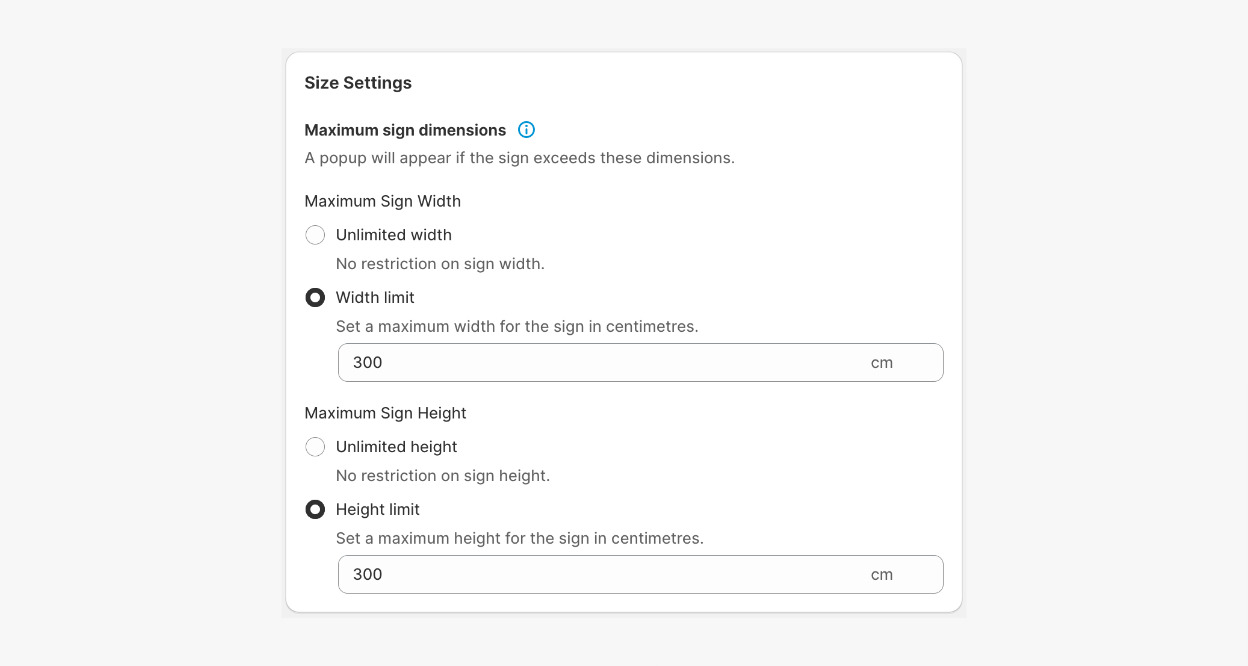
Step 4: Set Sign Size Limits
You can restrict the maximum width and height for a sign.
-
In Sizes, scroll to the Size Settings section.
-
Set Maximum Sign Width:
-
Unlimited width – no restrictions (if Custom Sizing is enabled, the slider maximum still applies)
-
Width limit – set a maximum allowed width.
-
-
Set Maximum Sign Height:
-
Unlimited height – no restrictions.
-
Height limit – set a maximum allowed height.
-
-
Click Save.
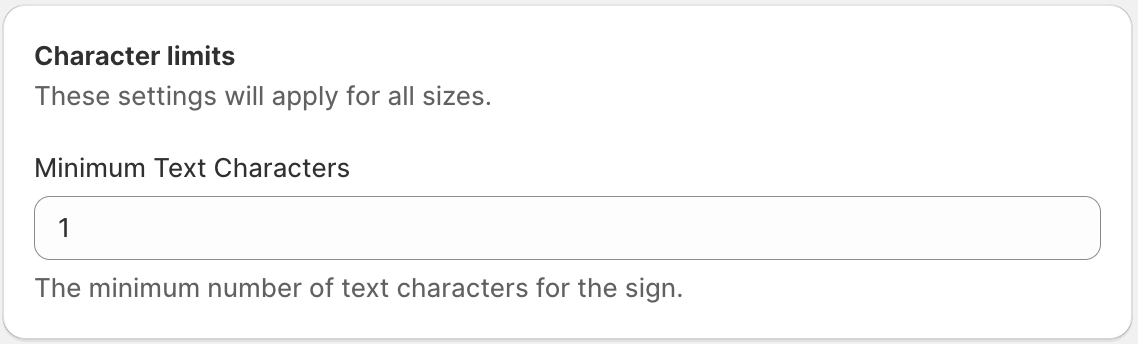
Step 5: Set Character Limits
-
In Sizes, scroll to the Character limits section.
-
Set the minimum number of characters required for the sign in the Minimum Text Characters input field.
-
Click Save.
Once completed, the Size section of your Advanced Letter Model customiser is fully configured. You can now proceed to Pricing and Fonts.