Custom Design Forms
Last updated:
A Custom Design Form is a built-in contact form within the Sign Customiser app, allowing merchants to collect custom design requests that the app cannot automatically generate.
This form appears on the Custom Design screen:
-
On desktop, it is accessed through the default labelled “Custom” tab.
-
On mobile, it appears as a link below the selections.
Note: Custom Design Forms is only available for Growth Plans.
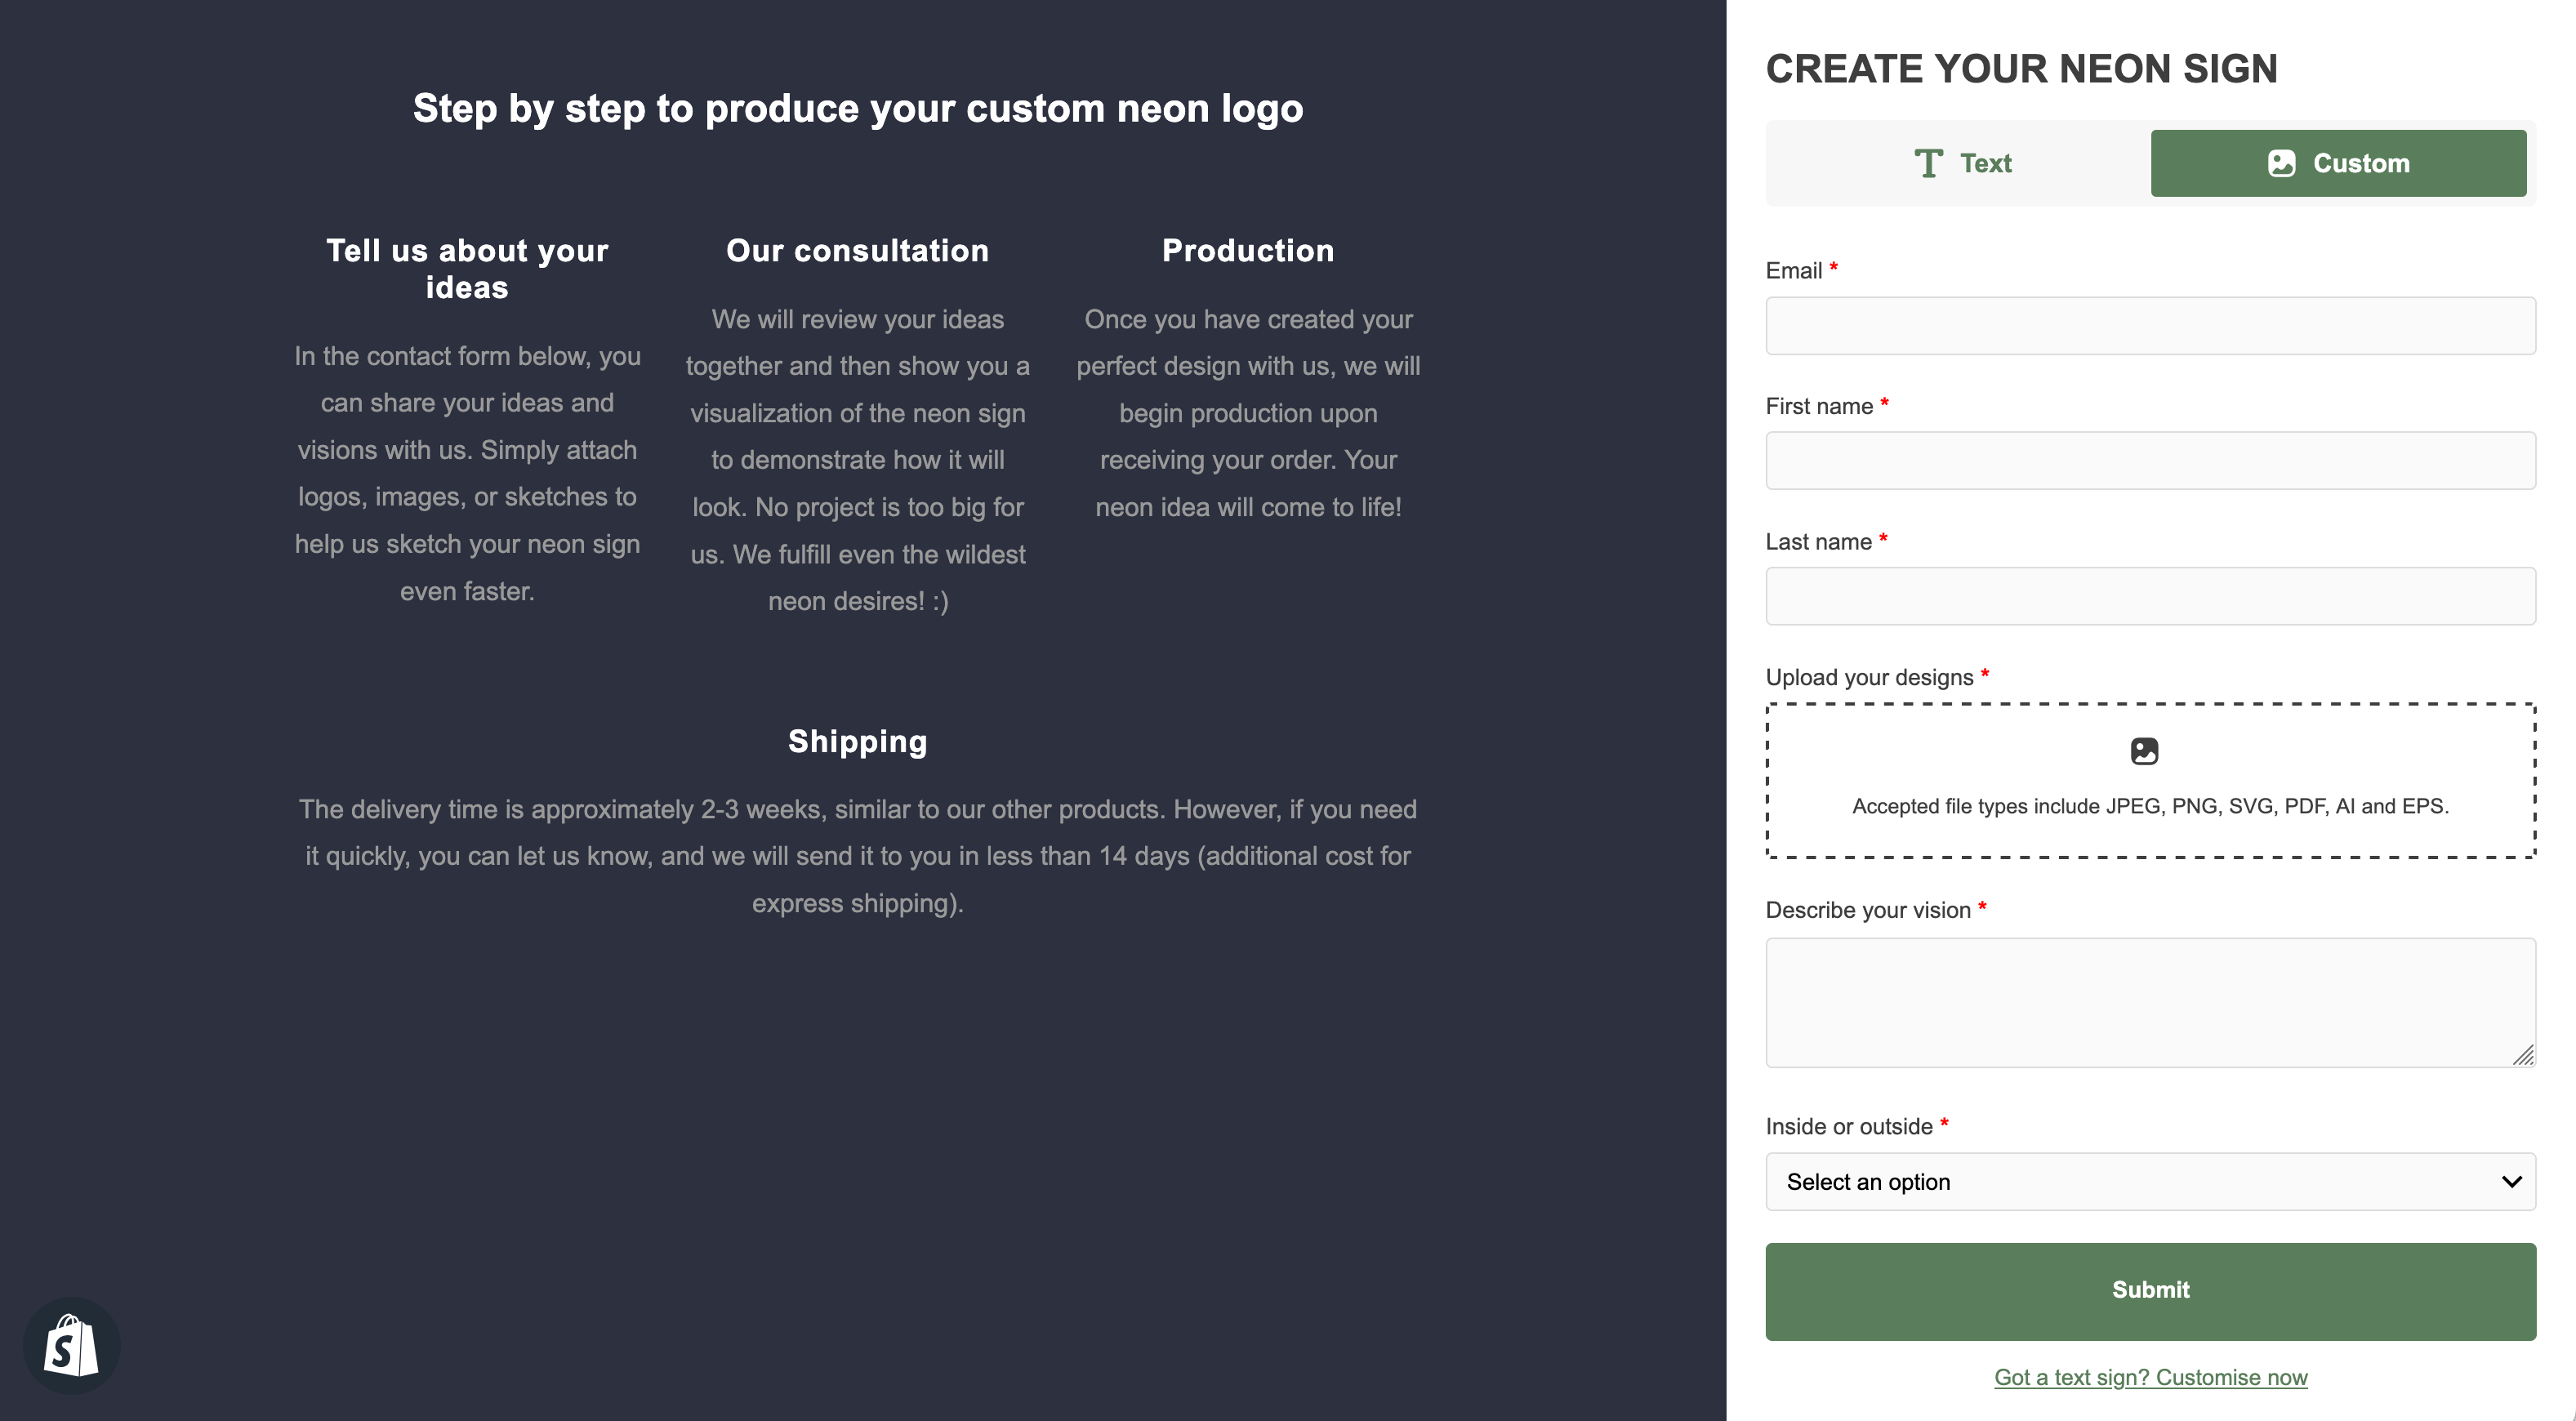
Custom Design Forms allow users to upload files, submit messages, and use form elements like dropdowns, checkboxes, and radio buttons – all without leaving the page.
Merchants using this feature receive up to 47% more submissions compared to those using external forms.
For a more streamlined quoting process, merchants can enable Quote Mode instead. Click here to learn more about Quote Mode.
Create and edit a form
This guide explains how to create and display a form within the customiser.
Step 1: Adding a New Form
-
Go to the Sign Customiser Admin:
-
Universal subscribers: Go to Home in your account.
-
Shopify users: Navigate to Shopify admin → Apps → Sign Customiser.
-
-
Click on Customisers in the menu.
-
Select the customiser you want to edit.
-
From the left-hand menu, go to Features → Forms.
-
Click on the Add New Form button.
-
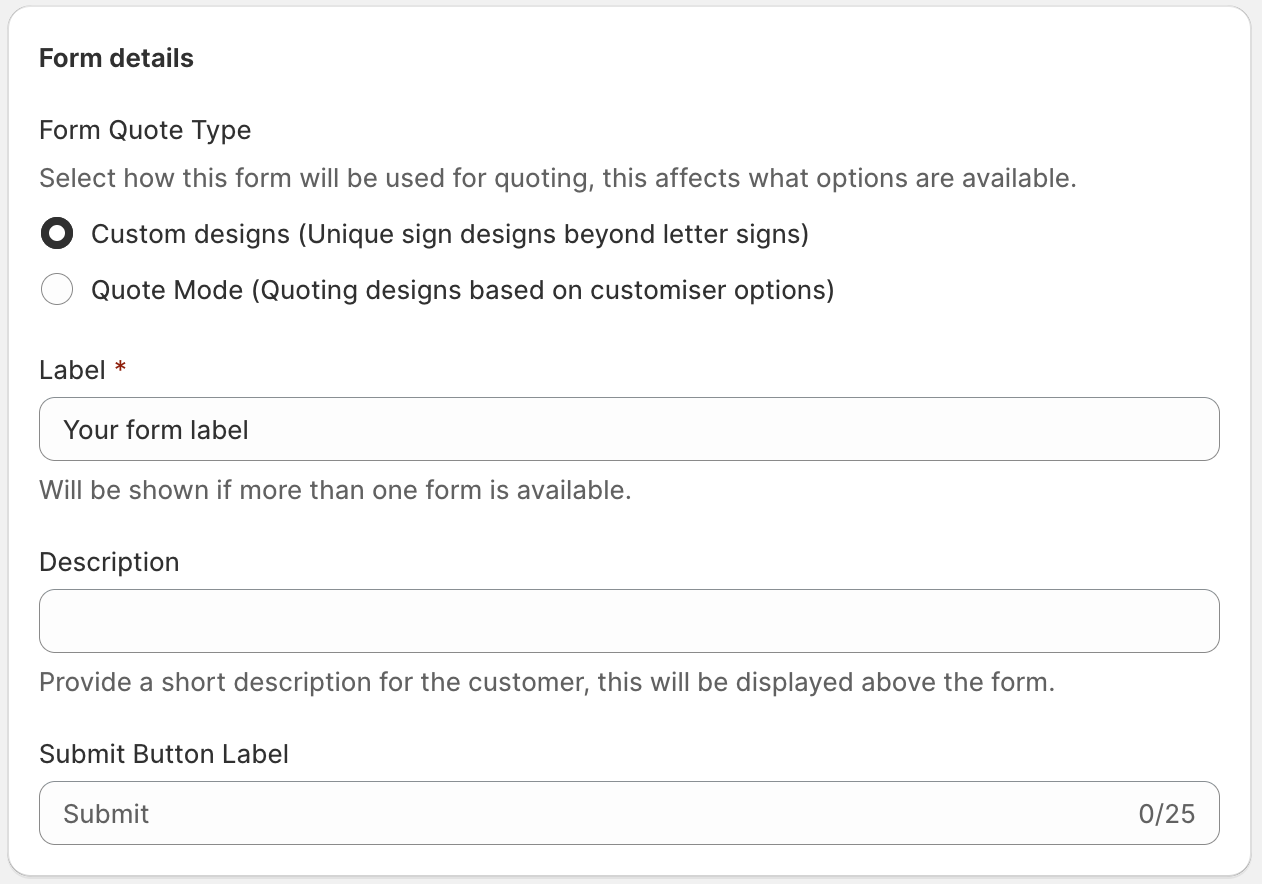
Select a Form Quote Type:
-
Custom Designs – For additional design inquiries alongside your customiser.
-
Quote Mode – To use the form for quoting customiser-generated designs.
-
-
Label your form (only visible if multiple forms exist).
-
(Optional) Add a form description and rename the submit button.
Step 2: Add Fields to Your Form
-
In the Fields section, click “Add new field” and select the field type you need. Follow our Add and Edit Custom Form Field Options for a detailed walk-through.
-
Every form must contain a required Email field. New forms include this field. Do not remove it or make it optional.
-
(Optional) For Shopify users only: Enable Shopify Sync to automatically sync customer emails and names with Shopify.
Step 3: Set a Receiver Email to Your Form (Optional)
By default, form submissions are sent to your store’s email.
-
To override this, enter a new Receiver Email in the settings.
-
Customise the Email Subject if needed.
Step 4: Define the Action After Form Submission
Once the form is submitted, you can choose between two available actions:
-
Display a confirmation message – A small “Thank you for submitting” message appears.
-
Redirect to an external page – Users are taken to a specified URL.
Click Save to apply your changes.
Step 5: Embed Your Form in the Customiser
To display the form on your storefront:
-
From the left-hand menu, go to Core Setup → Custom Designs.
-
Under Choose how you would like to handle custom designs, select Embed Custom Design Form.
-
Click Save.
The form is now active on your storefront.
Step 6 (Optional): Hook into form submissions events using javascript.
External JavaScript code can listen for the following event that has fired after a form submission has been sent.
// Listen for form submissionsdocument.addEventListener('signCustomiserFormSubmitted', function(event) {console.log('Form submitted:', event.detail);// Access form data: event.detail.data// Access customiser ID: event.detail.customiserId// Access domain: event.detail.domain});FAQ
How do I receive form submissions?
When a user submits a form on the Custom Design screen, you’ll receive an email containing all selected options.
By default, this is sent to your store’s email.
If you entered a custom Receiver Email, submissions will be sent there instead.

Where can I see the form entries?
Open Quotes from the app admin. This page contains quote requests and form submissions, including AI Sign Designer fallback requests. Select the blue submission number and form name to open the submission details.
Why is a customer’s email missing?
All new submissions include a required customer email. An older submission can have no email if its form did not collect one.
Open the submission and note the Form and Customiser values.
Select Customisers and open the same customiser.
Go to Features → Forms and select the same form.
Confirm that the form has a required Email field.
This change applies to new submissions only. It cannot add an email to an existing submission or PDF.