Icons in Sign Designs
Last updated:
The Icons feature allows you to upload SVG graphics that customers can add to their sign designs. These icons can be used alongside text to create personalised and visually engaging signs.
This guide explains how to upload icons and how customers can access them in the customiser.
Adding Icons to Your Customiser
-
Go to the Sign Customiser Admin:
-
Universal subscribers: Go to Home in your account.
-
Shopify users: Navigate to Shopify admin → Apps and select Sign Customiser.
-
-
Click on Customisers in the menu.
-
Select the customiser you want to edit.
-
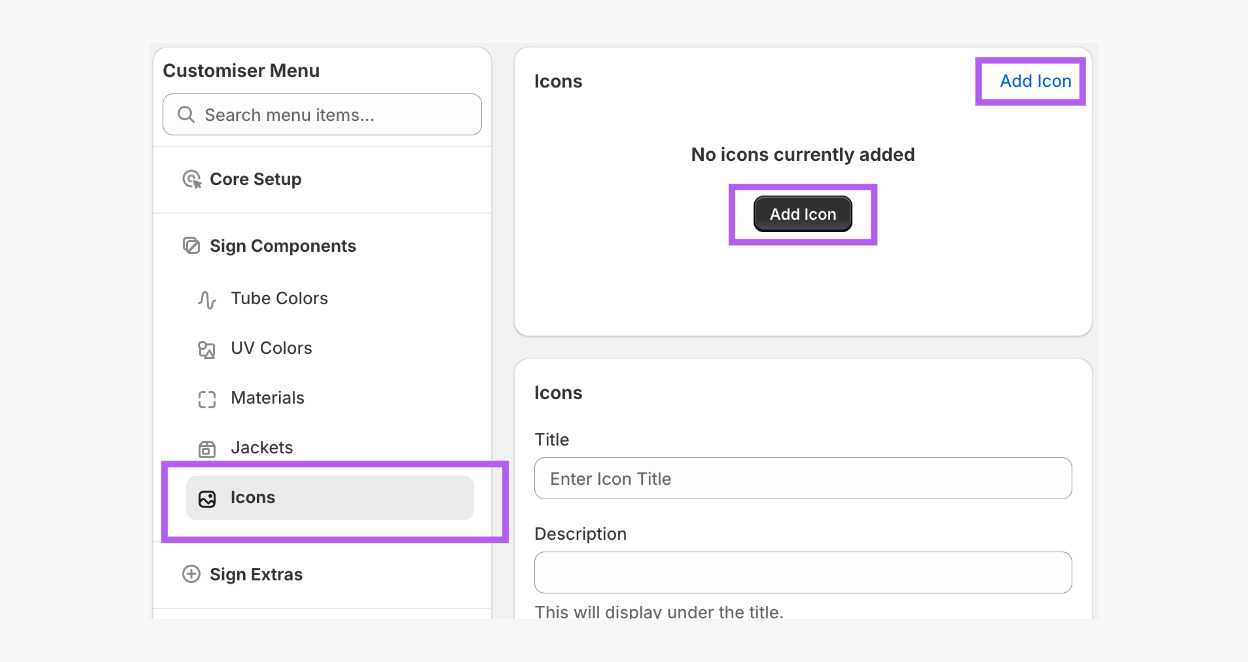
From the left-hand menu, go to Sign Components → Icons.
-
Click Add Icon.
-
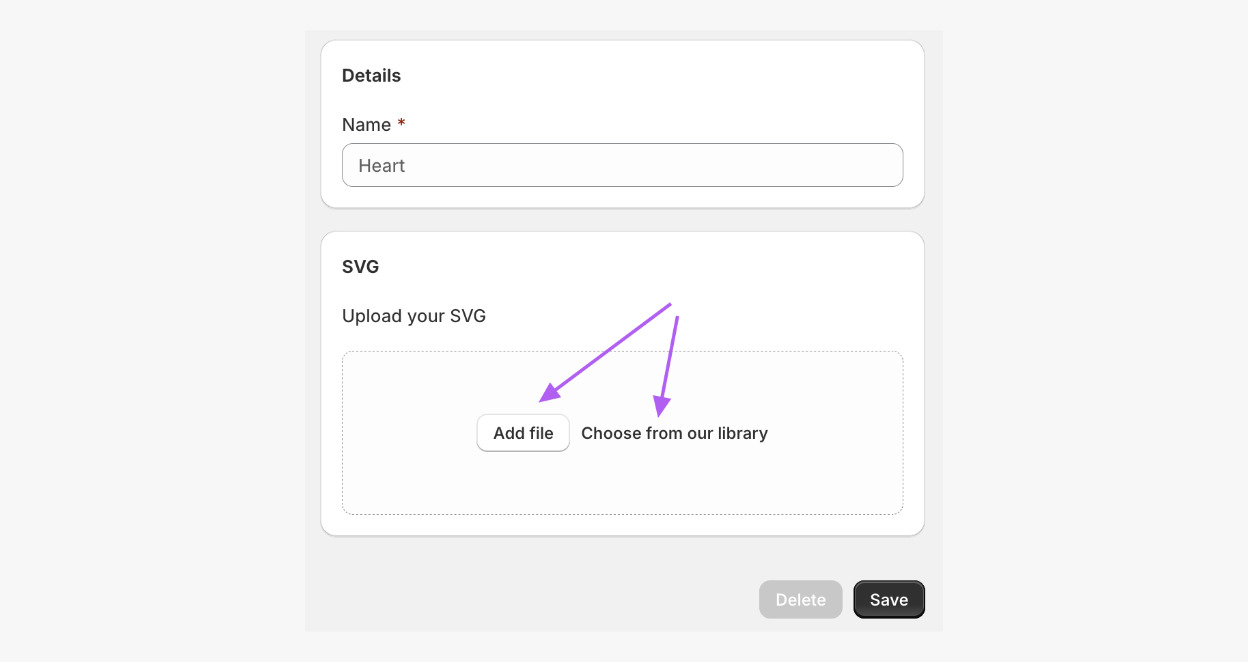
Enter a name for your icon.
-
Click Add file to upload an SVG file, or click on Choose from our library to select icons from our library.
-
Click Save.
-
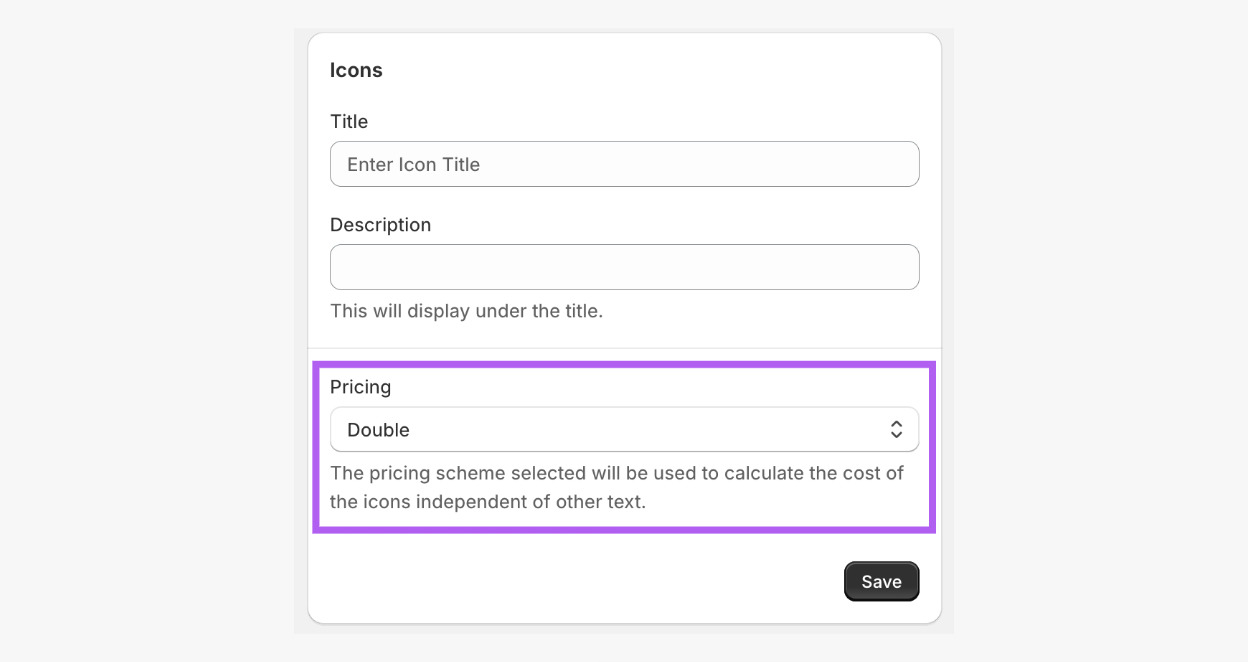
Still in Icons, in Pricing, and assign a pricing model in the dropdown menu to your icons to ensure correct price calculations.
Where Can Customers Find Icons?
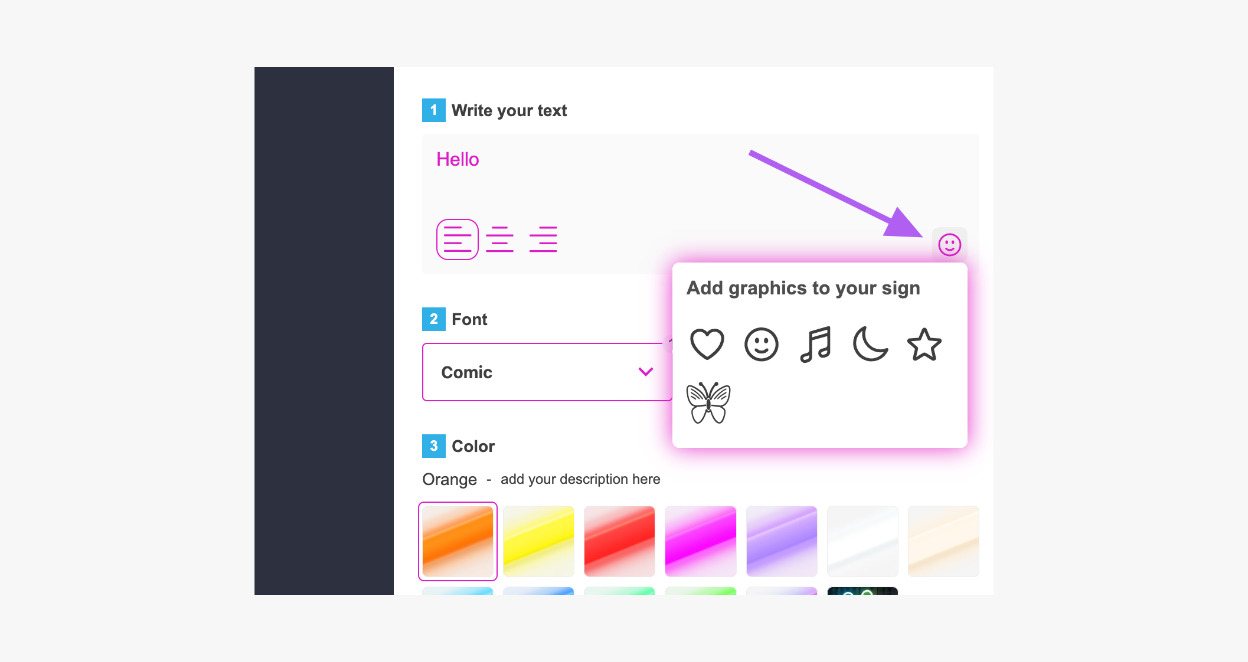
Customers can access your icons by clicking the smiling emoji icon located on the right-hand side of the text input field. This opens the icon library where they can browse and add icons to their sign designs.
Why Do My Icons Look Different?
For icons to be compatible with the app, they must use fill attributes rather than stroke attributes. If an uploaded SVG uses stroke attributes, the app will attempt to convert them to fill attributes, which may alter how the icon will look.
For more details and best practices, see our guide: Why Are “Fill” Attributes Important for Your SVG Files?