

Etsy integration
Connect Etsy once from Integrations, and every customiser in your store pairs with an Etsy listing through a Customiser Link.
Last updated:
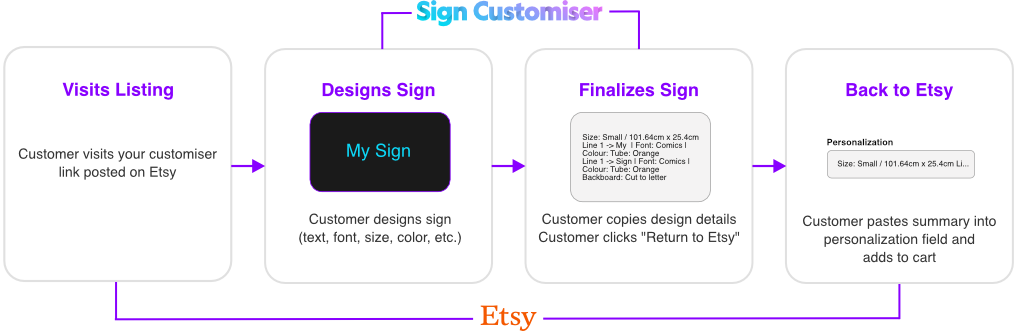
The Etsy integration lets you use Sign Customiser as a hosted design tool for your Etsy listings. Customers design their sign in our app. They copy a summary of their design. They paste the summary into Etsy when they place an order.
Etsy still processes the orders. Etsy handles payments and fees.
How Etsy and Sign Customiser Work Together
-
You connect to Etsy one time in your Sign Customiser account. This also turns on your Customiser Link.
-
You share each customiser with a Customiser Link.
-
Customers use the link to design their sign.
-
The customiser makes a design summary of their sign. It lists the size, the text with its font and colours, and the options they picked.
-
Customers copy the summary. Then they return to Etsy.
-
They paste the summary into the personalisation box. Then they complete checkout.
Before You Begin
Make sure that you have:
-
An active Etsy store
-
A Sign Customiser account on the Universal platform (log in)
-
An active subscription, or a trial with a payment method on file, on your Store. Without one, buyers who open your Customiser Link see “This designer isn’t available right now”. To subscribe, go to Billing under Your Company.
-
A customiser created for your Etsy product (if you have not made one, follow our Quick Start guide)
-
Your full Etsy listing URL ready to use. The Etsy listing settings form accepts only a listing URL that includes
/listing/and the listing number.
Setting Up Etsy Integration
Step 1: Connect Your Sign Customiser Account to Etsy
-
Log in to your account: **https://web.signcustomiser.com/**
-
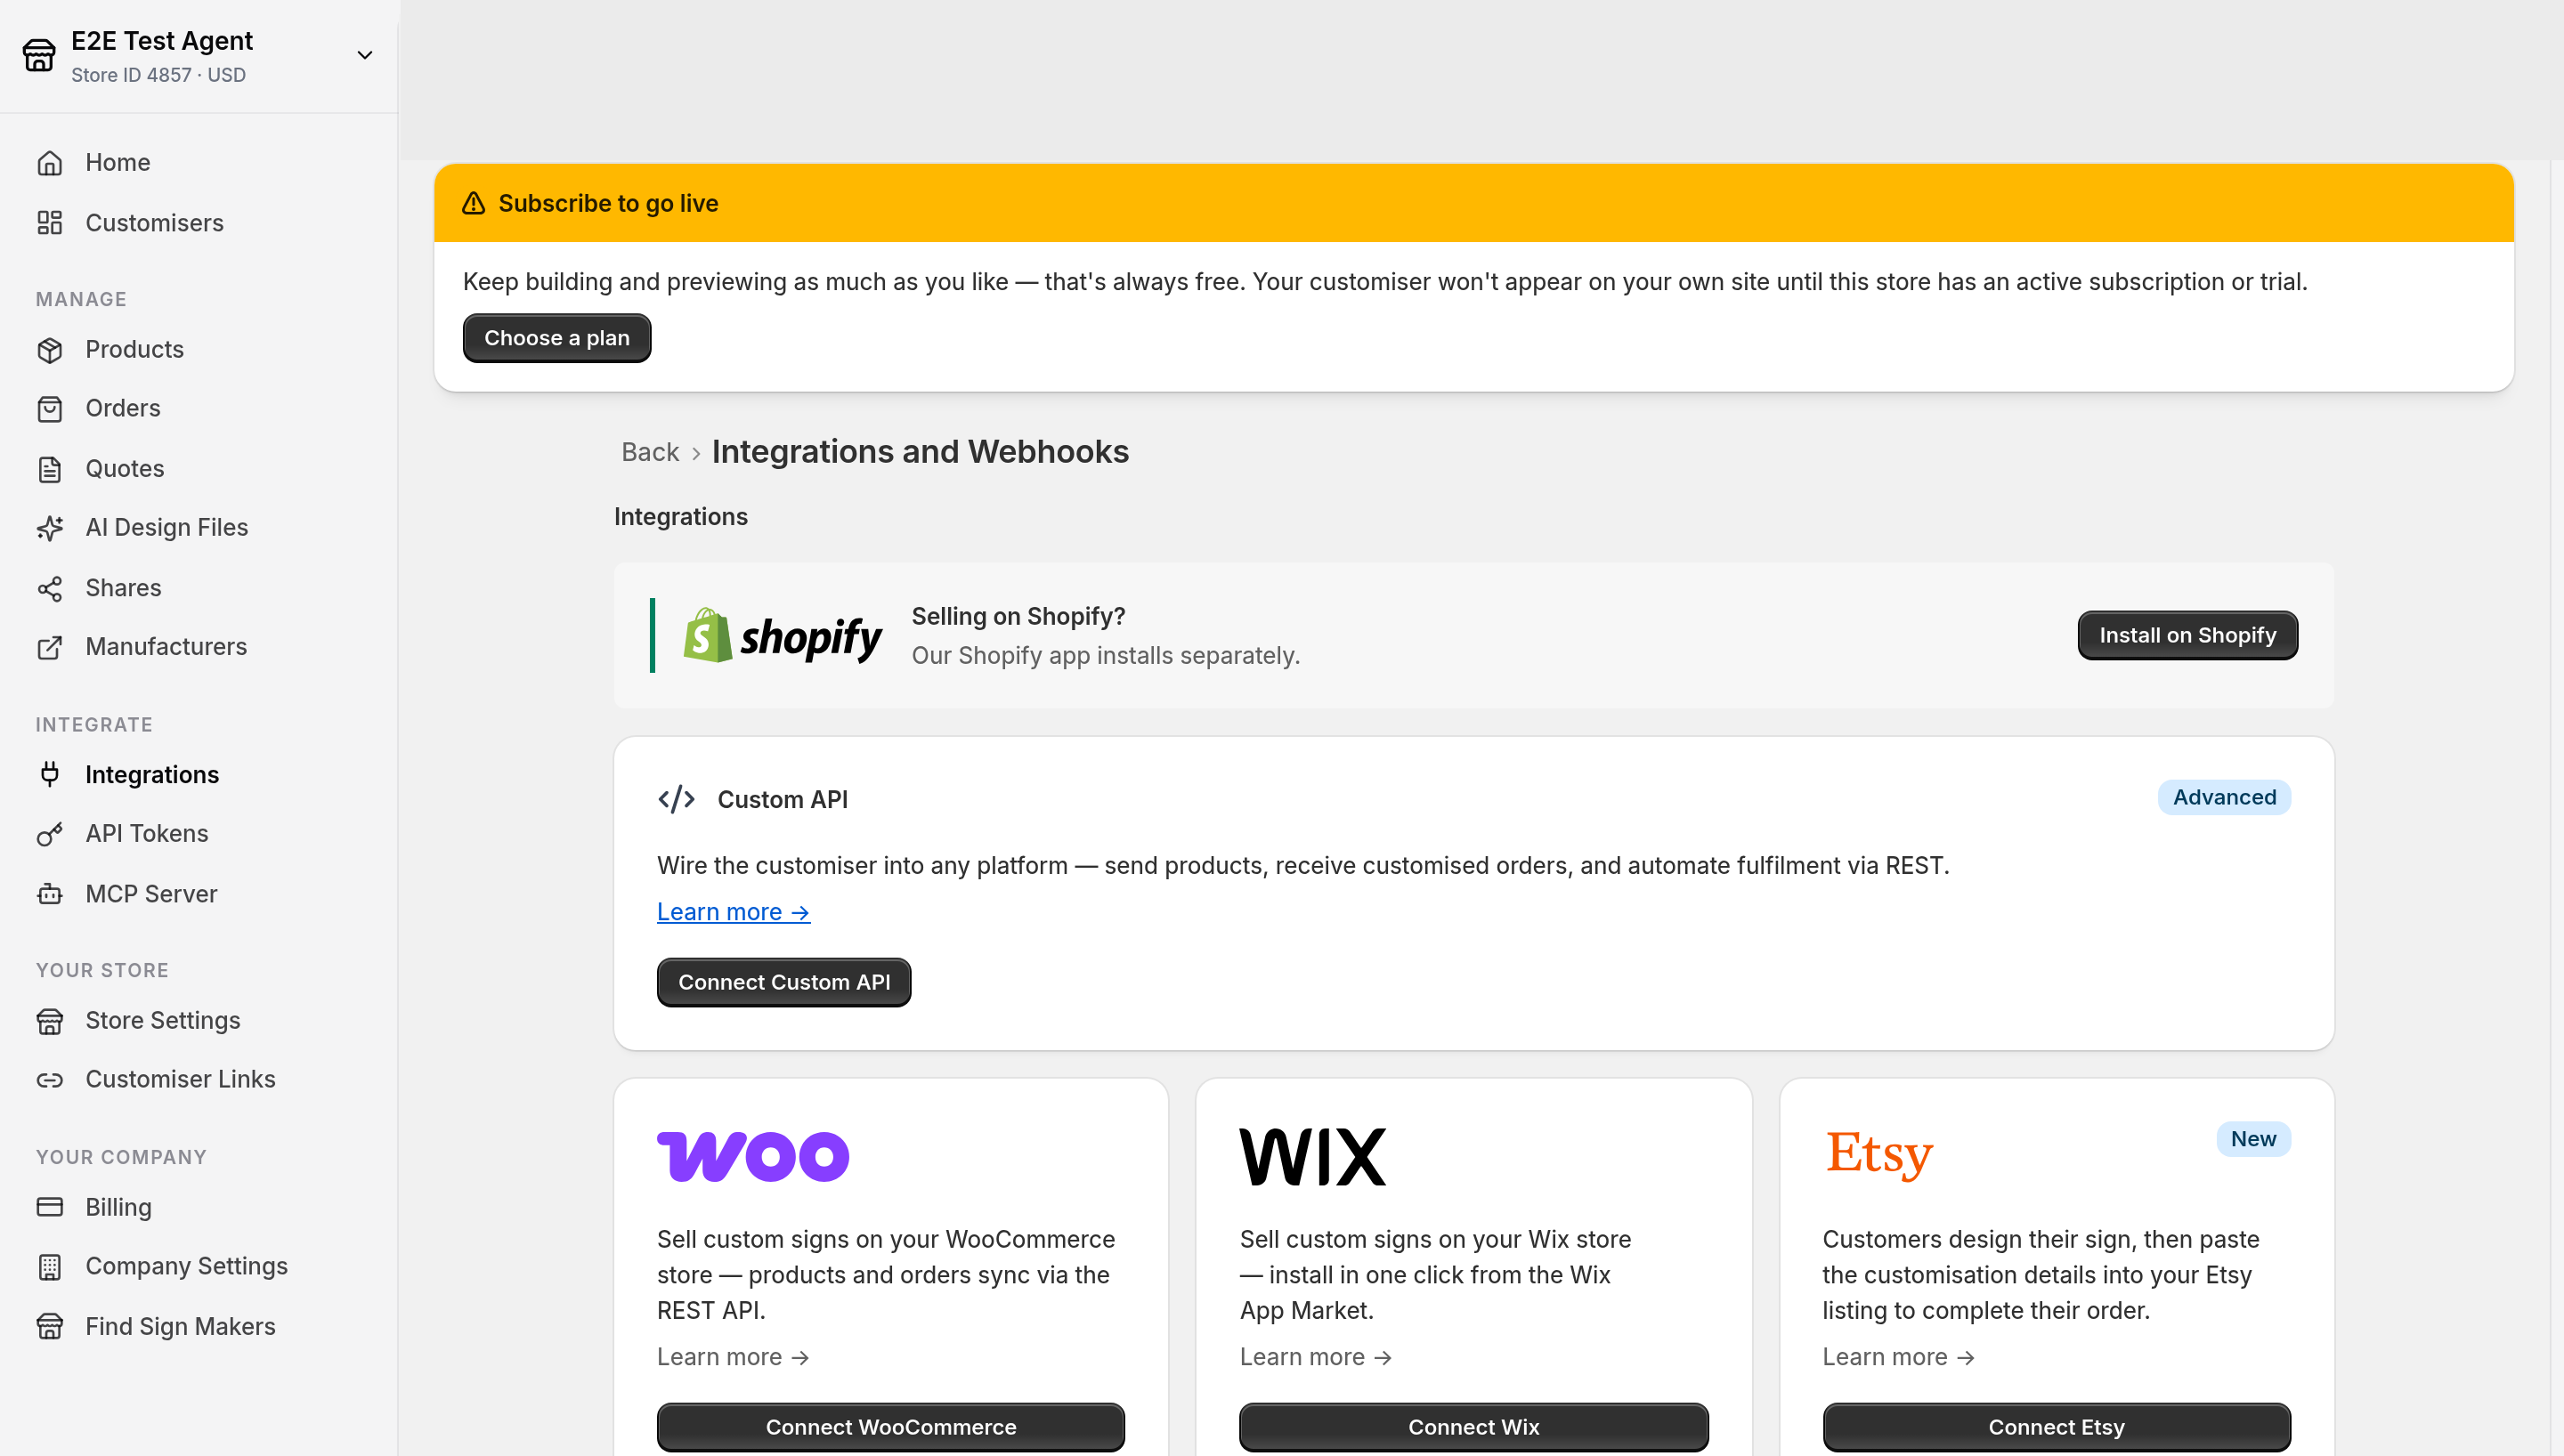
Click on Integrations in the menu.
-
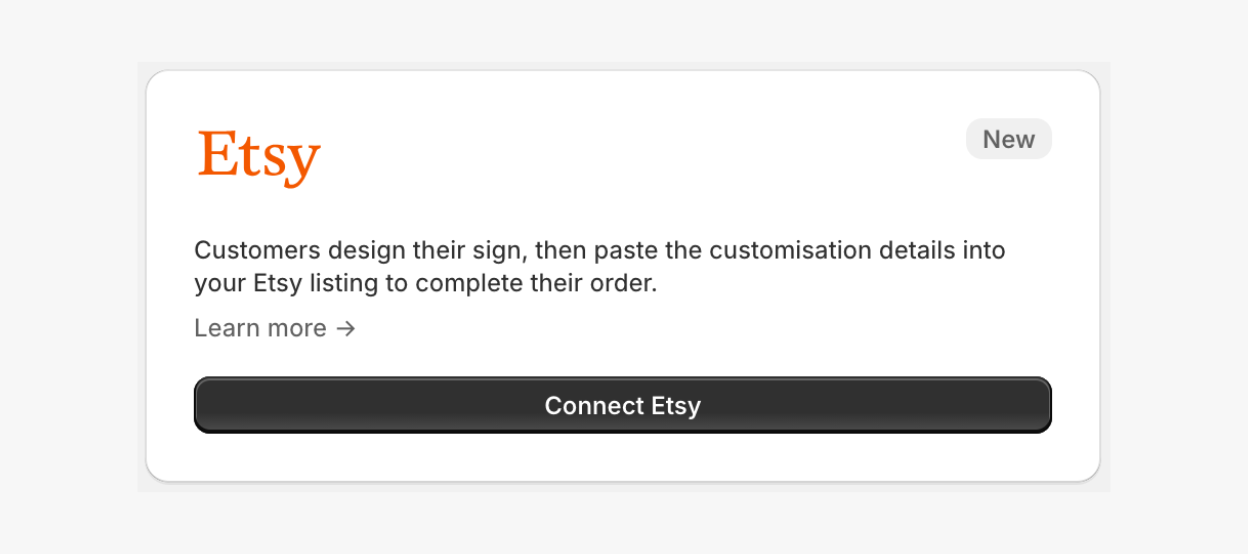
Click on Connect Etsy.
-
Click on Confirm.
Etsy is now connected to your account. Connecting Etsy also turns on the Customiser Link for your Store. If you turn it off later, buyers cannot open your Customiser Link from your Etsy listing.
The admin then opens the Etsy integration page. Its Setup steps show if the Customiser Link is on. They also show which customisers still need an Etsy return URL.
Note: Only one integration can be active at a time. While another integration is active, the Integrations page shows only that integration. The Etsy card is hidden. Remove the other integration first. For the steps, read The Etsy card is missing from Integrations in Troubleshooting.
Step 2: Add Your Customiser Link to an Etsy Listing
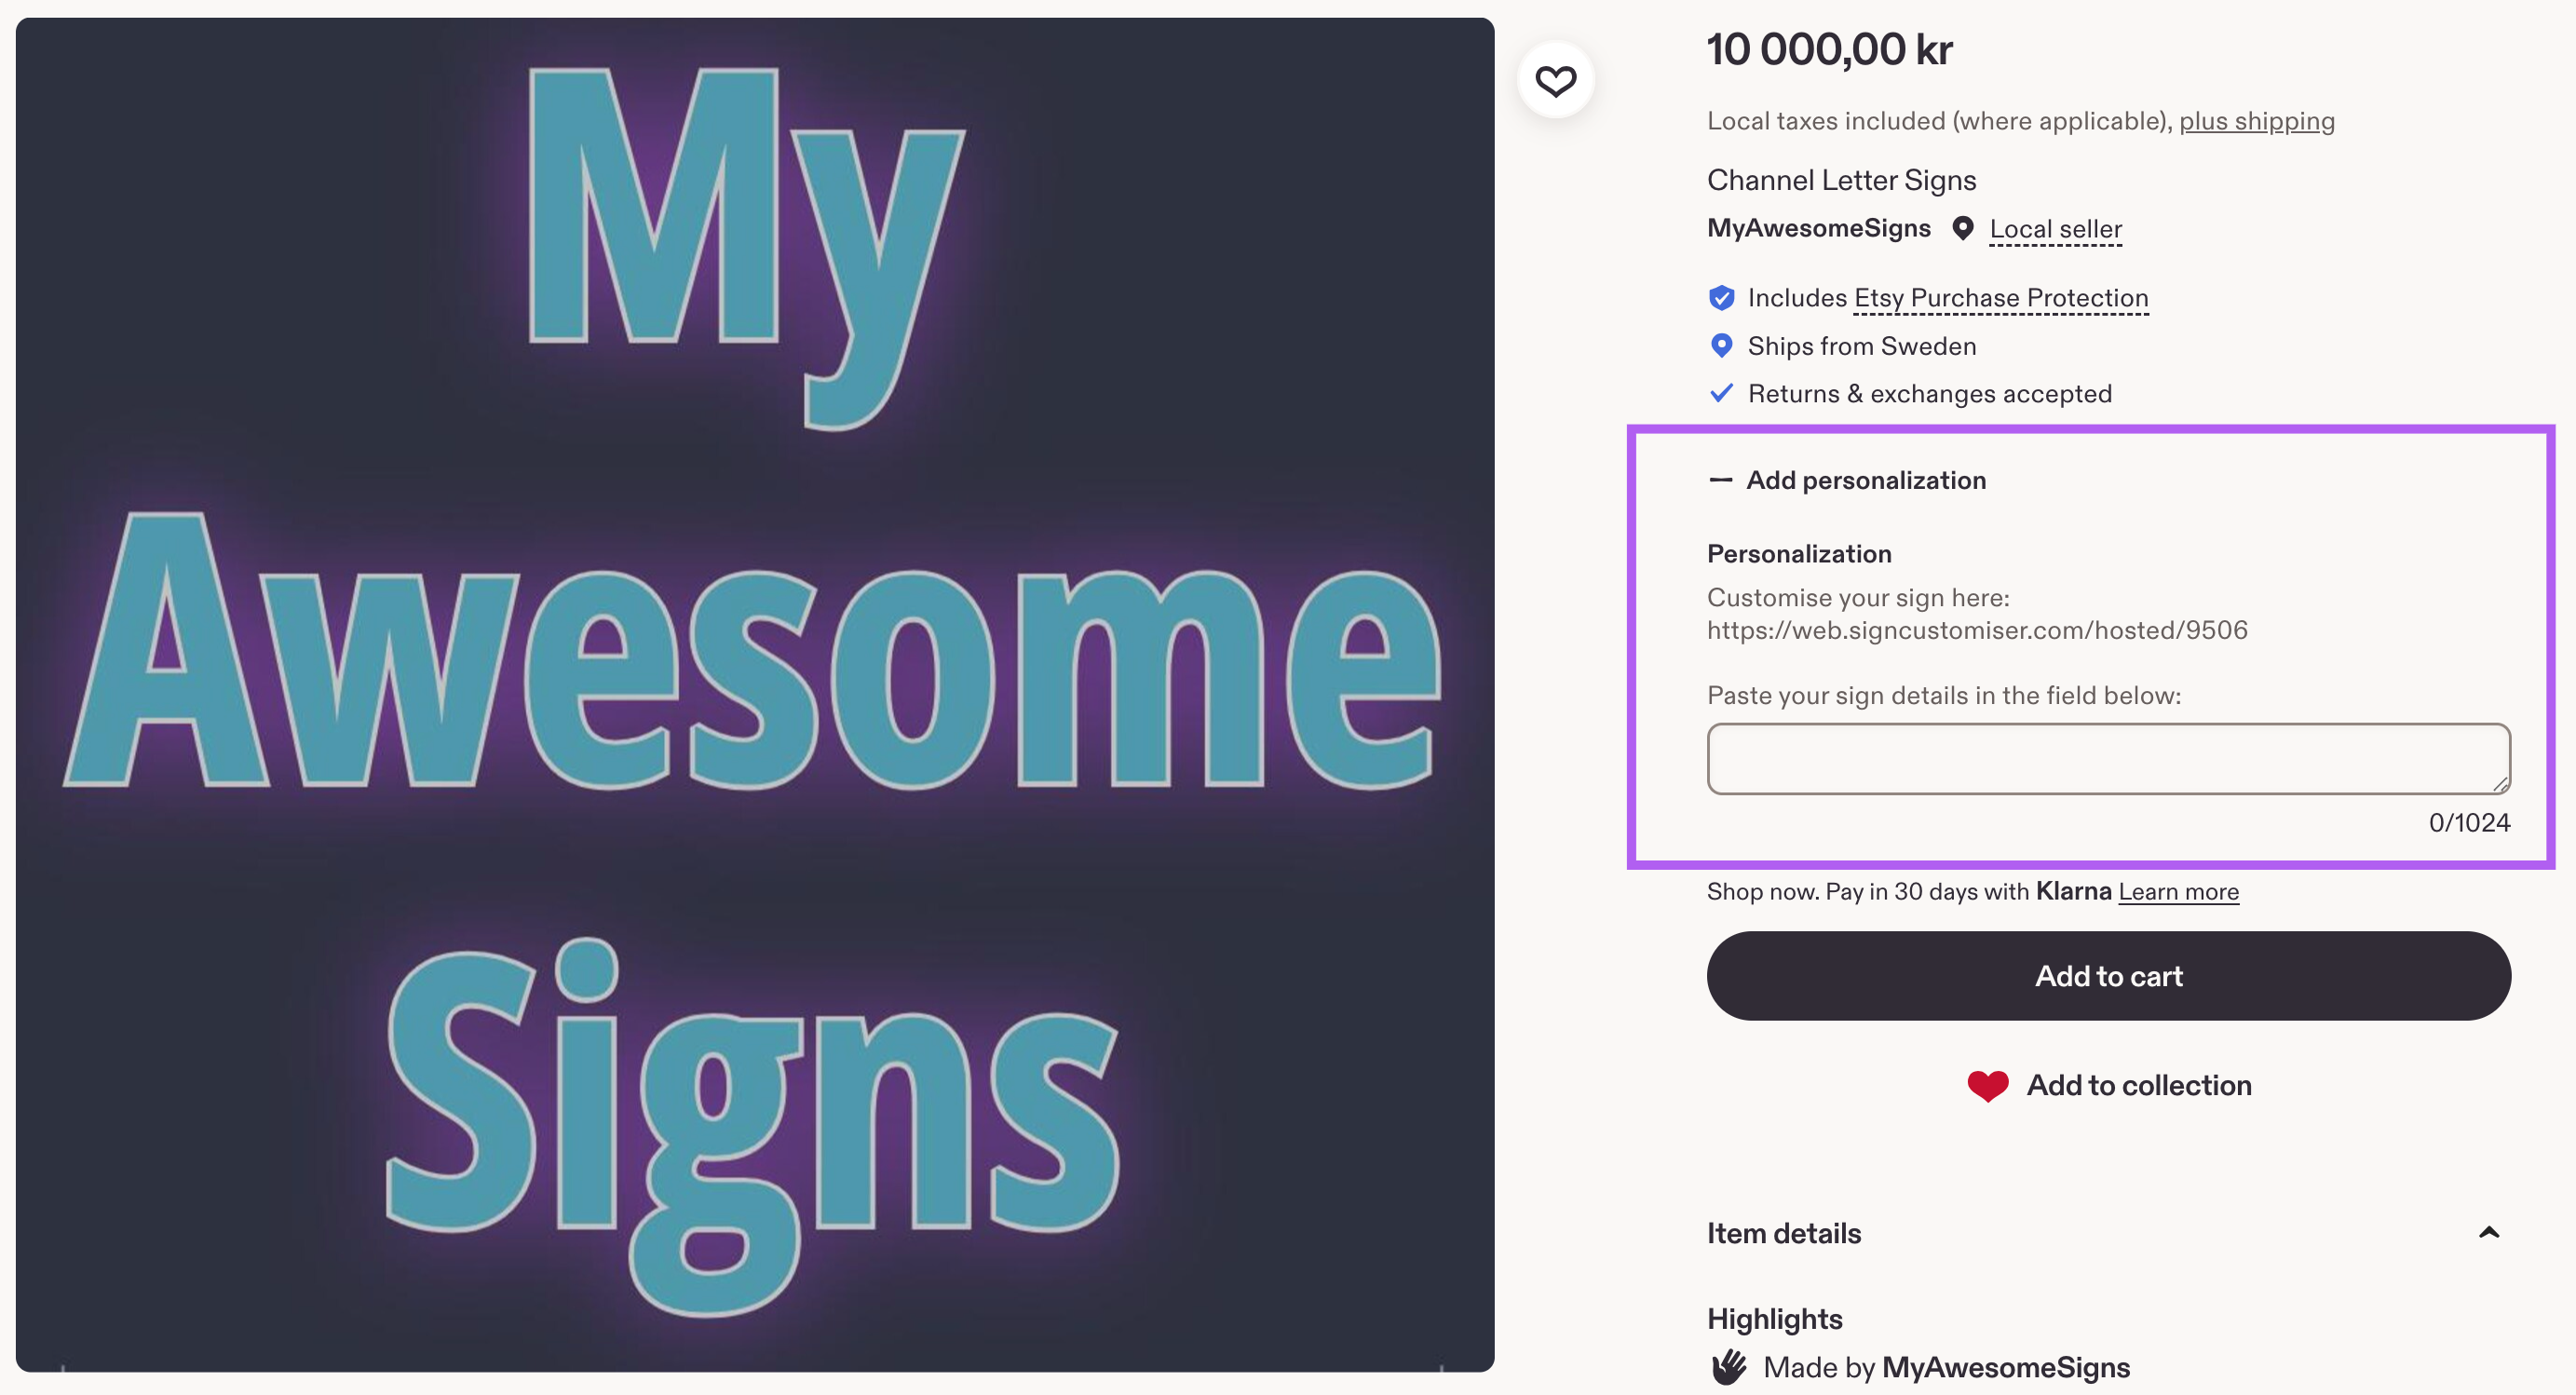
Add your Customiser Link to your Etsy listing. Put the link in the personalisation instructions of the listing. The customer opens the link, designs the sign, and pastes the sign details into the personalisation box on Etsy.
Get Your Customiser Link
-
Go to your Sign Customiser account: https://web.signcustomiser.com/
-
In the left-hand menu, click on Customisers.
-
Select the customiser you want to use for your Etsy listing.
-
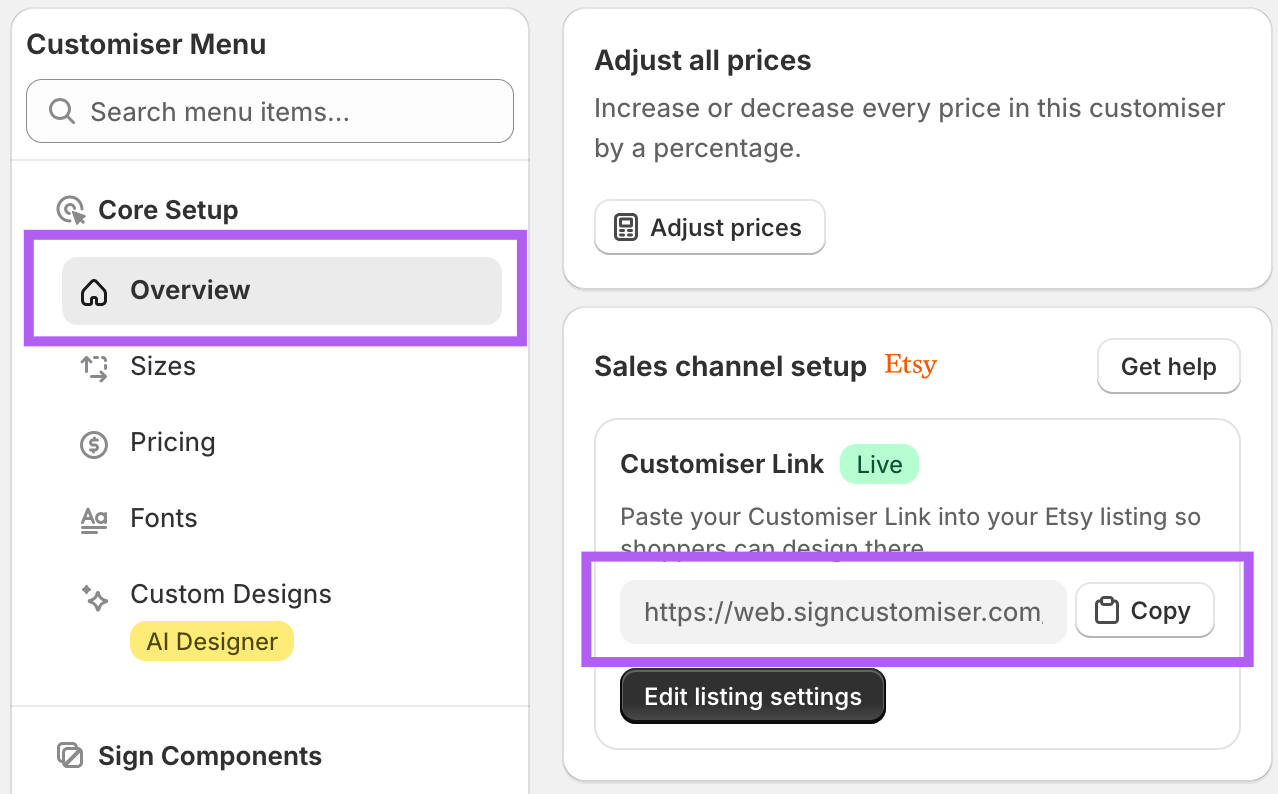
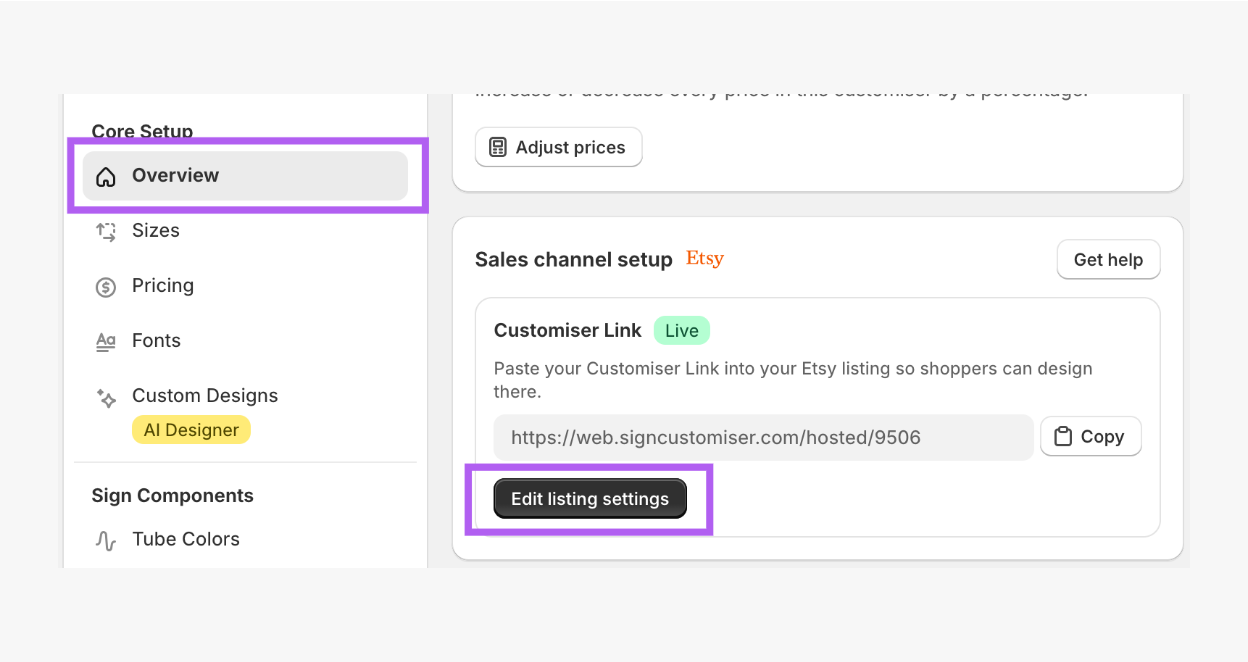
On the left-hand menu, click on Overview.
-
In the Sales channel setup card, copy your Customiser Link.
Add the Link to Your Etsy Listing
Etsy can change its listing editor. Your screen can look different from the screenshots.
-
Log in to your Etsy account.
-
Create a listing, or edit an existing listing.
-
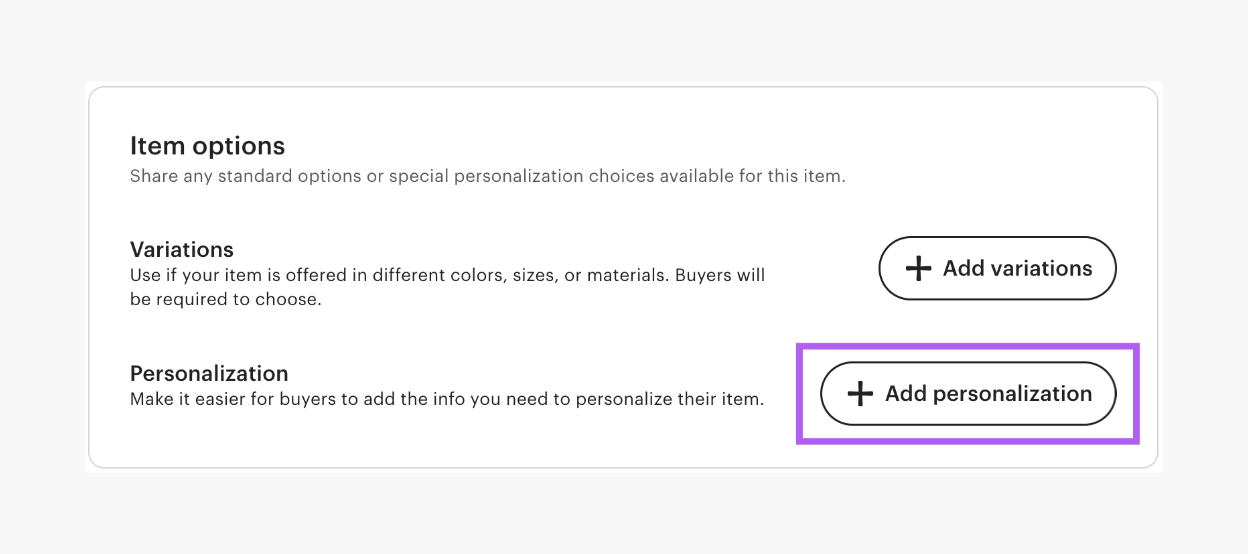
Add personalisation to the listing, as the screenshot shows.
-
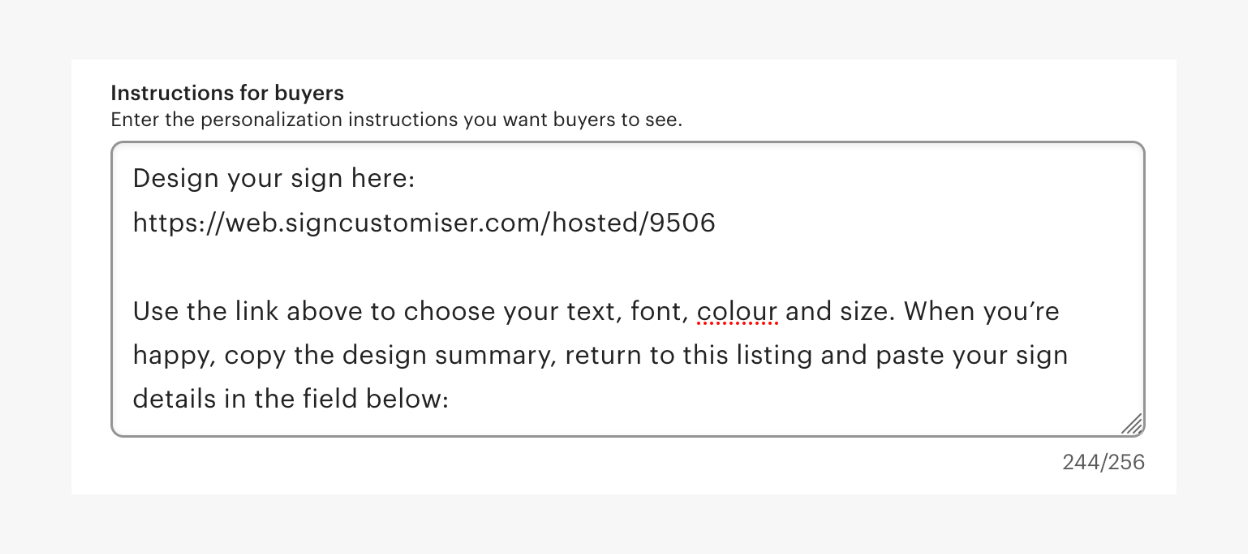
In the box for buyer instructions, paste your copied Customiser Link. Add instructions on how to use it.
Example:
_Design your sign here:_
https://web.signcustomiser.com/hosted/9506
Use the link above to choose your text, font, colour and size. When you are happy, copy the design summary. Return to this listing. Paste your sign details in the field below:
-
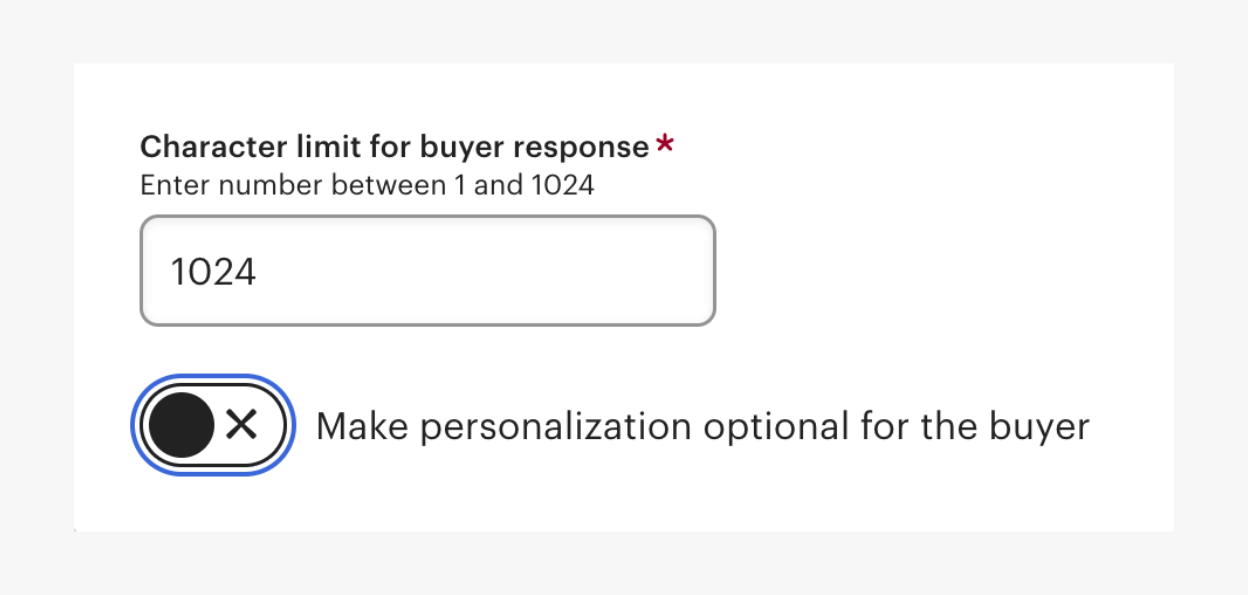
If Etsy limits the length of the buyer response, set the limit high enough for the full summary, as the screenshot shows.
-
Make sure that the personalisation is not optional for the buyer. In the screenshot, the option that makes it optional is OFF.
-
Add all your other details to your listing and publish it.
Your Etsy listing is ready.
Step 3: Add Your Etsy Listing’s Return URL to Your Customiser
Next, add a return URL in your customiser. The return URL sends the customer back to the correct listing to paste their sign details.
-
Copy your Etsy listing URL.
-
Go to your Sign Customiser account.
-
In the left-hand menu, click on Customisers.
-
Select the customiser used for this listing.
-
On the left-hand menu, click on Overview.
-
In the Sales channel setup card, click on Edit listing settings.
-
Paste your Etsy listing URL into the Etsy listing URL field. Use the full listing URL with
/listing/and the listing number. The form does not accept a shop URL.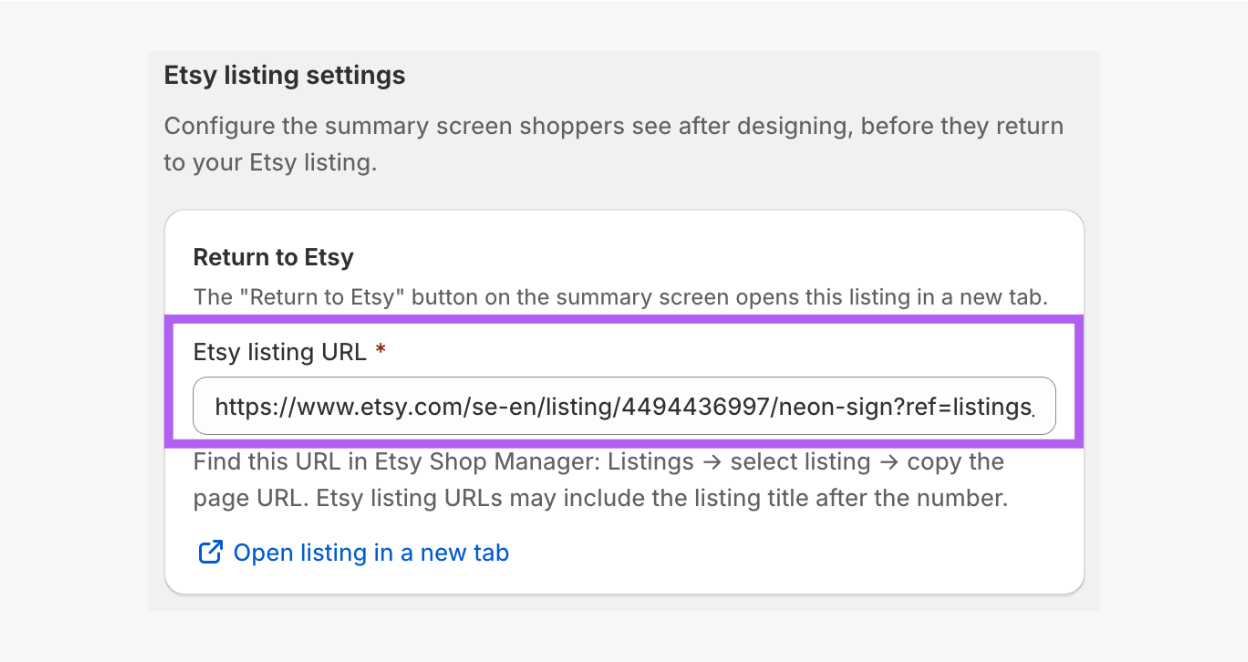
-
Click Save.
Your customiser now has your Etsy listing URL saved.
What Your Customers Experience
-
They click your Customiser Link in the personalisation instructions on your Etsy listing.
-
They design their sign.
-
When they are done, they click Continue to Etsy.
-
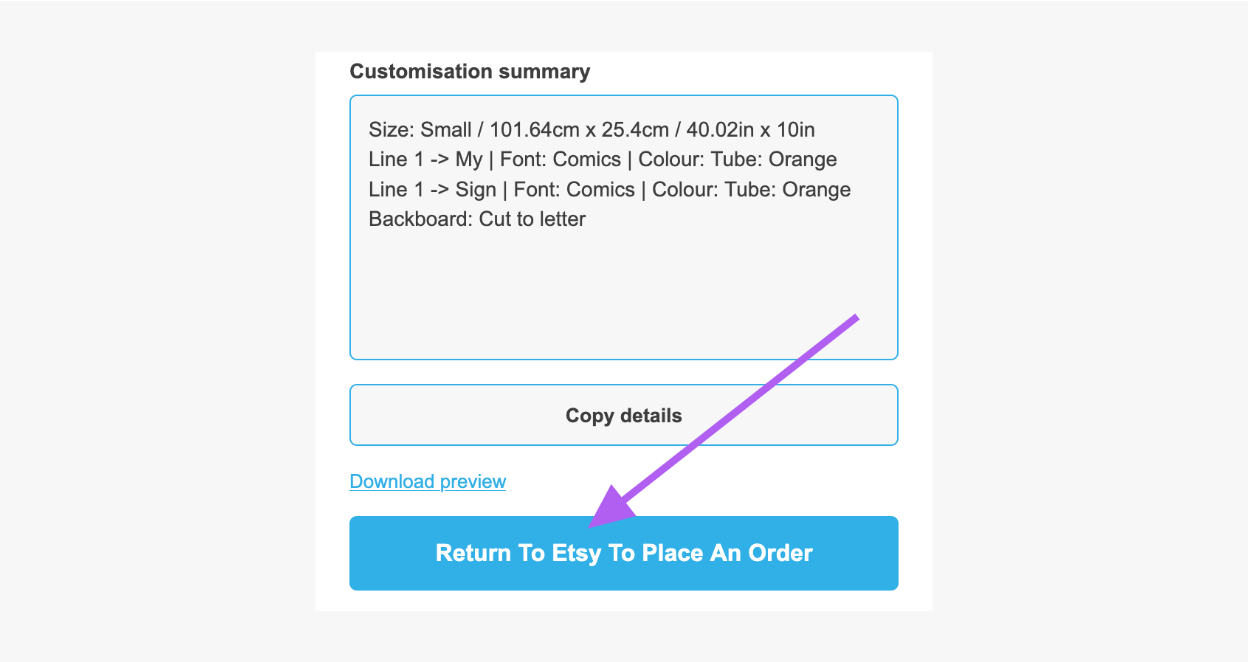
The customiser shows a Customisation summary. It lists the size, every line of text with its font and colours, and each option they picked. It also shows a Suggested price, unless you hide it.
-
They click:
-
Copy details
-
Return To Etsy To Place An Order (this opens your Etsy listing in a new tab)
-
-
They paste the summary into the personalisation box on Etsy.
-
They place the order on Etsy.
Shoppers can click Download preview to save an image of their sign.
Important Notes
-
Each customiser links to one Etsy listing only
-
The Return To Etsy To Place An Order button stays greyed out until you save a listing URL. The Etsy listing settings form accepts only Etsy listing URLs.
-
You can show or hide the suggested price in the summary. Open Overview and click Edit listing settings. Under Summary display, change Show suggested price.
Disconnect Etsy
You can disconnect Etsy at any time — no support ticket needed.
-
Open Integrations.
-
On the Etsy card, click the trash icon beside View Details.
Etsy is removed at once. There is no confirmation step, so click only when you are sure.
Disconnecting Etsy removes Etsy behaviour from every customiser in your Store. It also frees the slot for a different integration. Your Etsy listing URLs stay saved on each customiser. If you connect Etsy again, you do not enter them again.
Troubleshooting
The Etsy card is missing from Integrations.
While another integration is active, the Integrations page shows only that integration. Remove it. Then return to Integrations and connect Etsy. WooCommerce and Custom API have a trash icon on their card. Click it to remove that integration. Wix and Shopify have no remove button. If one of them is active, contact support.
Buyers see “This designer isn’t available right now”.
Your Store needs an active subscription, or a trial with a payment method on file, before buyers can use your Customiser Link. Make sure that the Customiser Link is on. Open Customiser Links under Your Store.
The Return To Etsy To Place An Order button is greyed out.
Add the Etsy listing URL in the Etsy listing settings of the customiser. Until you do, shoppers see “Your Etsy listing link hasn’t been set up yet”.
The price on the summary does not match my Etsy listing.
Change the pricing in your customiser to match the price of your Etsy listing. Or hide the price. Open Overview and click Edit listing settings. Under Summary display, clear Show suggested price.
Buyers do not paste the summary into the personalisation box.
Add clear instructions in the personalisation instructions of your listing. Tell buyers to copy the design summary and paste it into the personalisation box.