
Set the Sign area for each background image
Place a Sign area on a background image so the customer customiser shows the sign in that box.
Last updated:
The Sign area is a box that you place on a background image. In the customer customiser, the sign shows inside this box. Use it when the photo has a good place for a sign, for example the wall above a bed.
The Sign area changes where the sign shows in the Design view and on the Review screen. When the product image uses the background, it also changes the product image. For details, see “What the customer sees” below. The Sign area does not change the size that the customer orders, the price, or the SVG, EPS, AI and DXF files.
Before you start
-
Add a background image and save it. For the steps, see Scene Editor.
-
Select Enable Preview Images, Enable Review Screen Images, or both. If both are off, the Manage Images section does not show.
-
Turn off Enable Dragging, Enable Scaling and Enable Rotation. These options are on the Drag, Scale, Rotate page, in the Features menu. The Sign area is not available when one of them is on.
-
Use a customiser that is not a lightbox. The Sign area is not available for lightbox signs.
Set the Sign area
-
In the admin, click Customisers.
-
Click the customiser that you want to edit.
-
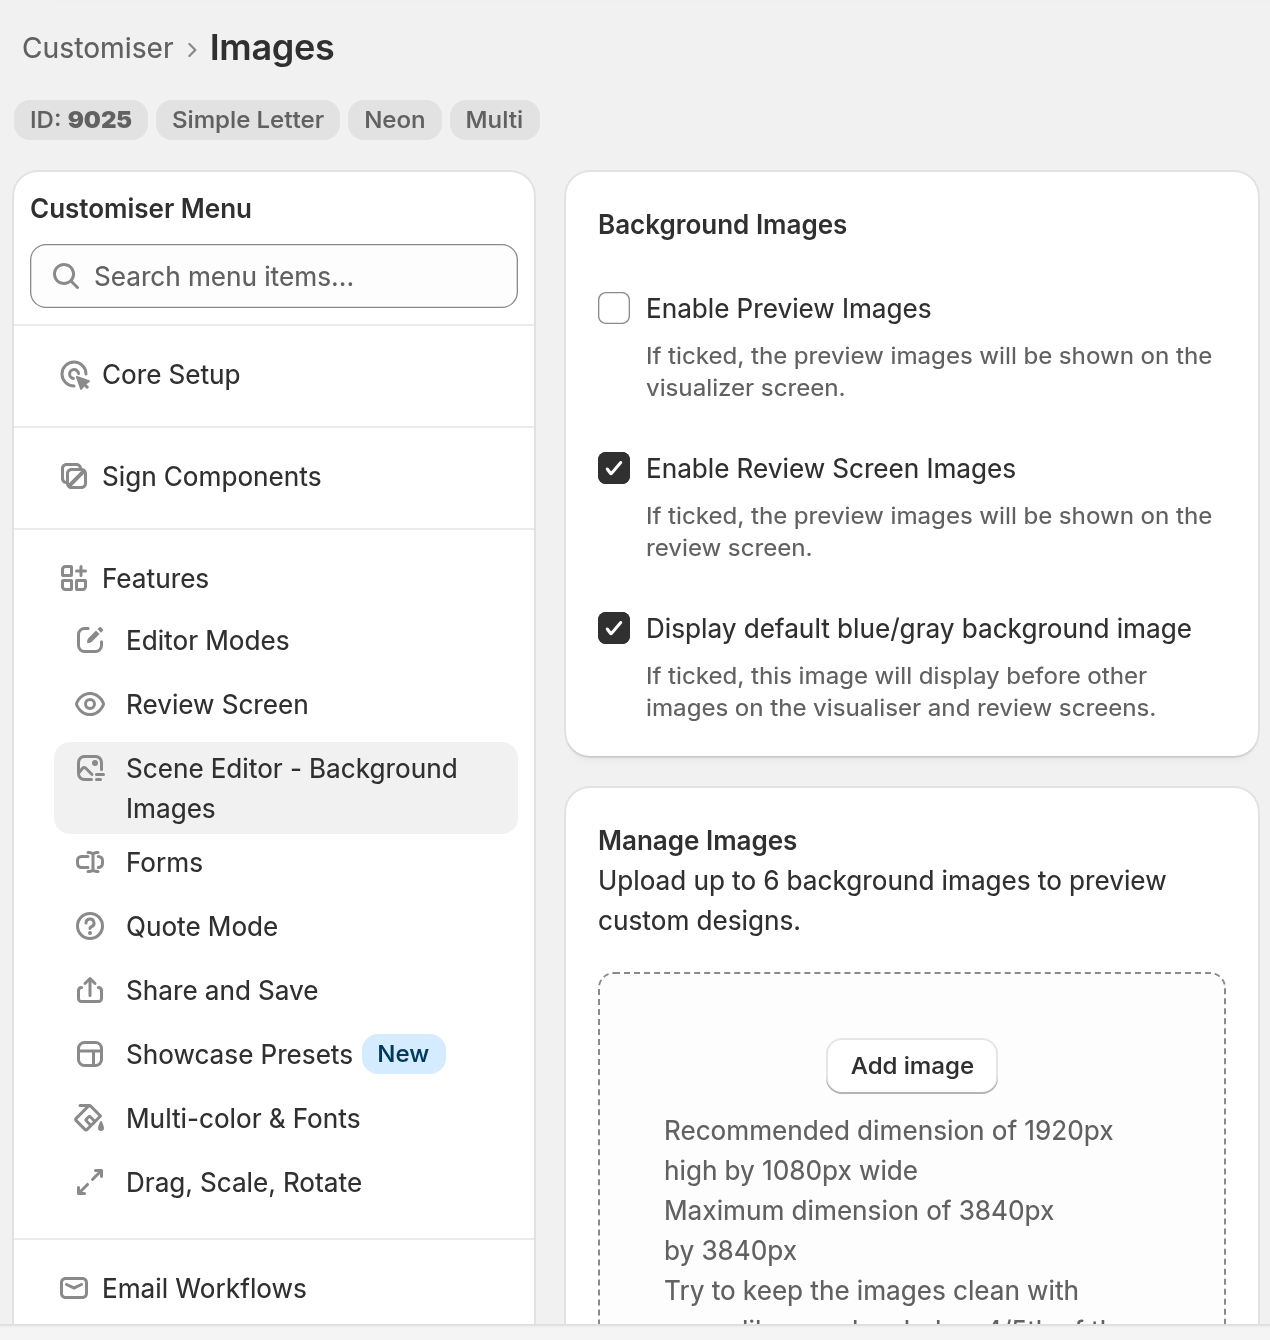
In the left-hand menu, click Features → Scene Editor - Background Images.
-
In Manage Images, find the image. Under Sign area, click Set Sign area. If the image has a Sign area, the button is Edit.
If the form has changes that you did not save, the button is off. The page says “Save your changes first.” Click Save on the Images page, then try again.
-
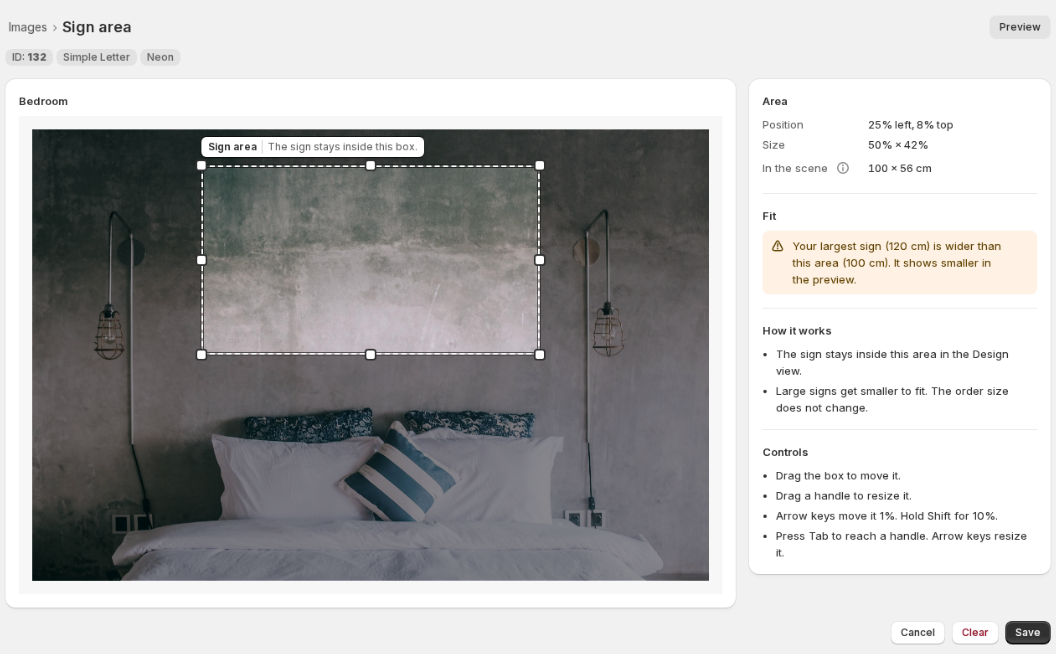
On the Sign area page, move the box and change its size:
-
Drag the box to move it.
-
Drag a handle to change the size.
-
Press an arrow key to move the box by 1%. Hold Shift to move it by 10%.
-
Press Tab to select a handle. Then press an arrow key to change the size.
The first time, the box is 60% wide and 40% high. The box must stay inside the image. Each side must be at least 5% of the image.
-
-
Click Save. The page shows “Successfully Updated!”.
To remove a Sign area, open the page again and click Clear. Clear shows only when the image has a saved Sign area. To close the page and not save your change, click Cancel.
Add a Sign area for mobile
Each background image can have a mobile version. The mobile version has its own Sign area. The Sign area of the desktop image does not apply to it.
-
In Manage Images, find the image. In the Mobile version (optional) group, click Add mobile image and choose the file. Then click Save on the Images page. This group is not available for lightbox signs, and it shows only when Enable Preview Images is on.
-
After the save, a Sign area line shows in the Mobile version (optional) group. Click Set Sign area.
-
On the Sign area page, the Desktop image and Mobile image buttons show which image you edit. Move and resize the box for the mobile image. Then click Save.
The mobile Sign area is for screens narrower than 1025 px. These screens show the mobile image in the live preview. The product image and the Review screen use the desktop image and its Sign area.
Check that your largest sign fits
The Area panel shows the position and the size of the box as percentages. When Scale visualisation with size is on, the panel also shows In the scene. This is the size of the box in the scene, from the width of the image. If the image has no width, the panel shows “Enter a background width.”
To give the image a real width, select Scale visualisation with size in the Visualiser Scaling section of the Images page. Then, in Manage Images, find the Scene size line for the image. Enter the real width of the scene in the first box. Click Save.
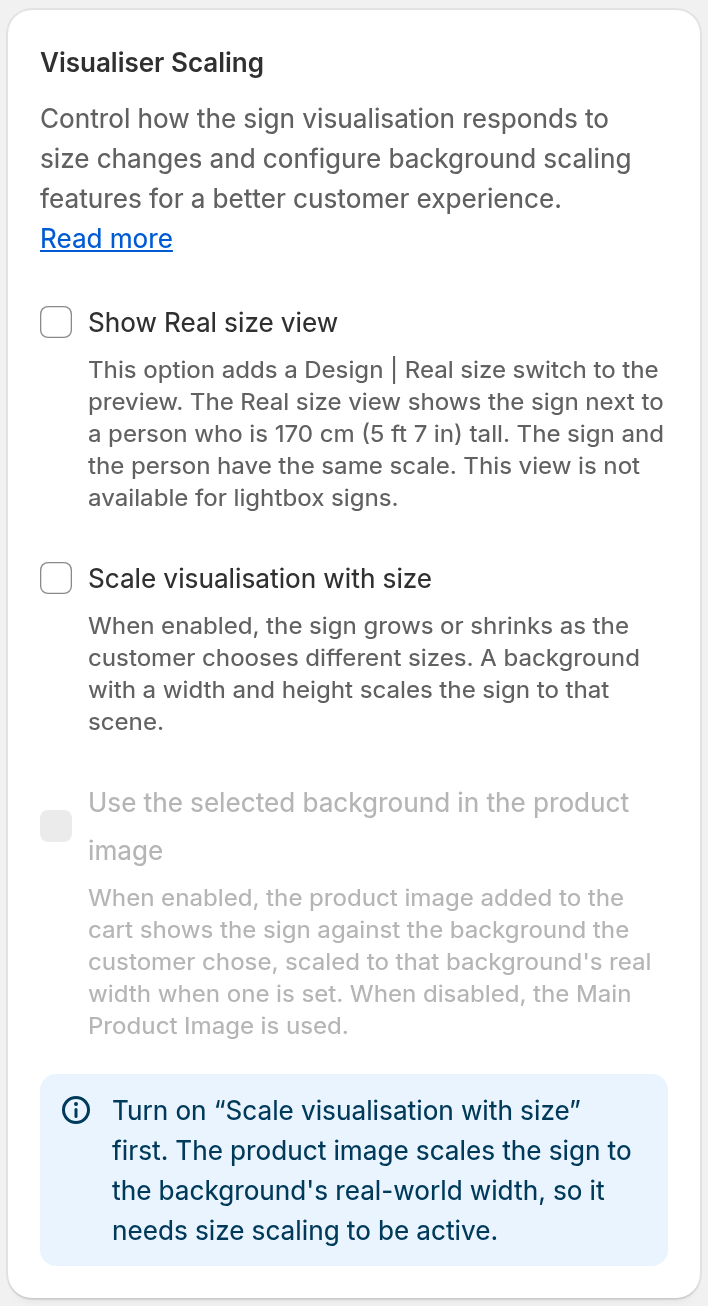
When Scale visualisation with size is on, the image has a width, and a size sets the sign width, the Fit panel compares your largest sign with the width of the box. If the sign is wider, a warning shows. The sign shows smaller in the preview. When the product image uses the box, it also shows smaller in the product image. To fix this, make the box wider.
The Fit panel uses only the sizes that set the width of the sign. These sizes are in customisers with the Frame Fit pricing model. They are also in customisers with the Simple Letter pricing model, unless the Size Strategy of the size is Fixed Height - Width scales dynamically.
What the customer sees
-
Design view. The sign is at the centre of the box. If Scale visualisation with size is off, the sign fits in the box. If it is on and the image has a width, the sign keeps its real size. The sign gets smaller only when it does not fit in the box. If it is on and the image has no width, the largest size fits in the box and smaller sizes show smaller.
-
Photo position. The preview frame can have a different shape from the photo. Then the customiser moves the photo in the frame, so that the box stays in view.
-
Review screen. The Review screen shows the sign in the same box when Enable Review Screen Images is on.
-
Product image. The product image for the cart and the order uses the box when Use the selected background in the product image and Scale visualisation with size are on. The product image in the order email also uses the box. For more detail, see Set a real size for the built-in background and use scenes in product images.
An image without a Sign area works as before.
Limits
-
The Sign area does not apply to a background that the customer uploads.
-
The Sign area does not apply to a colour-only background.
-
The Sign area does not apply to the Real size view.
-
A large sign gets smaller in the preview. When the product image uses the box, it also gets smaller in the product image. The ordered size does not change.