Backboards
Last updated:
Backboards let you control the shape, colour, material, texture, and appearance of the backboard for your sign. You can also allow customers to upload their own image for certain backboard types.
This guide explains how to:
-
Configure the Backboard section
-
Add different backboard types
-
Add backboard colours and materials
-
Allow customers to upload their own backboard images
Accessing the Backboard Settings
-
Go to the Sign Customiser Admin:
-
Universal subscribers: Go to Home in your account.
-
Shopify users: Navigate to Shopify admin → Apps and select Sign Customiser.
-
-
Click on Customisers in the menu.
-
Select the customiser you want to edit.
-
From the left-hand menu, go to Sign Components → Backboards.
Backboard colours and materials are also managed from the same Backboards section.
Step 1: Set Backboard Section Title and Description
You can customise the heading and description displayed above the backboard options in your customiser.
-
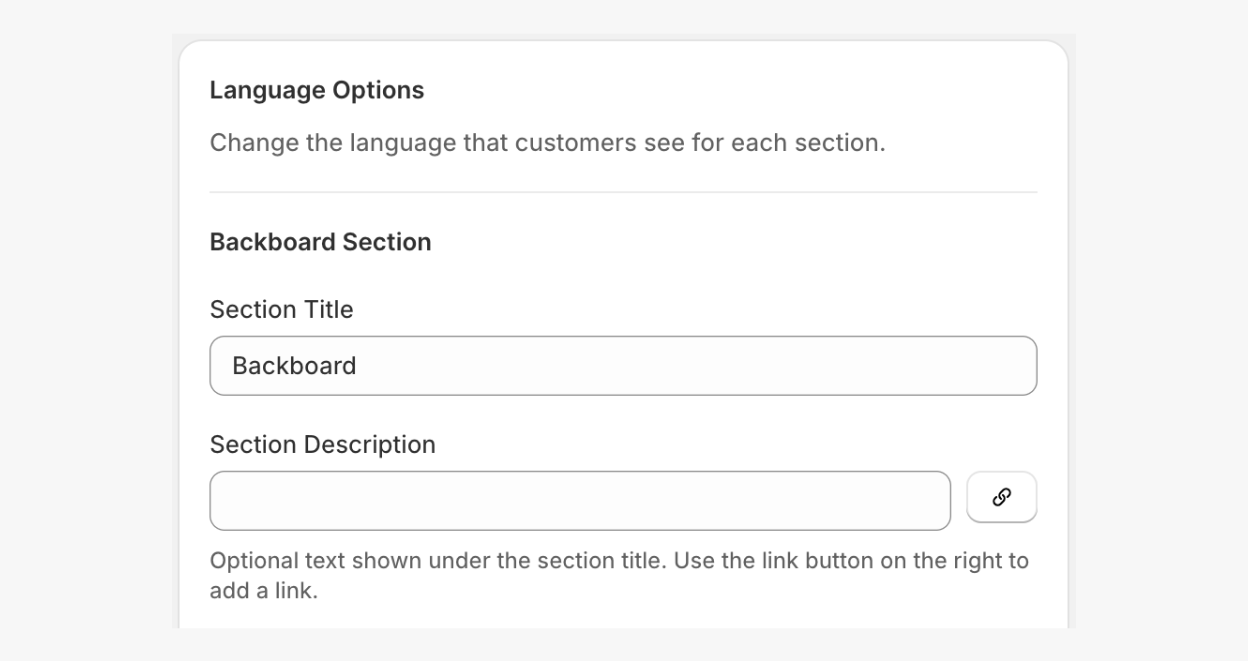
In the Backboards section, scroll to Language Options.
-
Under Backboard Section, enter:
-
Section Title – The title displayed above the Backboard section.
-
Section Description (optional) – A description displayed below the title. You can also add a link to an external page.
-
Step 2: Set the Backboard Colours & Materials Section Title and Description
You can customise the heading and description displayed above the backboard colour and material options.
-
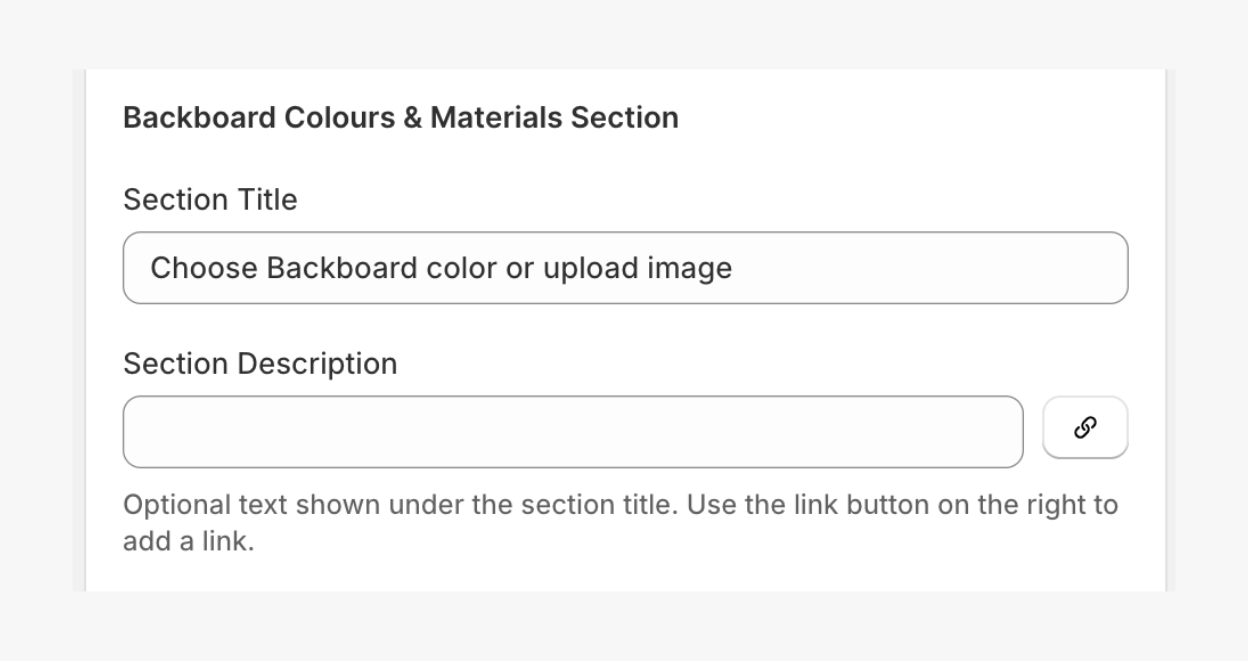
In the Backboards section, scroll to Language Options.
-
Under the Backboard Colours & Materials Section, enter:
-
Section Title – The title displayed above the backboard colour and material options.
-
Section Description (optional) – A description below the title. You can also add a link to an external page.
-
Step 3: Add a Backboard
Backboards are the different types of panels customers can choose for their sign.
-
In the Backboards section, click Add New Backboard.
-
Enter the following:
-
Label – The name of the backboard displayed to customers.
-
Description (optional) – A description of the backboard. You can also add a link to an external page.
-
-
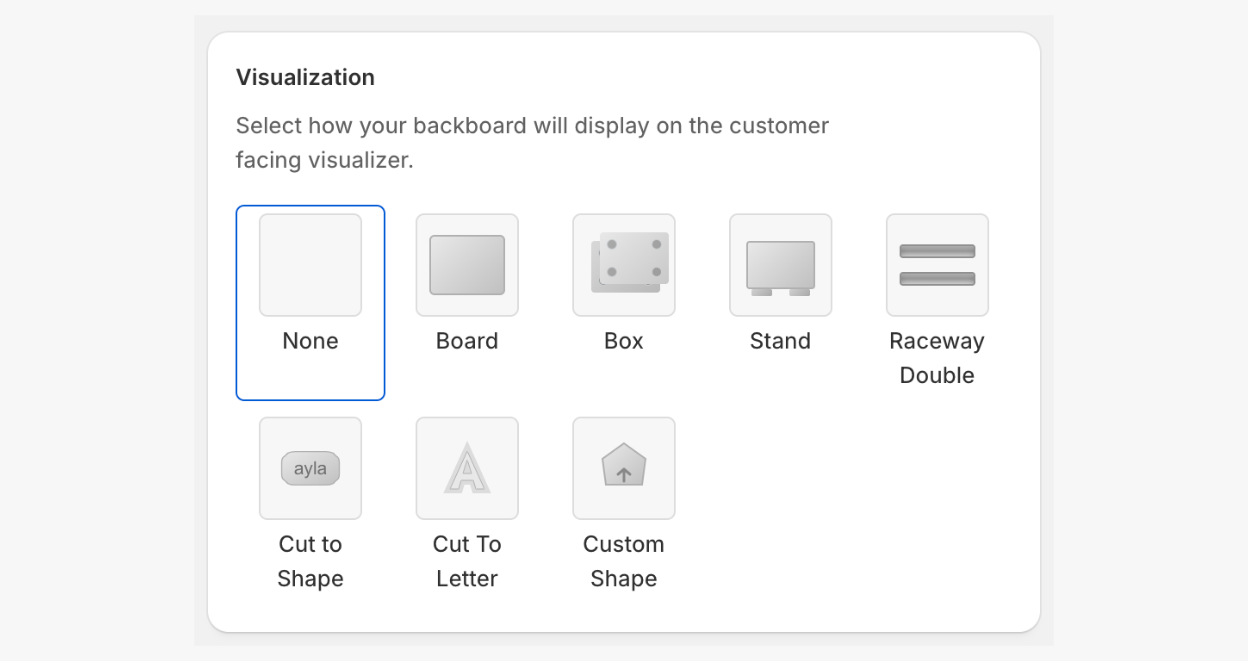
In the Visualisation section, choose the appropriate backboard type.
Available backboard visualisation types:
-
None – No backboard visualisation is shown.
-
Board – A rectangular backboard around the wording.
-
Box – A box-style backboard.
-
Stand – A self-supporting backboard.
-
Raceway Double – A double raceway backboard.
-
Cut to Shape – The backboard follows the shape of the words.
-
Cut To Letter – The backboard follows the shape os the lettering.
-
Custom Shape – Use your own SVG shape or a shape from the Sign Customiser library.
-
-
(Optional) In the Button Image, upload an image. This image will be displayed as a thumbnail on the backboard selection button in the customiser.
-
(Optional) In the Popup Image, upload a real-life example of the backboard.
Customers can view this image when they hover over or interact with the relevant image link.
-
In Additional Pricing, set pricing either to:
-
None – No additional cost is added.
-
Base Price – Adds a fixed amount.
-
Price Multiplier – Multiplies the relevant sign price. For example, to add a charge of 20%, enter 0.2 as the multiplier. You can choose whether the multiplier is applied to:
-
Letter Price only – The multiplier is applied to the letter price only.
-
Final Price – The multiplier is applied after all the other costs have been added.
-
-
Price per square cm – Charges are based on the area of the backboard.
This does not apply to Frame Fit or Cut-out Metal customisers.
-
-
Click Save.
Step 4: Additional Settings for Backboards Depending on Backboard Type
Customer Image Upload Setting
In the Customer Image Upload section, you can allow customers to upload their own image to use on a backboard.
Customer image uploads are available for these backboard types:
-
Board
-
Box
-
Stand
-
Custom Shape
For instructions on setting up customer image uploads, see Customer Designed Backboard Images.
Additional Backboard Display Options Setting
This setting allows you to create letter-shaped signs where the backboard consists of two or more colours or materials.
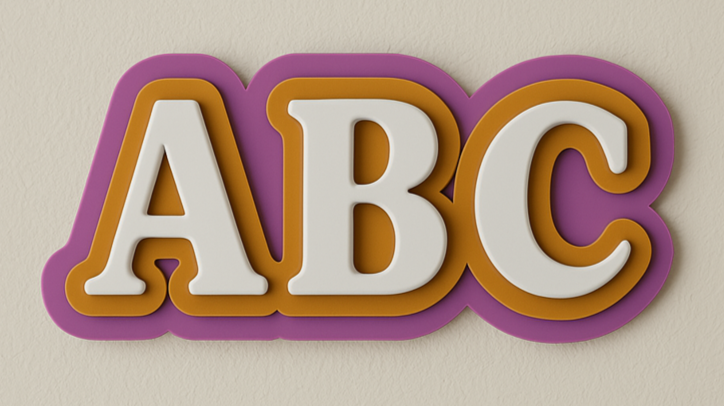
View a working demo here: Multi-Layer Backboard signs.
Multi-layer backboard signs are available for these backboard types:
-
Cut to Shape
-
Cut to Letter
To create a multi-layer backboard:
-
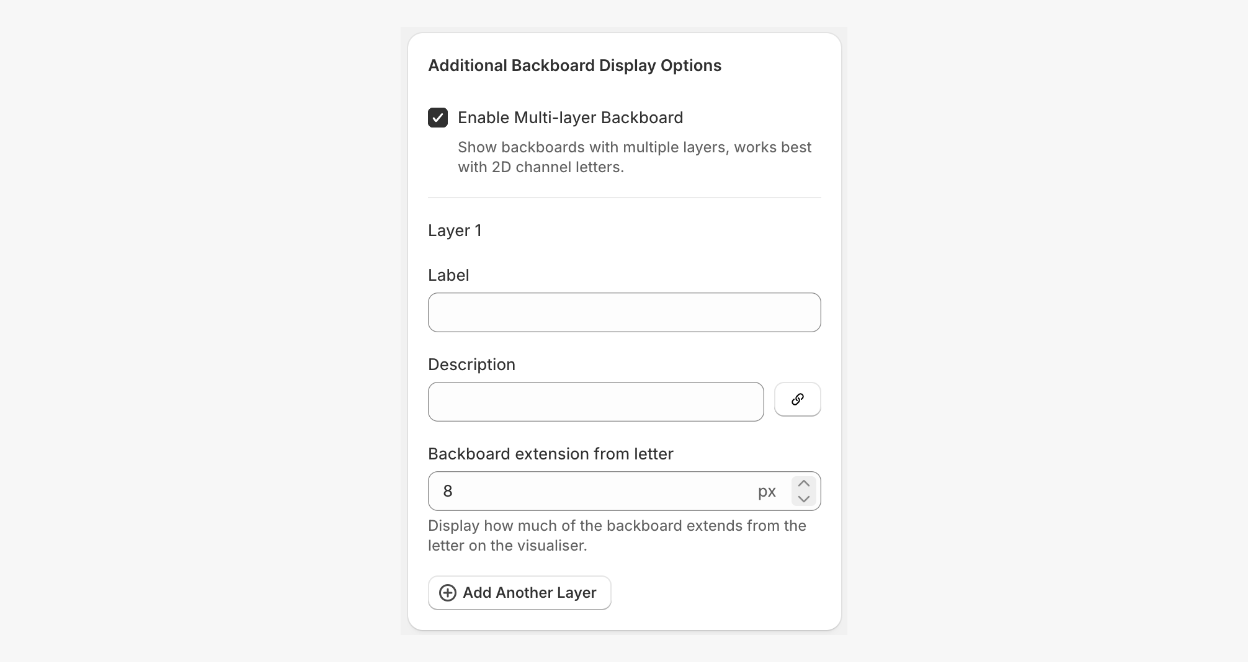
In Additional Backboard Display Options, enable Enable Multi-layer Backboard.
-
In Layer 1, enter:
-
Label – The name of the layer displayed to customers.
-
Description (optional) – A description of the layer. You can also add a link to an external page.
-
Backboard extension from letter – Controls how far the backboard extends from the lettering in the visualiser.
-
-
Click on Add Another Layer to add another layer. This layer represents the backboard under the previous layer. Fill in the same fields.
-
Click Save.
Note: For each layer, the Backboard extension from letter value should be greater than the value for the previous option.
Custom Shapes
The Custom Shape option allows you to upload your own SVG file and use it as a backboard design. This feature supports almost any type of shape, giving you the flexibility to create unique sign backboards.
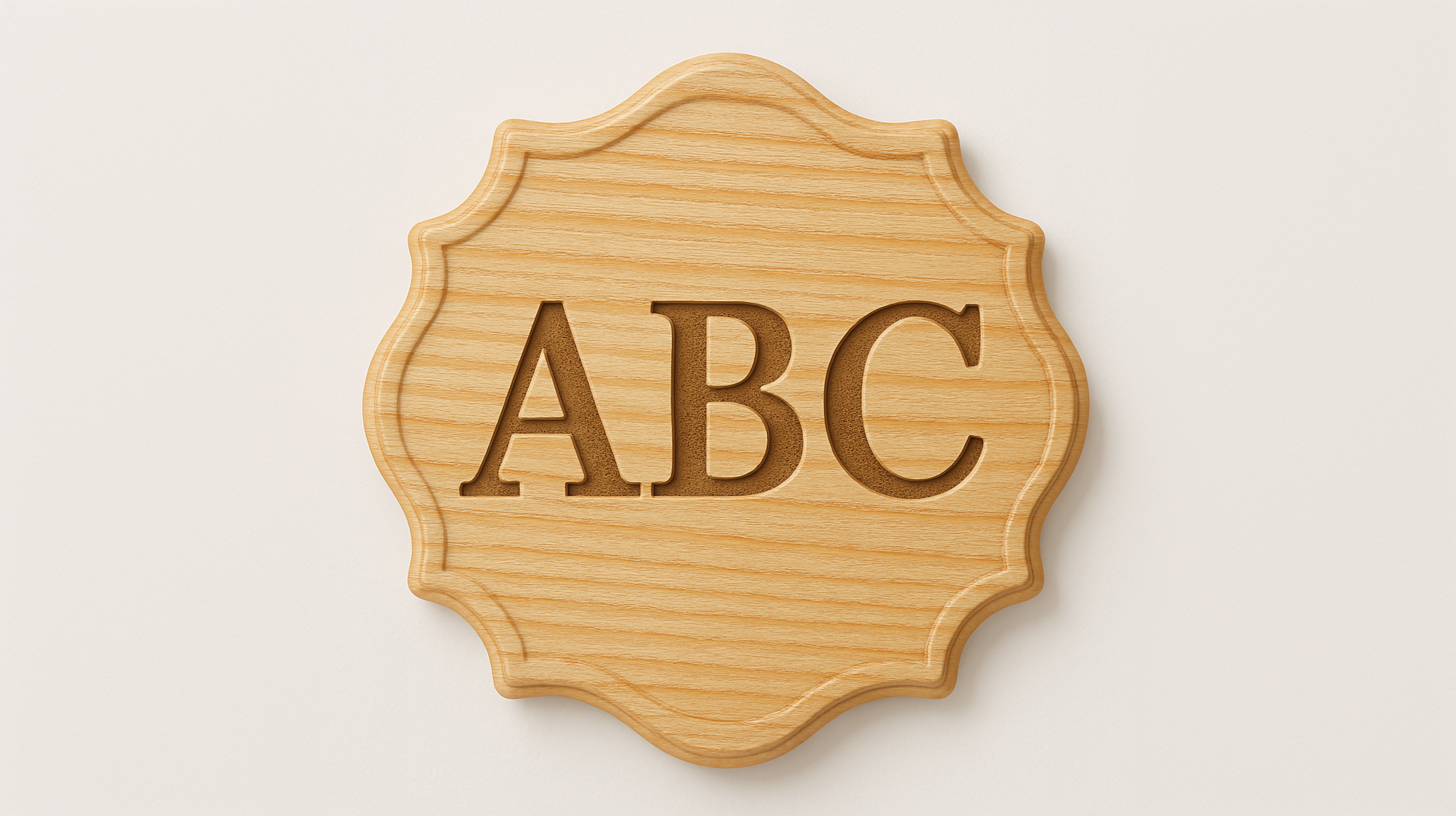
View a working demo here: Wood Signs
Custom Shape is available for only these backboard types:
- Custom Shape
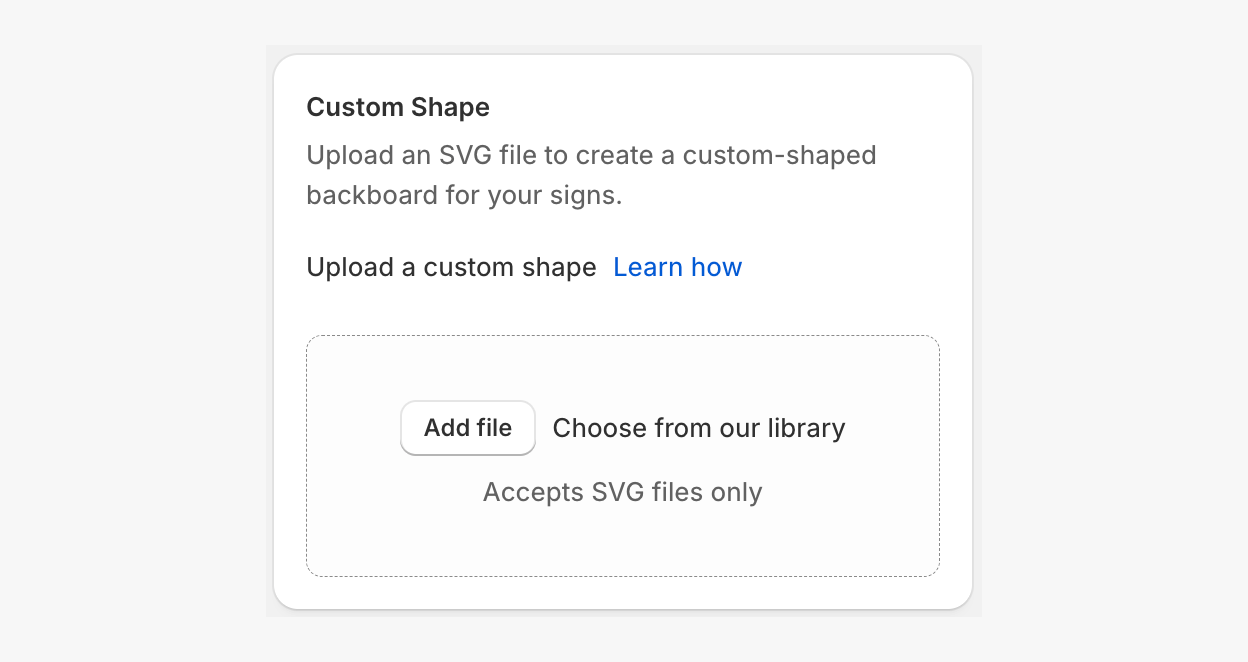
To configure custom shape:
-
In Custom Shape, upload your SVG file or choose a shape from our library.
-
Adjust the padding in the preview to ensure the sign contents fit the shape.
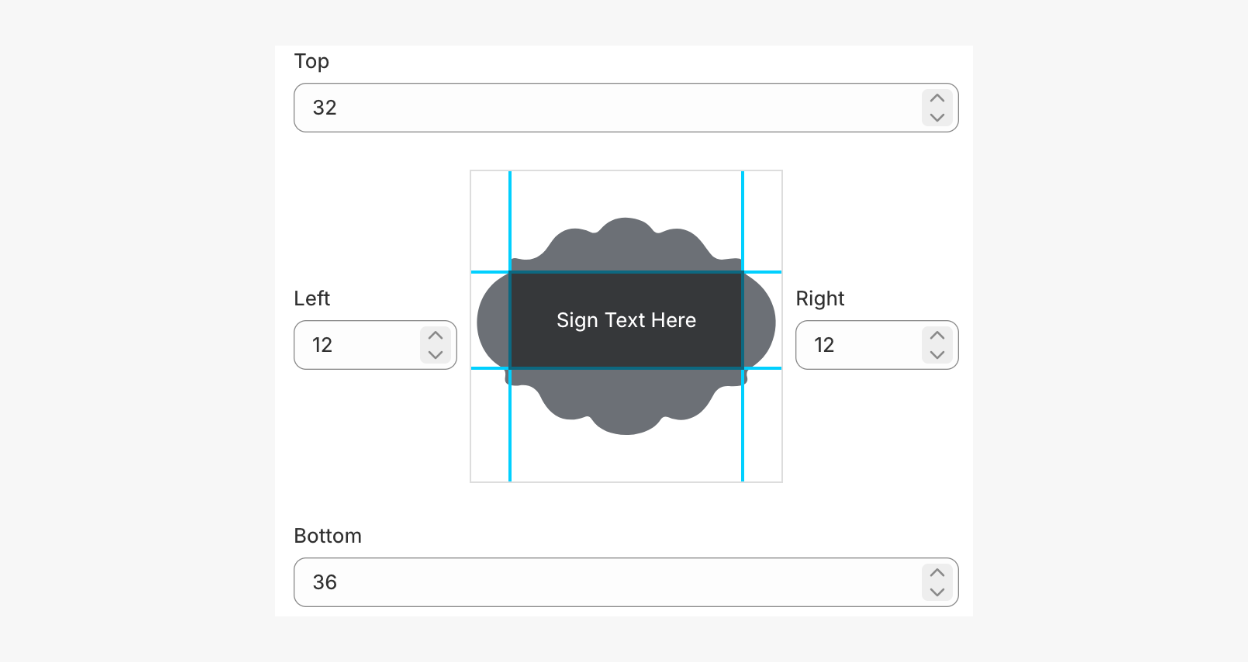
-
Click Save.
Why does my backboard shape look different?
To ensure compatibility with our app, your SVG must:
Use fill attributes
Consist of solid-filled shapes.
For more information, see Why Are “Fill” Attributes Important for Your SVG Files?.
Step 5: Add Backboard Colours & Materials
You can create different colours and materials for your backboards, including:
-
Acrylic
-
Wood
-
Metal
-
Coloured panels
-
Textured materials
-
Other custom finishes
You can use a solid colour or add an image as a texture to give the backboard a more realistic appearance. This material can also be assigned to multiple backboards.
Note: You must create your backboards first before you can assign colours or materials to them.
To add a colour or texture:
-
While still in Backboards, scroll to the Backboard Colours & Materials section.
-
Click on Add New Backboard Colour.
-
Enter:
- Label – Name of the backboard displayed to customers.
-
Under Material, select either:
-
Colour – Use the colour picker to choose the colour. You can choose to display it as a solid colour or with transparency
-
Texture – Upload an image representing the backboard material or choose from our library.
For the best results, use a 1024x1024 pixel image for textures.
-
-
Check or uncheck the Apply texture to backboard visualisation? option:
-
Checked – The colour or texture is displayed on the backboard visualisation.
-
Unchecked – The colour or texture is only displayed on the option button.
-
-
In the Assign to a backboard section, select the backboards where the colour or texture should be available.
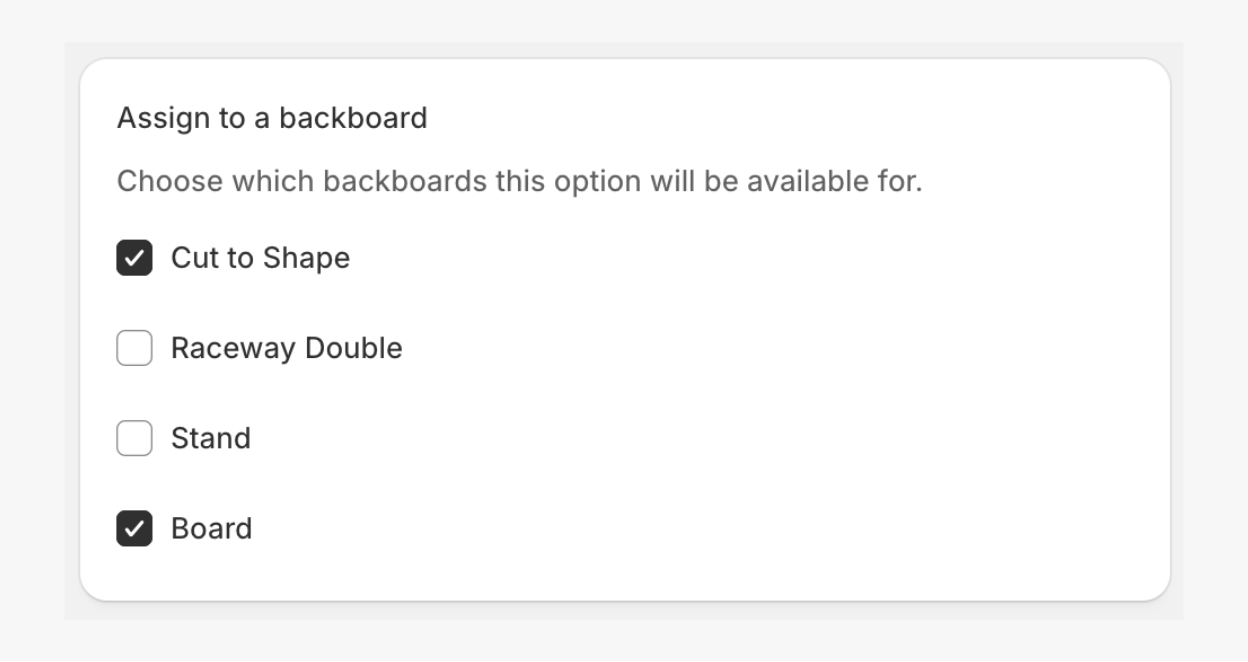
Can’t see any backboards?
This probably means no backboards were created.
Follow Step 3: Add Backboard and create one. -
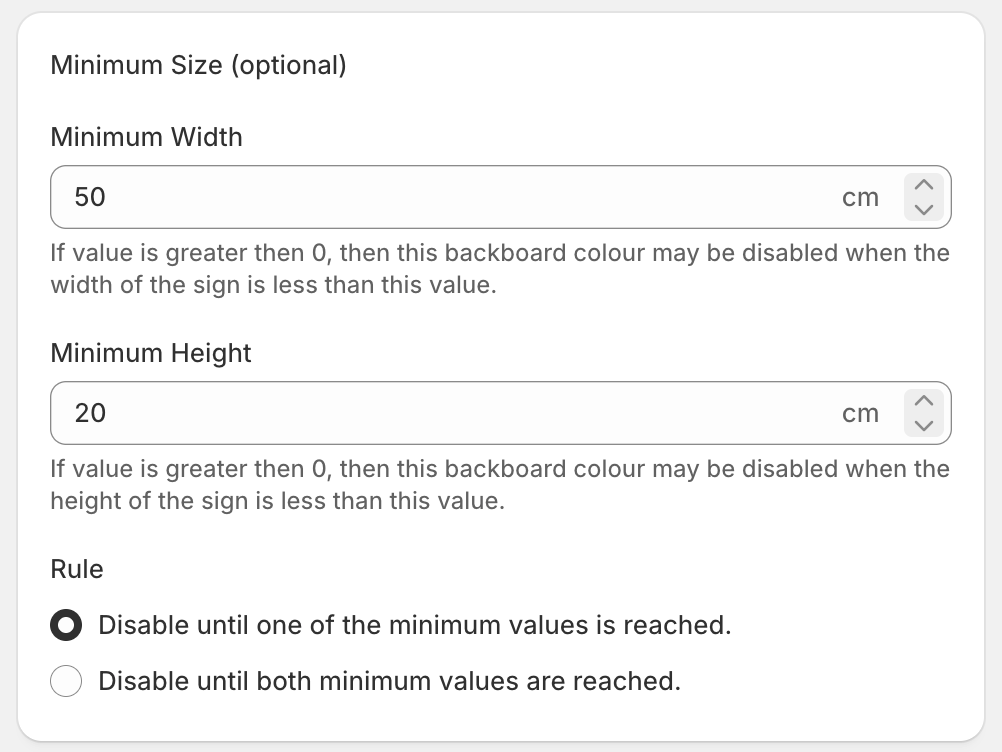
(Optional) In the Minimum Size section, you can disable backboard materials for smaller sizes. To restrict, enter:
-
Minimum Width – Backboard material is disabled when the sign width is below this value.
-
Minimum Height – Backboard material is disabled when the sign height is below this value.
-
-
Under Rule, choose how the Minimum Width and Minimum Height are applied:
-
Disable until one of the minimum values is reached – The material becomes available when either the minimum width or minimum height is reached.
-
Disable until both minimum values are reached – The material becomes available only when both the minimum width and minimum height are reached.
-
-
(Optional) In the Preview Image, upload an image. This will be shown as a thumbnail on the selection button in the customiser.
-
(Optional) In the Example Image, upload a real-life example of the backboard.
Customers can view this image when they hover over or interact with the relevant image link.
-
In Additional Pricing, set pricing either to:
-
None – No additional cost is added.
-
Base Price – Adds a fixed amount.
-
Price Multiplier – Multiplies the relevant sign price. For example, to add a charge of 20%, enter 0.2 as the multiplier. You can choose whether the multiplier is applied to:
-
Letter Price only – The multiplier is applied to the letter price only, or
-
Final Price – The multiplier is applied after all the other costs have been added.
-
-
-
Click Save.
Design Layout Options for Backboard and Materials
Backboard colours and textures can be displayed either alongside their respective backboard options or in a separate section below the backboard section.
To access the settings, go:
-
Click on your customiser.
-
From the left-hand menu, go to Settings → General Settings.
-
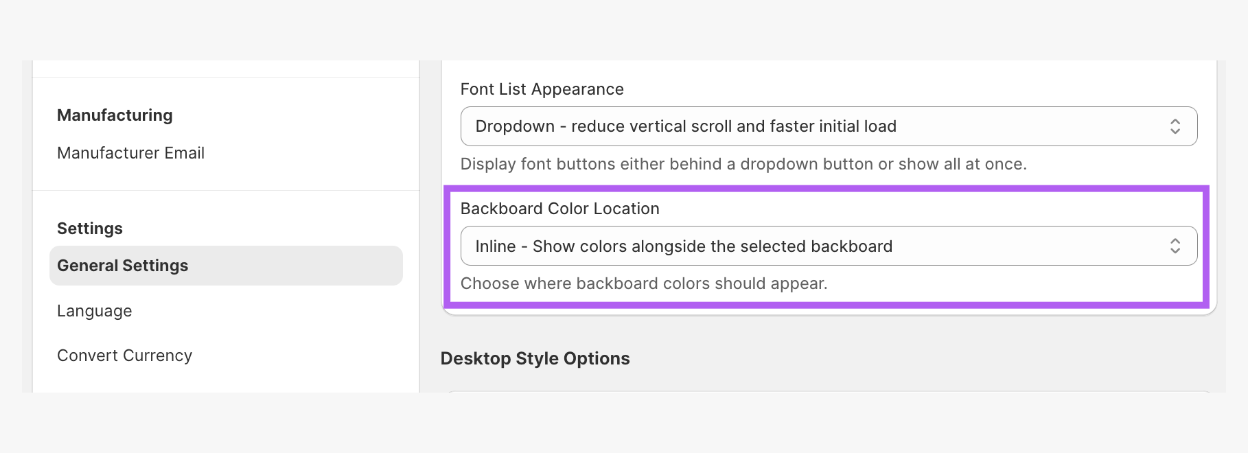
In the General Style Settings section, scroll down to Backboard Colour Location.
-
Choose either of these options to suit how you want customers to select their backboard and material options:
-
Inline - Show colours alongside the selected backboard – Displays the available colours and textures within their respective backboard options.
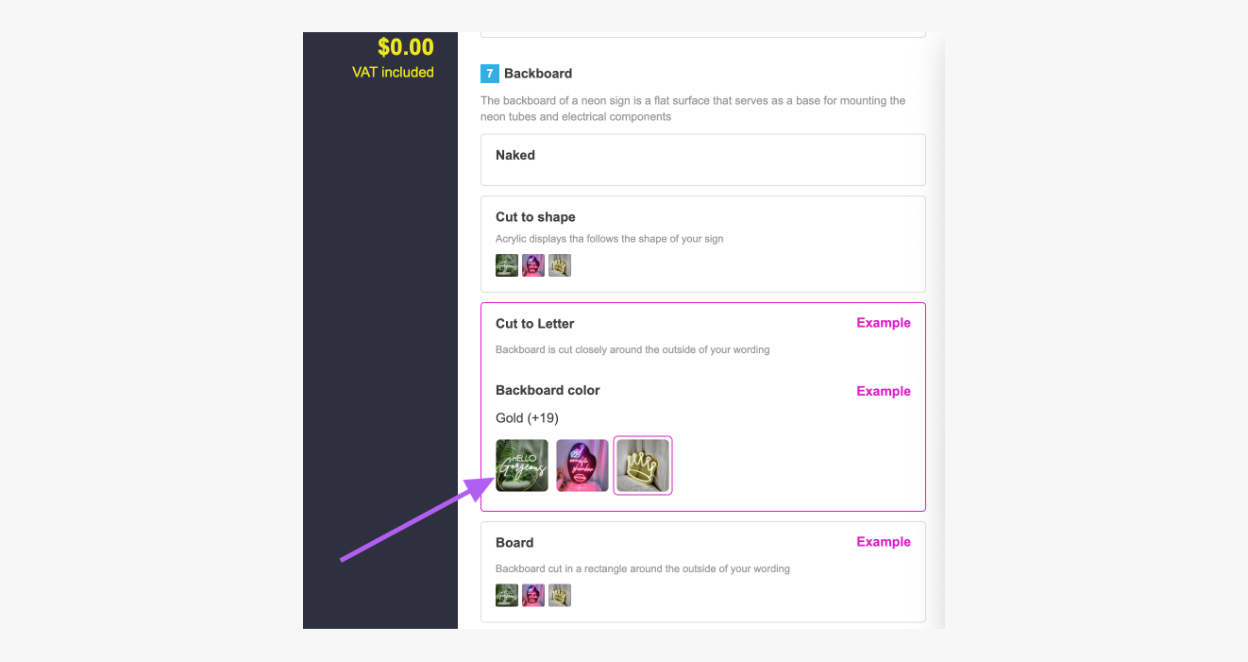
-
Detached - Displays underneath other selections – Displays the backboard colours and textures below the Backboard section as a section of its own. Note: The available colour and material options change according to which backboards are selected.
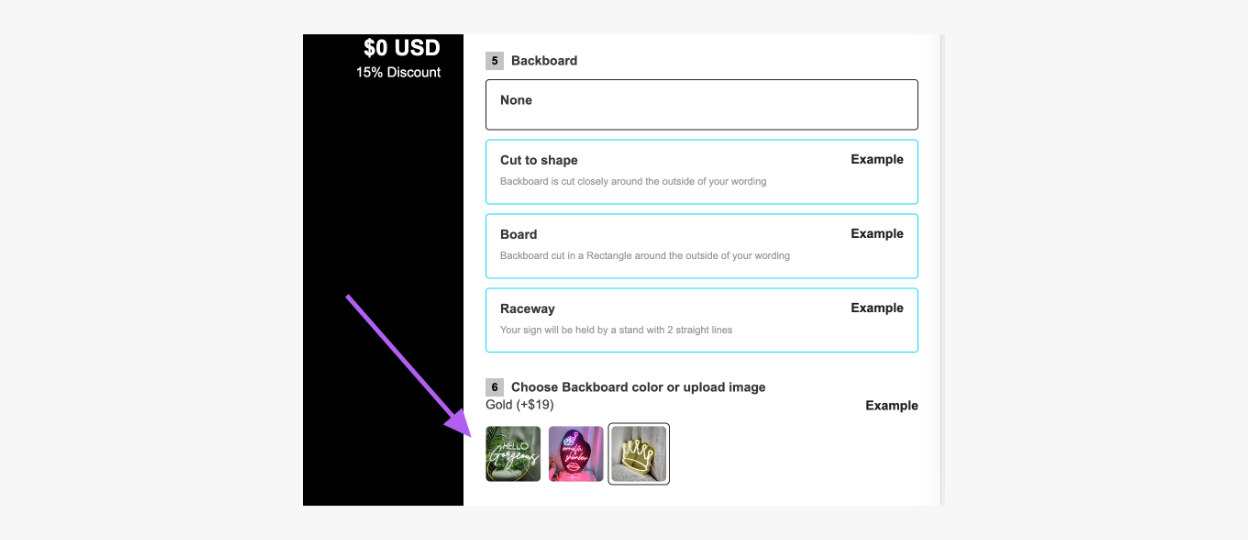
-