
Set up metal cut-out signs
Create a Metal Cut-Out Signs customiser, edit its panels, colours, mountings and backlights, and see what customers and manufacturers receive.
Last updated:
A metal cut-out sign is a metal panel with the customer’s text or artwork cut out of it.
This article shows you how to create a Metal Cut-Out Signs customiser and prepare it for customers. It is for merchants who sell metal cut-out signs.
Before you start
-
Metal cut-out signs use Frame Fit pricing only. The price depends on the size of the sign. The create flow does not ask you to choose a pricing model.
-
The starter panel colours, mountings and extras have a price of zero. The starter panels have no price set. Set your own prices before you go live.
-
Building and previewing is free. Your customiser does not show on your own website until your Store has an active subscription, or a trial with a payment method on file.
Step 1: Create the customiser
-
Open the Sign Customiser admin.
-
If your Store has no customisers yet, click Create your first customiser on the welcome screen, then answer the measurement and contact email questions. Otherwise, click Create new customiser.
-
On Choose the sign type, select Metal Cut-Out Signs.
-
Click Next.
-
On Review your customiser, keep Include demo data selected. It is selected by default.
-
If Set up AI Sign Designer shows, it is selected by default. Keep it selected to include AI Sign Designer demo data and keep the text editor enabled. Clear it to leave that demo data out.
-
Click Create.
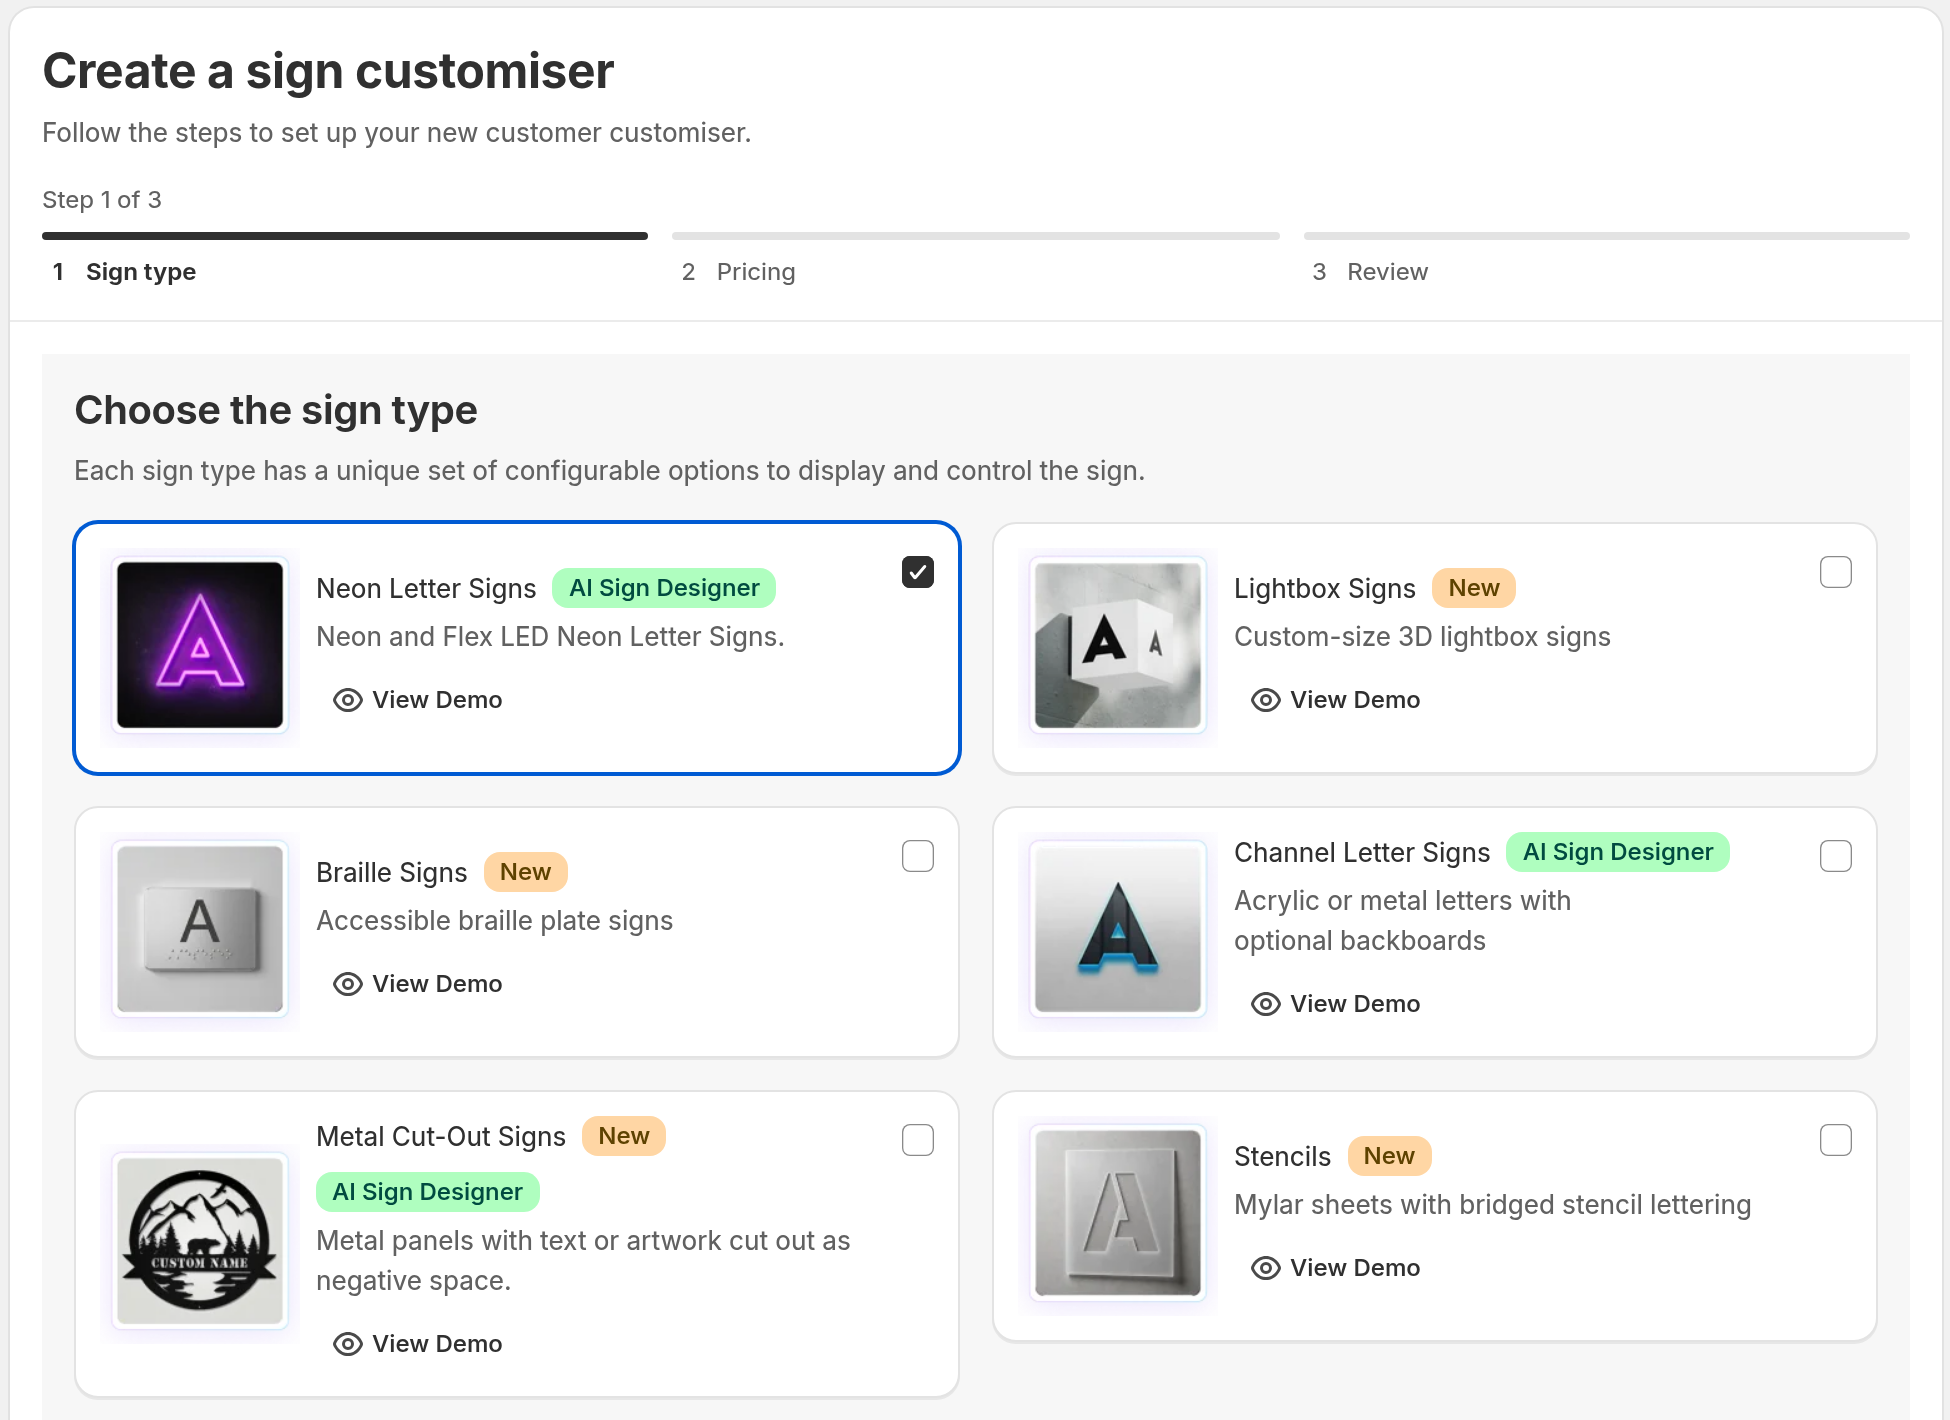
Sign Customiser names the new customiser “Metal Cut-Out Sign Customiser”. To change the name, open Settings → Admin in the customiser menu. Edit Name of sign customiser.
What the starter data includes
The starter data lets you preview the customiser immediately. It contains these items:
-
Six panel shapes: Rectangle, Rounded rectangle, Circle, Oval, Classic plaque and Banner.
-
Four panel colours: Raw steel, Black powder coat, Brushed aluminium and Bronze. Every panel offers all four colours.
-
Two mountings: Wall standoffs and Hanging holes.
-
One Additional Input Option: Outdoor clear coat. It is a Yes or No choice. The default is No.
-
Backlight colours: The sign loads with no backlight. The customer can choose a colour.
-
Four preset sizes and a custom size option.
-
One Frame Fit pricing formula: It is named Flat parcel pricing.
Replace this data with your own panels, finishes and prices before you go live.
Step 2: Set your prices
-
In the Customisers list, click the name of your new customiser.
-
Under Core Setup, click Pricing.
-
Check the starter pricing formula. Change the values to match your costs.
-
Under Core Setup, click Sizes.
-
Check the preset sizes and the size limits.
Frame Fit prices the sign by its width and height (area). To learn how the formula works, read Pricing - Frame Fit model and Sizing - Frame Fit Model.
You can also add a price to each panel, panel colour, mounting and extra. Each form has an optional pricing section. In the panel, panel colour and mounting forms it is Additional Pricing (optional). In the Additional Input Options form it is Pricing (optional).
Step 3: Edit panels and panel colours
Panels and panel colours are on one page.
To add or change a panel:
-
Under Sign Components, click Panels.
-
In the Panels table, click Add Panel. To change a panel, click it instead.
-
Enter a Label. Add a Description if you want one.
-
Under Panel Visualisation, select Cut-out Panel.
-
Under Panel Shape, click Add file and upload an SVG file. Or click Choose from our library. The SVG path defines the panel outline.
-
Set the Top, Right, Bottom and Left padding. Padding keeps the text away from the panel edge.
-
Click Save.
-
A window asks if you want to add your existing panel colours to the new panel. Click Yes, add all colours or No, just create the panel.
To add a finish, use the Panel Colours table on the same page:
-
Click Add Panel Colour.
-
Enter a Label.
-
For Material Type, choose Colour or Texture.
-
Pick a colour, or upload a texture image.
-
Under Assign to a panel, select each panel that offers this finish.
-
Click Save.
Language Options is below the tables on the same page. Use it to change the section titles that customers see.
Step 4: Edit mountings and extras
-
To add, change or price a mounting, click Mountings under Sign Components. For more help, read Mountings.
-
To add or change an extra choice, click Additional Input Options under Sign Components. The Outdoor clear coat is one example.
Step 5: Set up backlights (optional)
Only metal cut-out customisers have backlights.
-
Under Sign Components, click Backlights.
-
Add the colours you want to offer.
-
To add a None choice before the colours, turn on Allow no backlight.
-
To load the sign with no light, turn on Default to none.
-
To change the word “None”, enter your own word in Label for no backlight.
If the customiser has no backlight colours, customers do not see a backlight step. For more about backlights, read the Sign Components overview.
Let customers upload artwork
Metal cut-out customisers support the AI Sign Designer. The customer uploads a file (JPG, PNG, WebP, SVG or PDF). The AI Sign Designer makes artwork from it. Sign Customiser cuts this artwork out of the chosen panel.
The AI Sign Designer supports Frame Fit pricing. Metal cut-out customisers always use Frame Fit pricing.
To turn it on for an existing customiser, read How to Enable AI Sign Designer. For credits, file formats and limits, read the AI Sign Designer Guide.
What the customer sees
Customers move through these steps in order. To change the order, use Sort Option Order in the customiser menu.
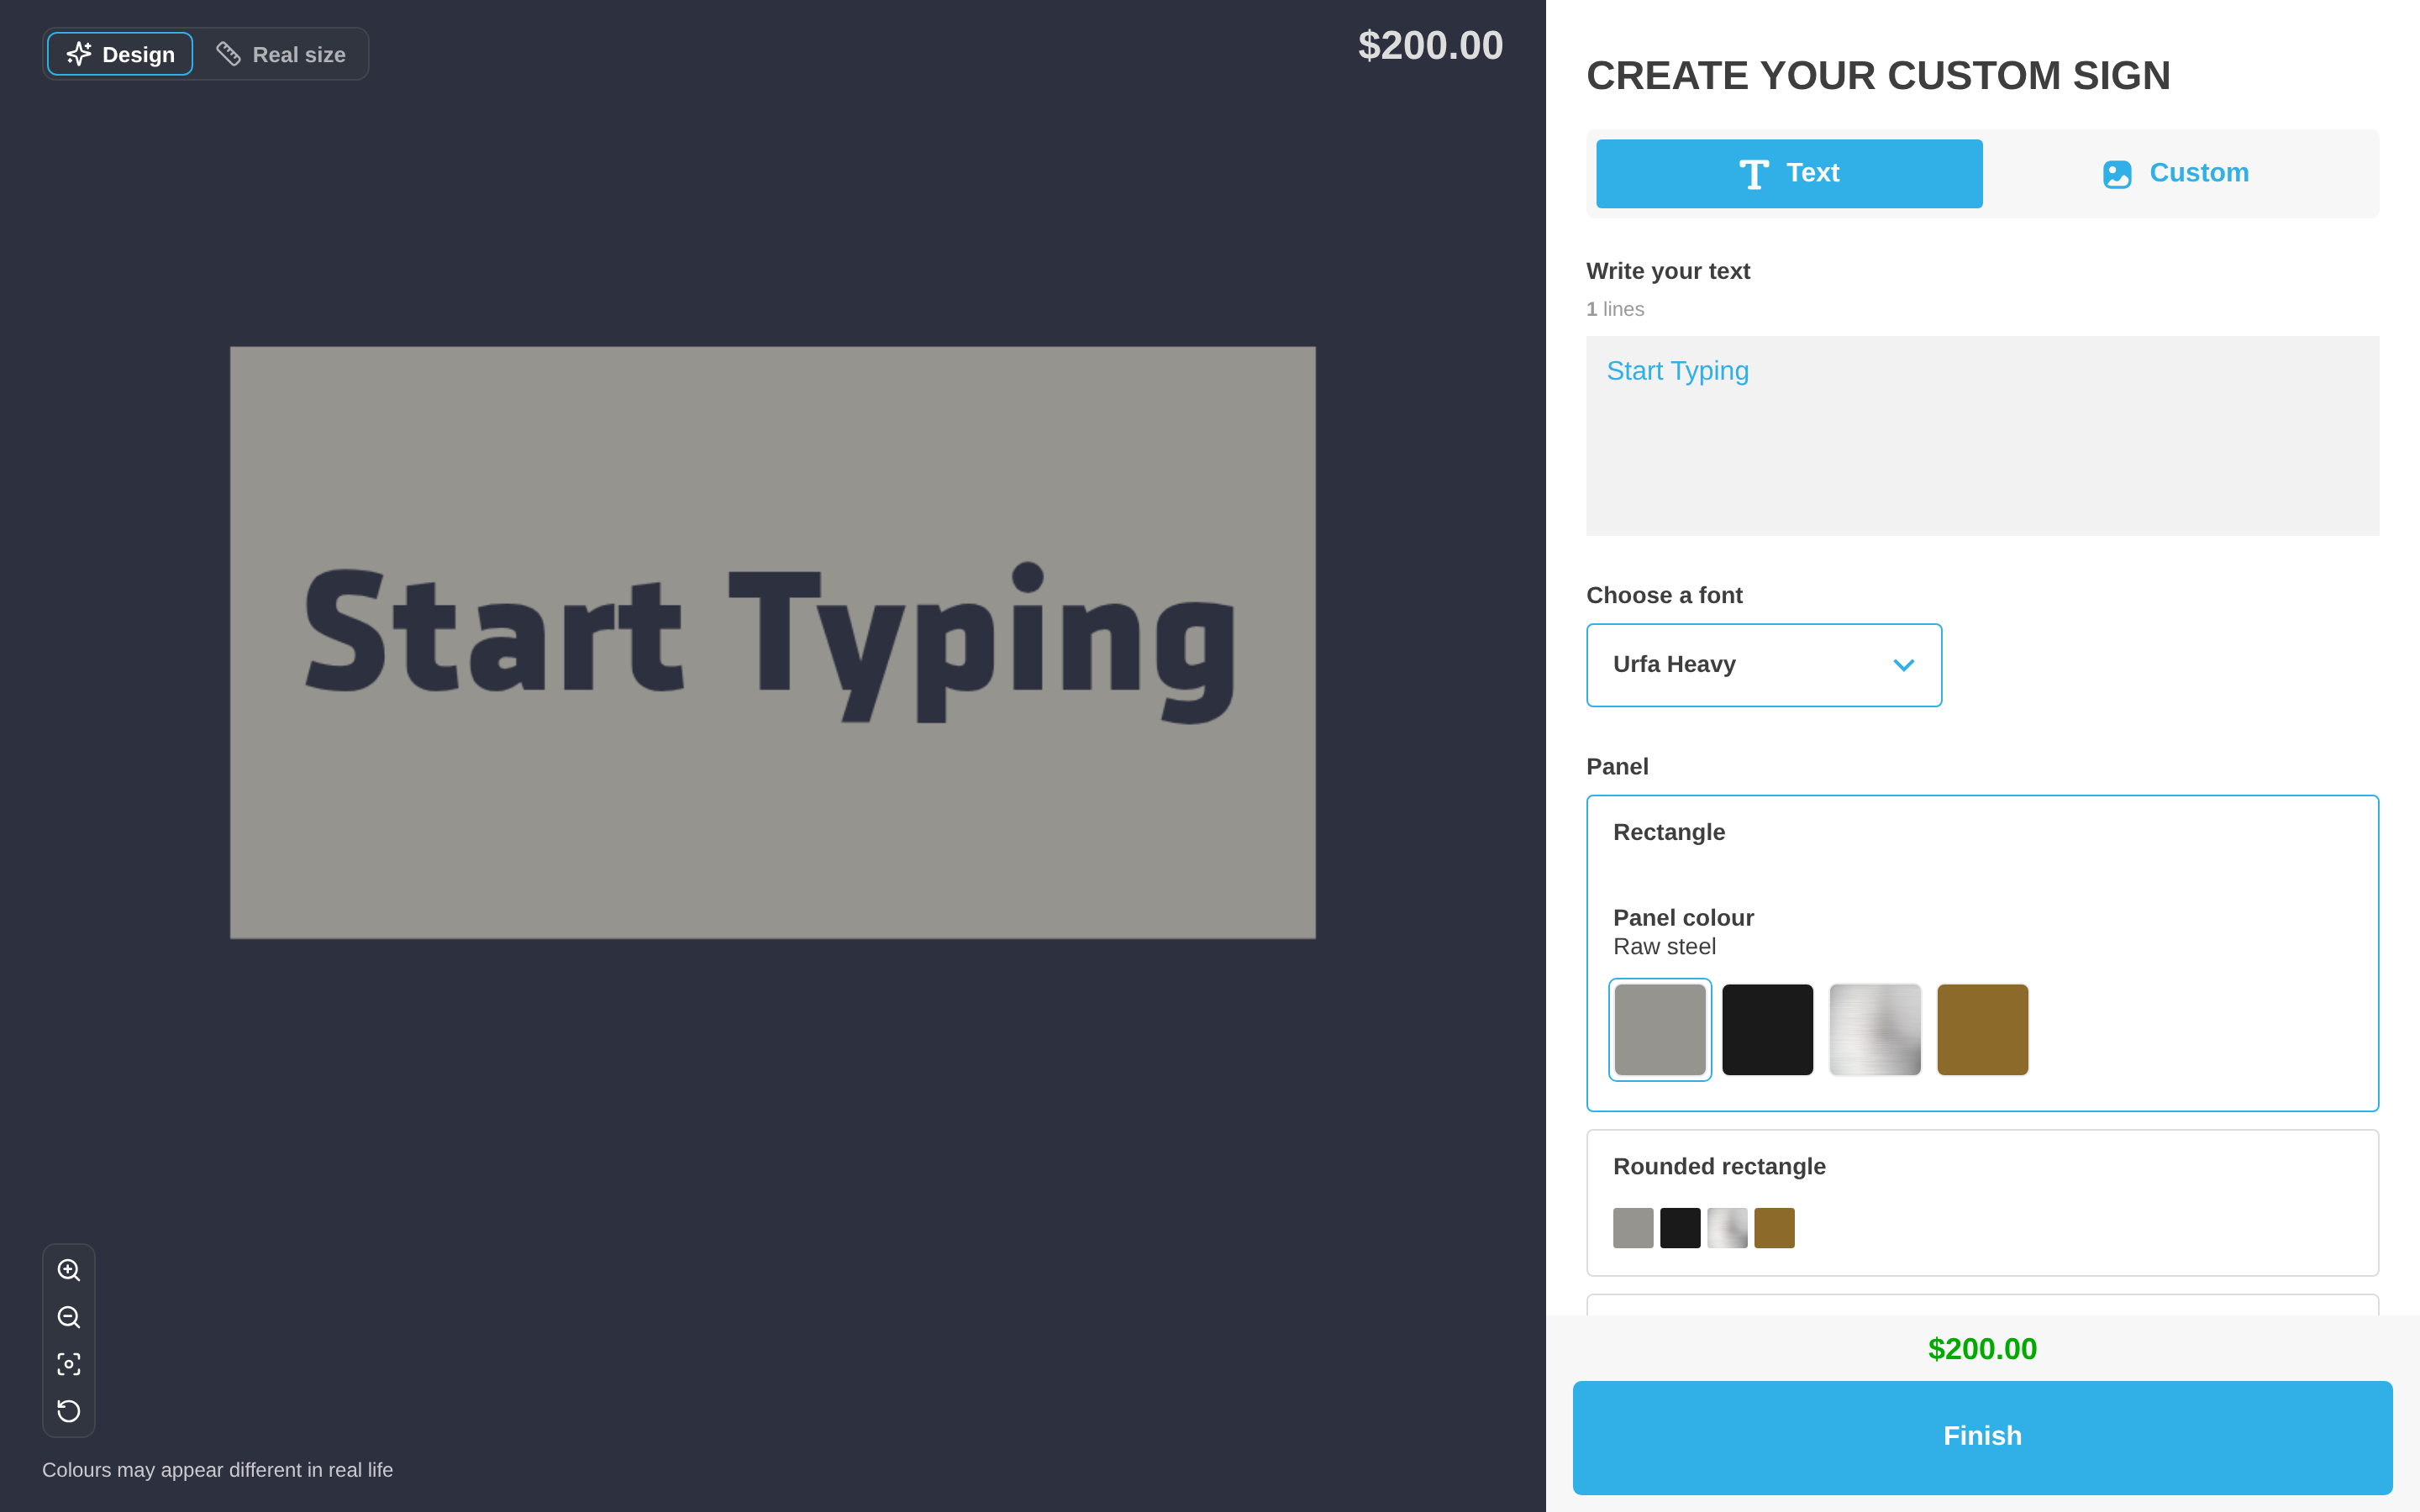
If the AI Sign Designer is on, the customer chooses Text or Custom with a switch at the top of the sidebar:
-
Text shows Write your text and Choose a font.
-
Custom shows Upload your logo first and hides those two steps. The other steps show after the customer uploads artwork.
Both paths then show the remaining steps in this order:
-
Panel. The customer picks a shape. With the starter settings, the panel colours show inside each panel card.
-
Backlight. This step shows only if you added backlight colours.
-
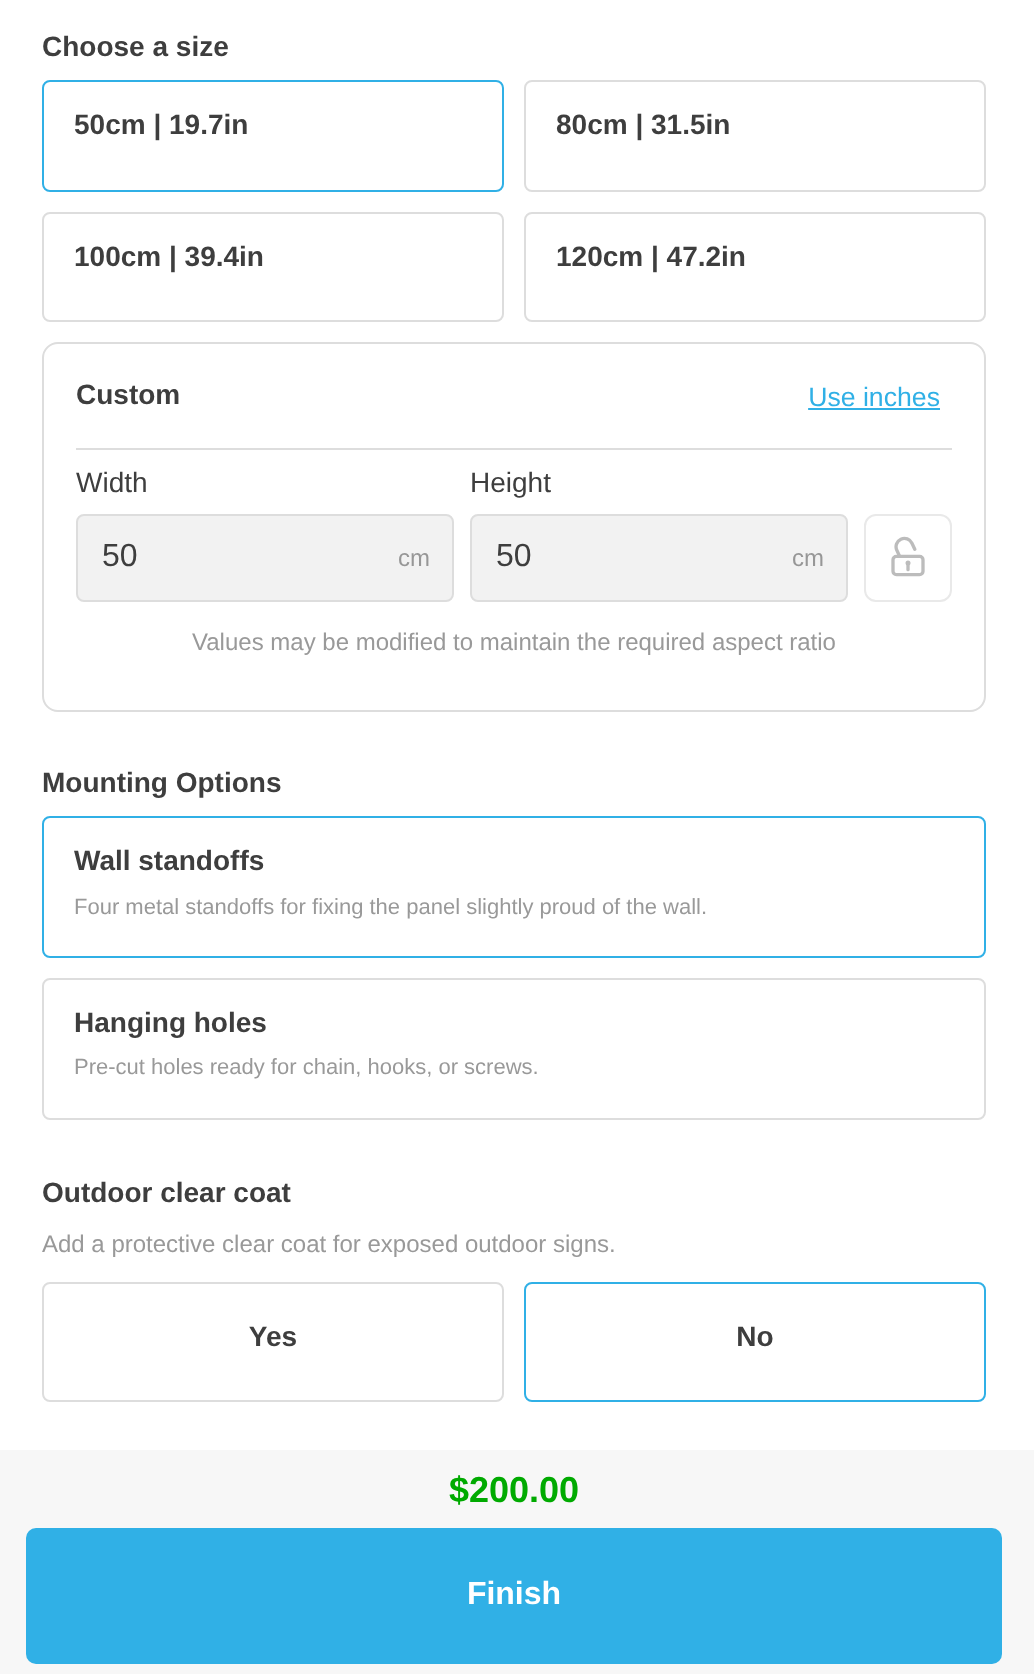
Choose a size. The customer picks a preset size or enters a custom size.
-
Mounting Options.
-
Extras. The customer answers your Additional Input Options.
To show the panel colours as a separate step, open General Settings and set Backboard Colour Location to Detached - Displays underneath other selections. A separate panel colour step then shows after Panel.
The preview shows the design as empty space cut out of the panel. The price box shows the total.
What you receive in an order
The subject of the manufacturer email starts with “New Metal Cut-Out Sign Order”. The email uses the names Panel and Panel Material for the customer’s choices.
For production files, read SVG, EPS and .AI files for manufacturing workflows.
Limits
-
Metal cut-out signs use Frame Fit pricing only. Simple Letter and Advanced Letter pricing are not available.
-
Panel shapes must be SVG files.
-
The AI Sign Designer uses AI credits.
-
Backlights are not available on other sign types.