

How to Enable AI Sign Designer
Enable AI Sign Designer on an existing customiser, configure its fallback form and pricing, then test the customer experience.
Last updated:
Enable AI Sign Designer on an existing customiser. Customers can then upload artwork and change it into a sign. They can configure and buy the sign.
Before you start
Make sure that:
-
Your customiser uses a supported sign type: Neon, Channel Letter (acrylic or metal), or Metal Cut-Out.
-
It uses a supported pricing model. Neon and Channel Letter customisers can use Frame Fit or Advanced Letter (Material Length) pricing. Metal Cut-Out customisers use Frame Fit pricing. Simple Letter (Fixed Width) pricing is not supported.
-
You have a Custom Design form with a File Upload field and a required Email field. If you do not, Step 3 and Step 4 show what to do.
-
Your Store has at least one AI credit before you test the customer experience. Each successful conversion uses one credit.
For more information about compatible customisers, credits, file formats, and generated files, read the AI Sign Designer Guide.
Step 1: Open the customiser
-
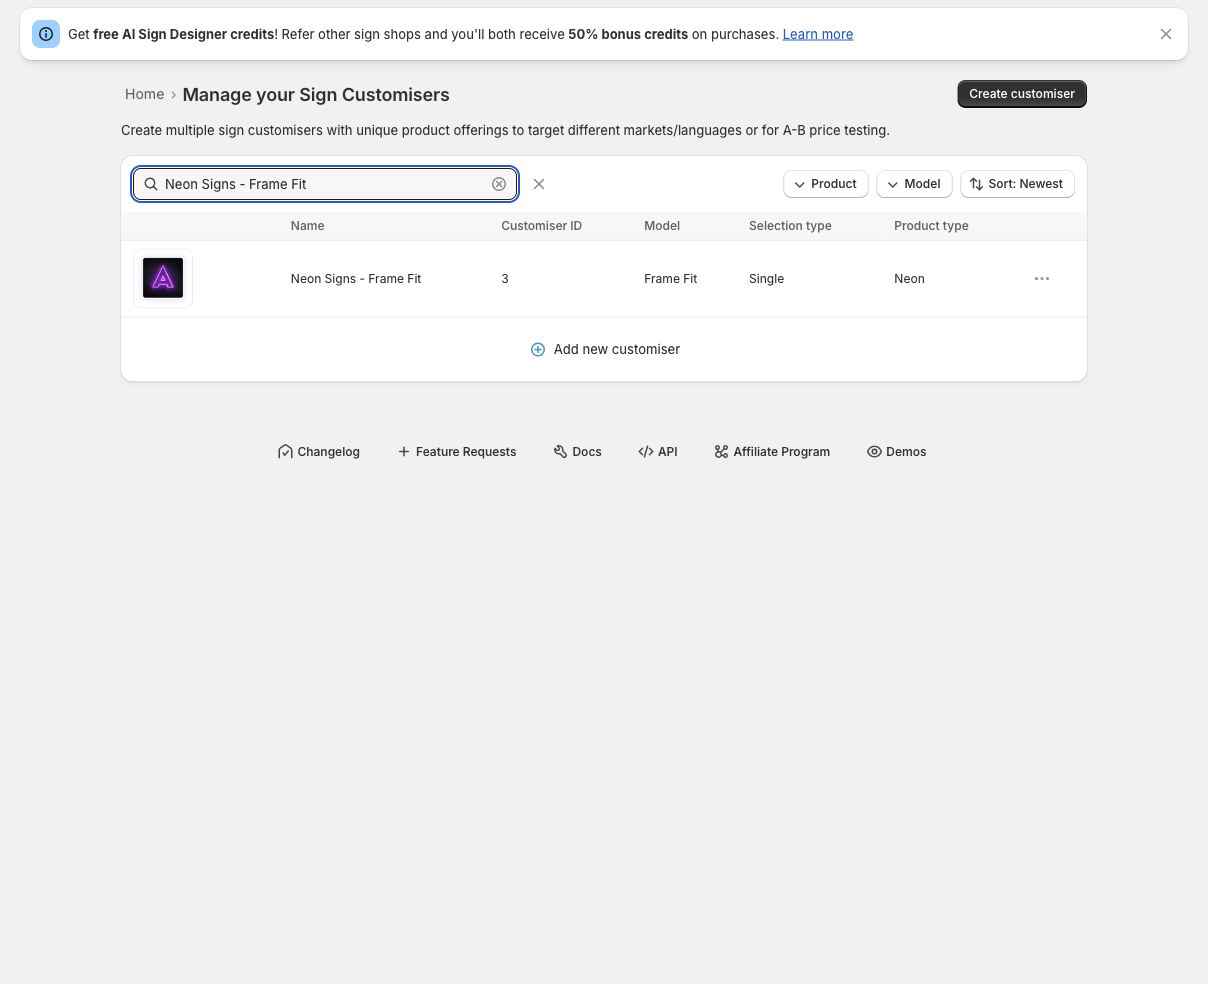
Open the Sign Customiser admin.
-
Select Customisers.
-
Find the customiser you want to change.
-
Select its name.
Step 2: Open Custom Designs
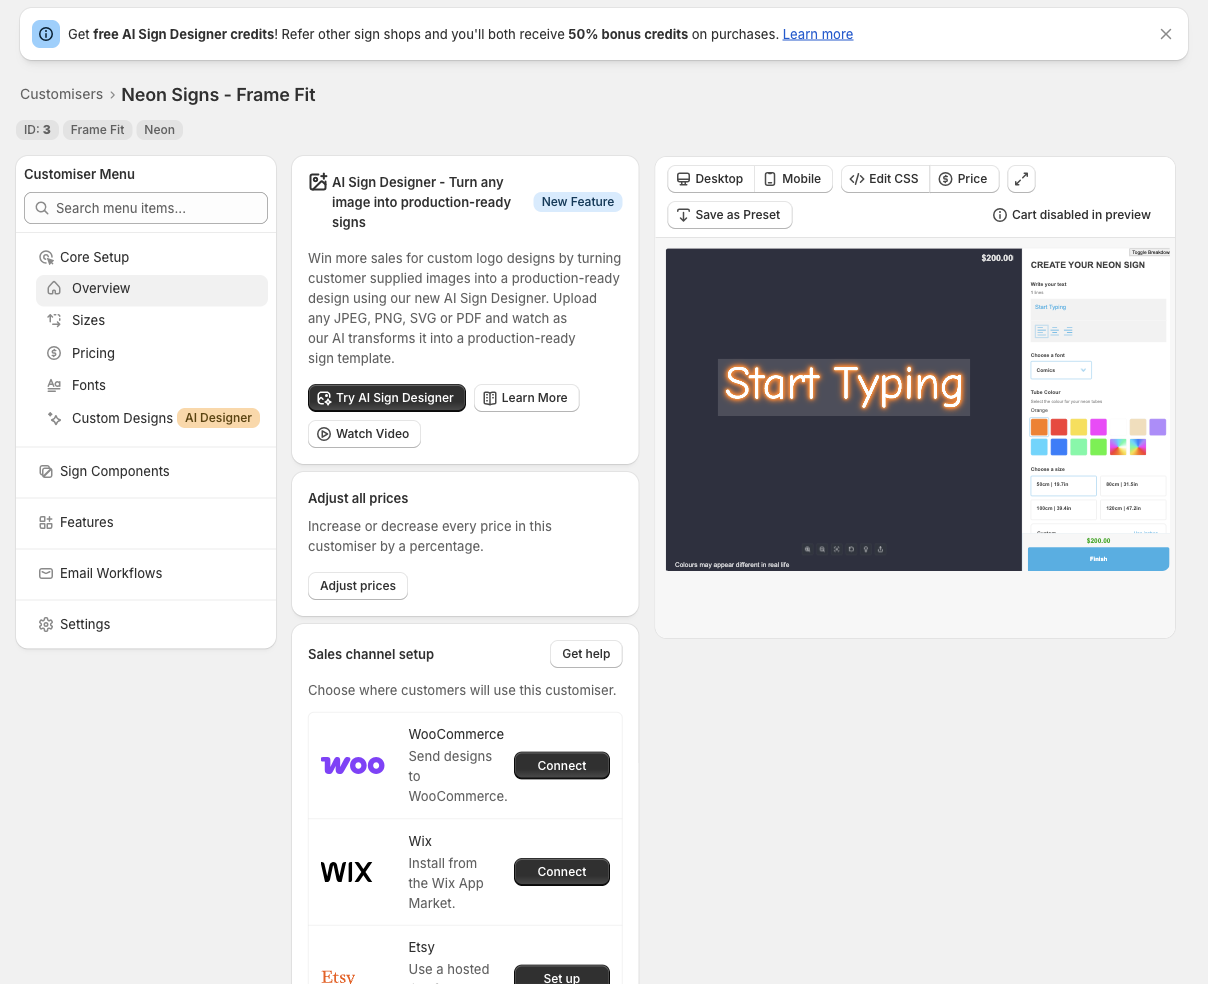
Under Core Setup, select Custom Designs.
You can also select Try AI Sign Designer on the customiser overview.
Step 3: Enable AI Sign Designer
Select the Enable AI Sign Designer checkbox.
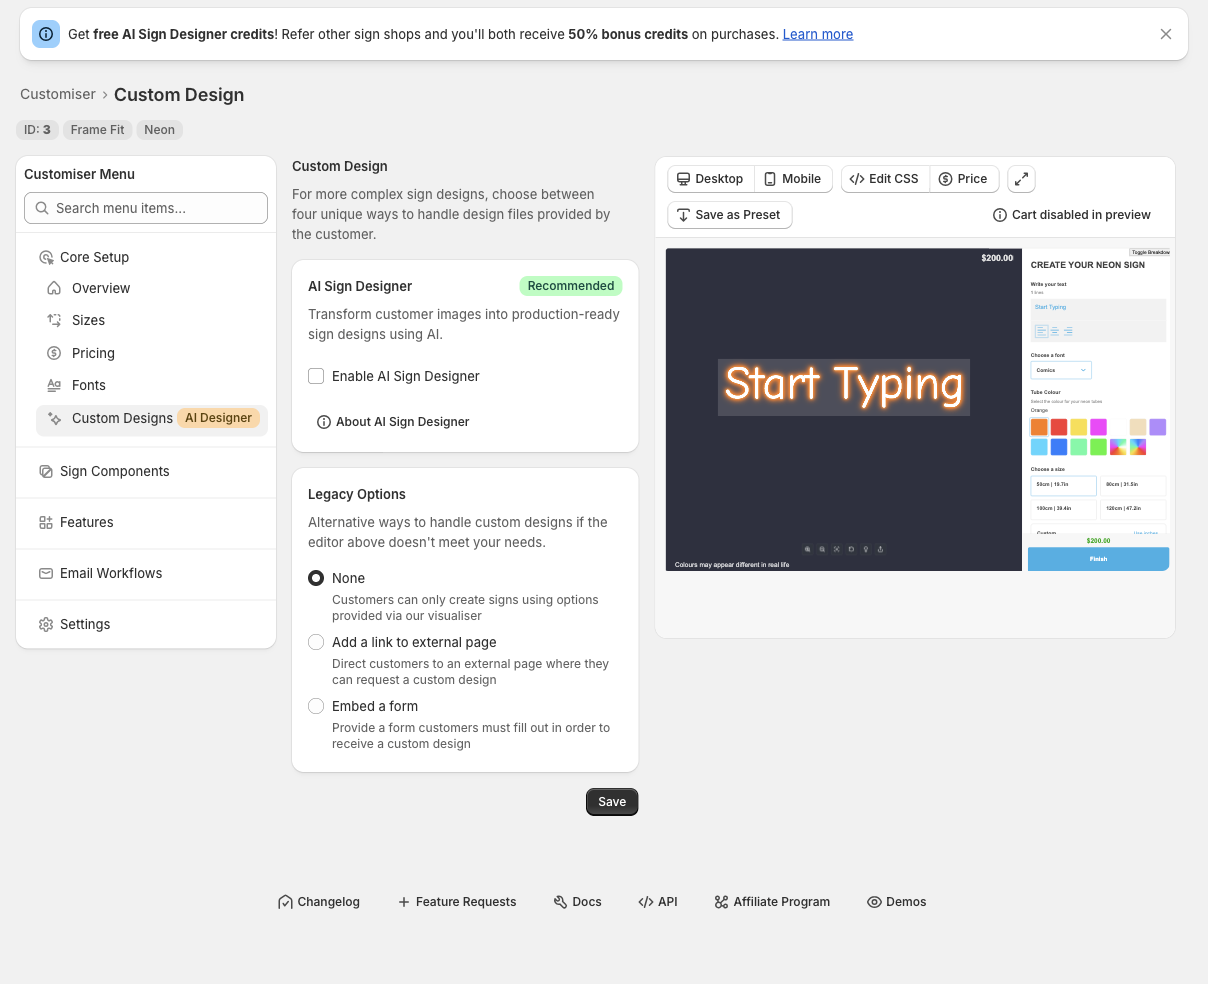
Look at the page, then do one of these:
-
If Pricing & Configuration shows your form and settings, continue to Step 5.
-
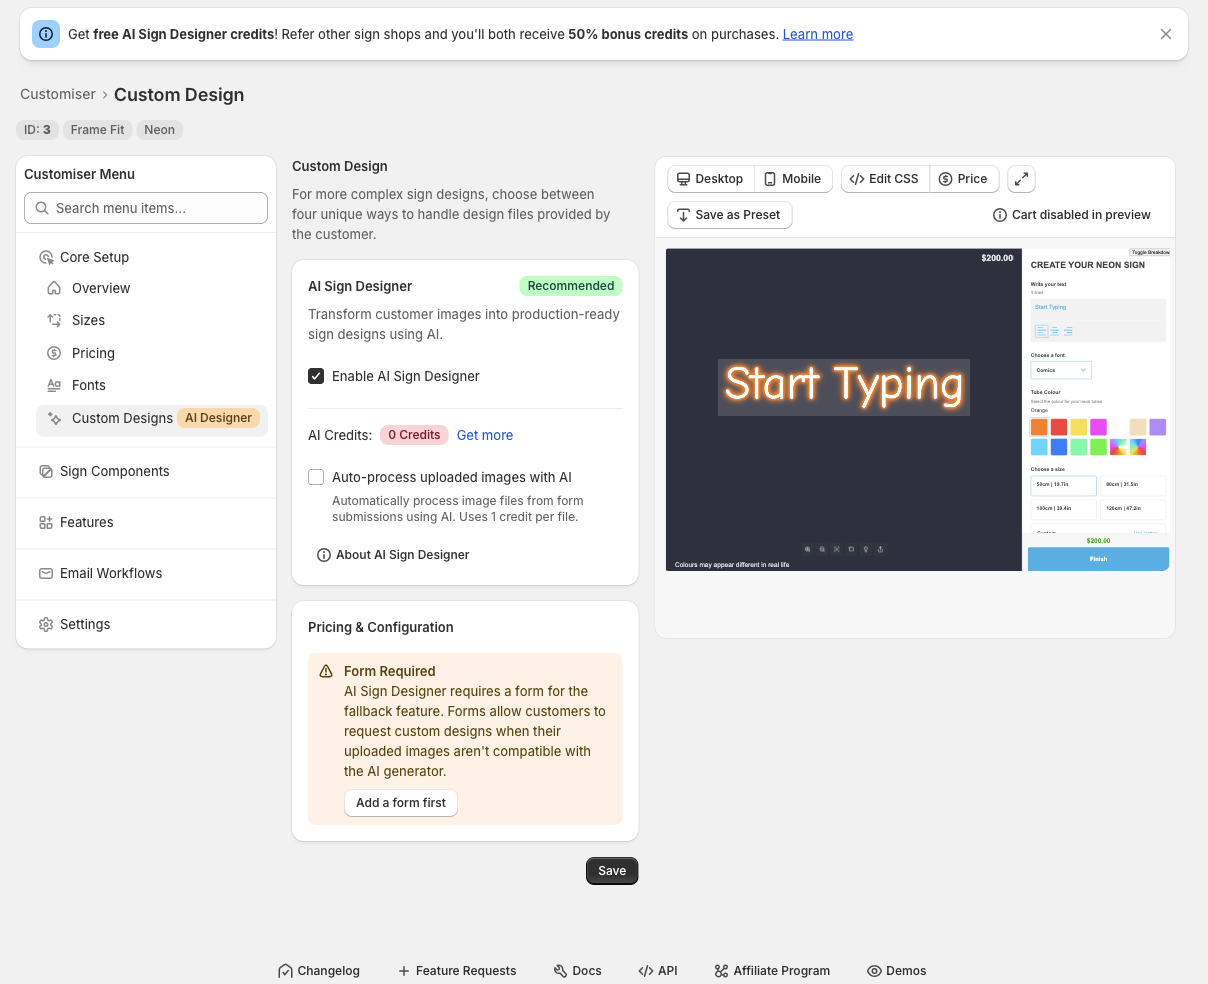
If you see Form Required, you have no forms. Continue to Step 4.
-
If you see Fallback Form Required, you have forms, but none has both a File Upload field and a required Email field. Select Update an existing form. Make sure that the form has a File Upload field and a required Email field. If it has no File Upload field, add one. Then continue to Step 5.
If the checkbox is grey, read “If something is missing” at the end of this article.
Step 4: Create the fallback form, if required
The fallback form lets customers send you their artwork. It shows when AI Sign Designer cannot make a design from the artwork. It also shows when your Store has no credits.
Select Add a form first. The Forms page opens.
-
On the Forms page, select Add New Form. If you already have forms, select Add Form.
-
Under Form Quote Type, keep Custom designs selected.
-
In Label, enter a name, such as Custom Design Request.
-
Under Fields, select Add new field.
-
Select File Upload.
-
In Label text, enter a label for the field, such as Upload your design.
-
Select Required Field. We recommend this setting.
-
Select Done.
-
Keep the Email field in the form. New forms include it. It must stay required.
-
In Receiver Email, enter an email address. If you leave it empty, the Store’s default email address is used.
-
Choose what happens After submission.
-
Select Save.
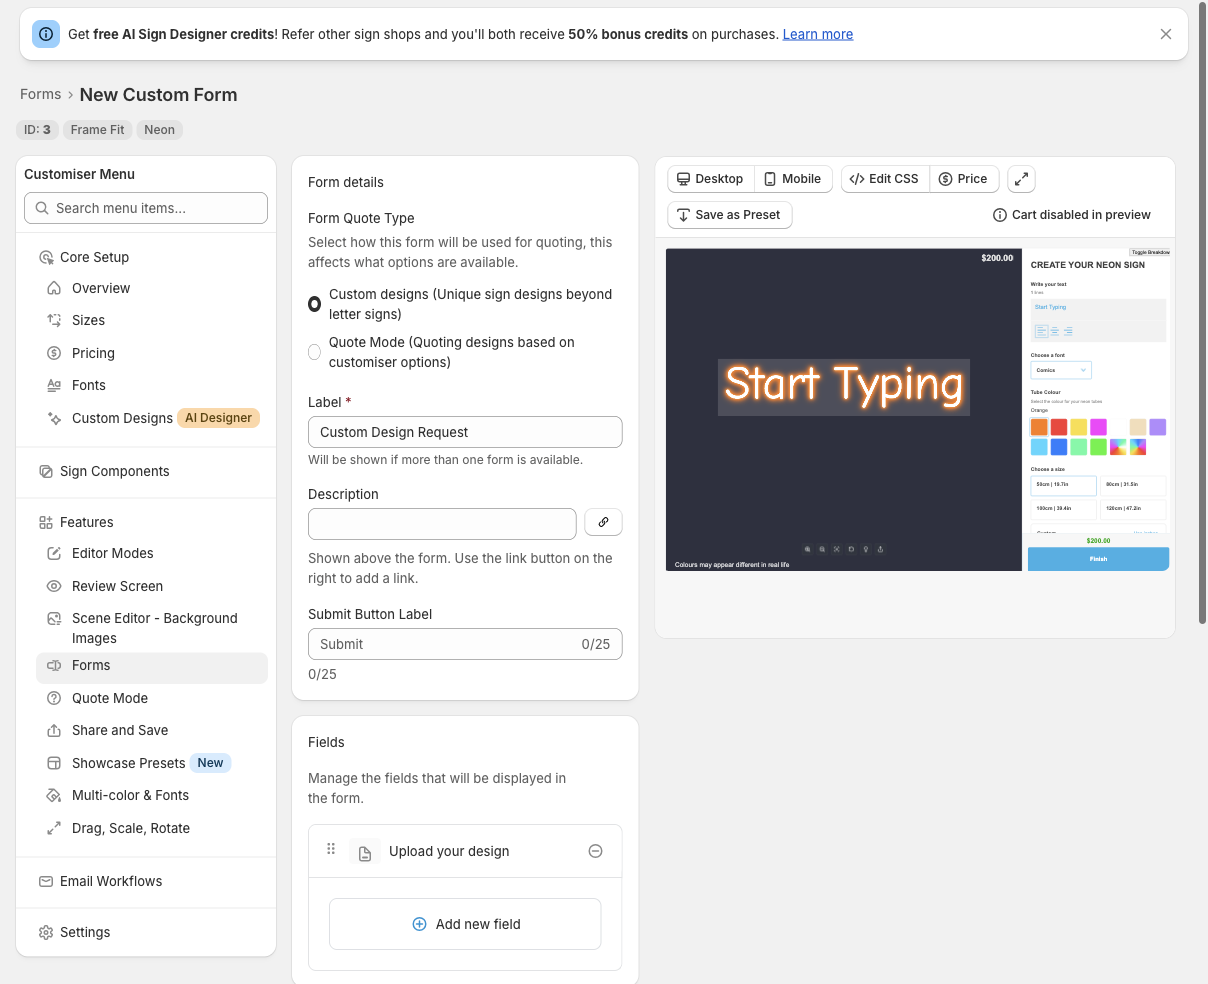
Go back to Core Setup. Then select Custom Designs.
When a customer uses this form, the request shows under Quotes. Form Quote Type sets where it shows:
-
Custom designs requests show as Form submissions.
-
Quote Mode requests show as Quote requests.
Keep Custom designs for the fallback form.
For more form settings, read Custom Design Forms.
Step 5: Complete the AI Sign Designer settings
For an Advanced Letter (Material Length) customiser, find Sign Dimensions. Then:
-
Set the Default width and Default height. These are the start dimensions for an uploaded design.
-
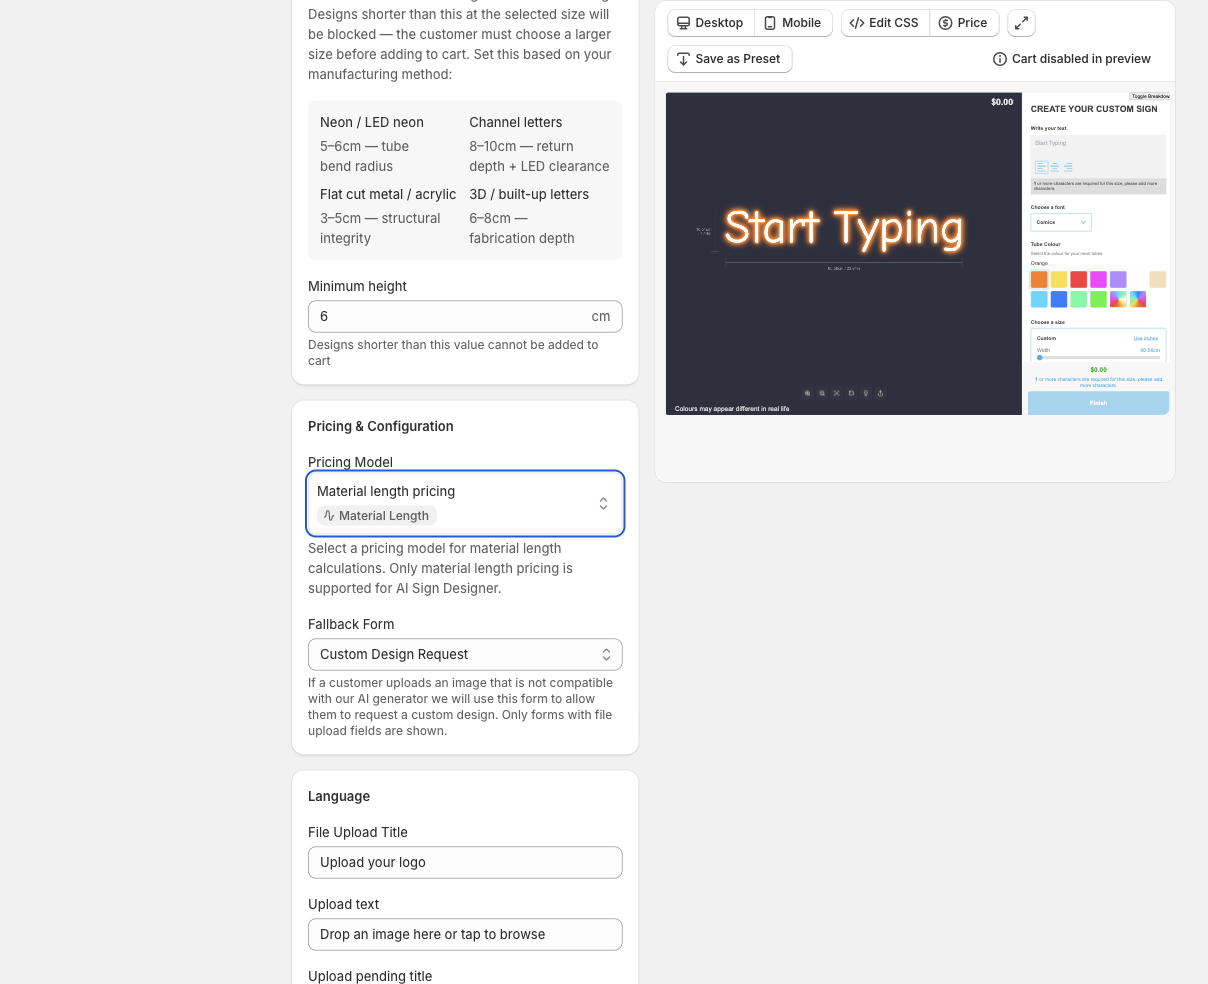
Set the Minimum height. Use the smallest height that your production method can make.
For a Frame Fit customiser, the dimension settings do not show.
Find Pricing & Configuration. Then:
-
Under Pricing Model, select the length pricing for this customiser. For an Advanced Letter customiser, it must use material length pricing.
-
Under Fallback Form, select a form that has a required Email field and a File Upload field.
-
Keep Send designs that cannot be made automatically to the fallback form selected. It is on by default.
-
Read the customer text under Language. Change it if necessary.
If you clear Send designs that cannot be made automatically to the fallback form, designs that AI Sign Designer refuses do not go to your form. Customers can try again or use another image.
Step 6: Decide whether to auto-process form uploads
Select Auto-process uploaded images with AI only if you want AI Sign Designer to process files from your forms automatically.
Each successfully processed file uses one credit. If you want to handle form submissions yourself, leave the setting off.
Step 7: Save and test
-
Select Save.
-
Look for the live preview on the right of the page. If you do not see it, select Preview at the top of the page. A Preview window opens with Desktop and Mobile views.
-
Find the upload area. It shows Upload your logo and Drop an image here or tap to browse.
-
If the customiser also has a Text editor, select the Custom tab first.
-
Upload a test image.
-
Make sure that the generated design shows in the customiser and that you can configure it.
A successful test uses one AI credit. A failed conversion does not use a credit.
If something is missing
-
The Enable AI Sign Designer checkbox is missing: Your sign type does not support AI Sign Designer. Check the sign types in “Before you start”.
-
A warning shows, or the checkbox is grey: The warning says “This customiser’s pricing model does not support AI Sign Designer.” Create a customiser with Frame Fit or Advanced Letter pricing. The warning shows when your Store includes AI Sign Designer, whether AI Sign Designer is on or off. The checkbox is grey only when AI Sign Designer is off. It is also grey if your Store does not include AI Sign Designer. If AI Sign Designer is already on, the checkbox stays active so that you can turn it off.
-
Your fallback form is not in the list: Edit the form. Make sure that it has a required Email field and a File Upload field.
-
Customers see the fallback form instead of AI Sign Designer: Check your AI credit balance. The fallback form also shows when AI Sign Designer cannot make a design from the uploaded file. If your balance is more than zero and customers see only the form, contact support.