
Set up stencil signs
Create a stencil customiser, set letter-height sizes, borders, sheet pricing, stencil-safe fonts and SVG or DXF production files.
Last updated:
A stencil sign is a Mylar sheet with letters cut in it. The customer chooses a letter height and types the text. The customiser shows the size and price of the finished sheet. Both values change when the customer changes the text. This article shows you how to set up a stencil customiser. It is for sign painters and workshops that sell cut stencils.
A bridged font keeps the centre of letters such as O, A and B attached to the letter, so that typed text can be cut as a physical stencil. Use bridged fonts for stencils.
Before you start
-
Stencil customisers use the Simple Letter (Fixed Width) pricing model. You do not choose a pricing model when you create a stencil customiser.
-
SVG files and DXF files are plan features. If your plan does not include them, the settings show Plan Upgrade Required. For more data about these files, read SVG, EPS and .AI files for manufacturing workflows.
Create a stencil customiser
-
Open the Sign Customiser admin.
-
Universal subscribers: Click Customisers in the menu.
-
Shopify users: In your Shopify admin, open the app. Then click Customisers in the app menu.
-
-
Click Create customiser.
-
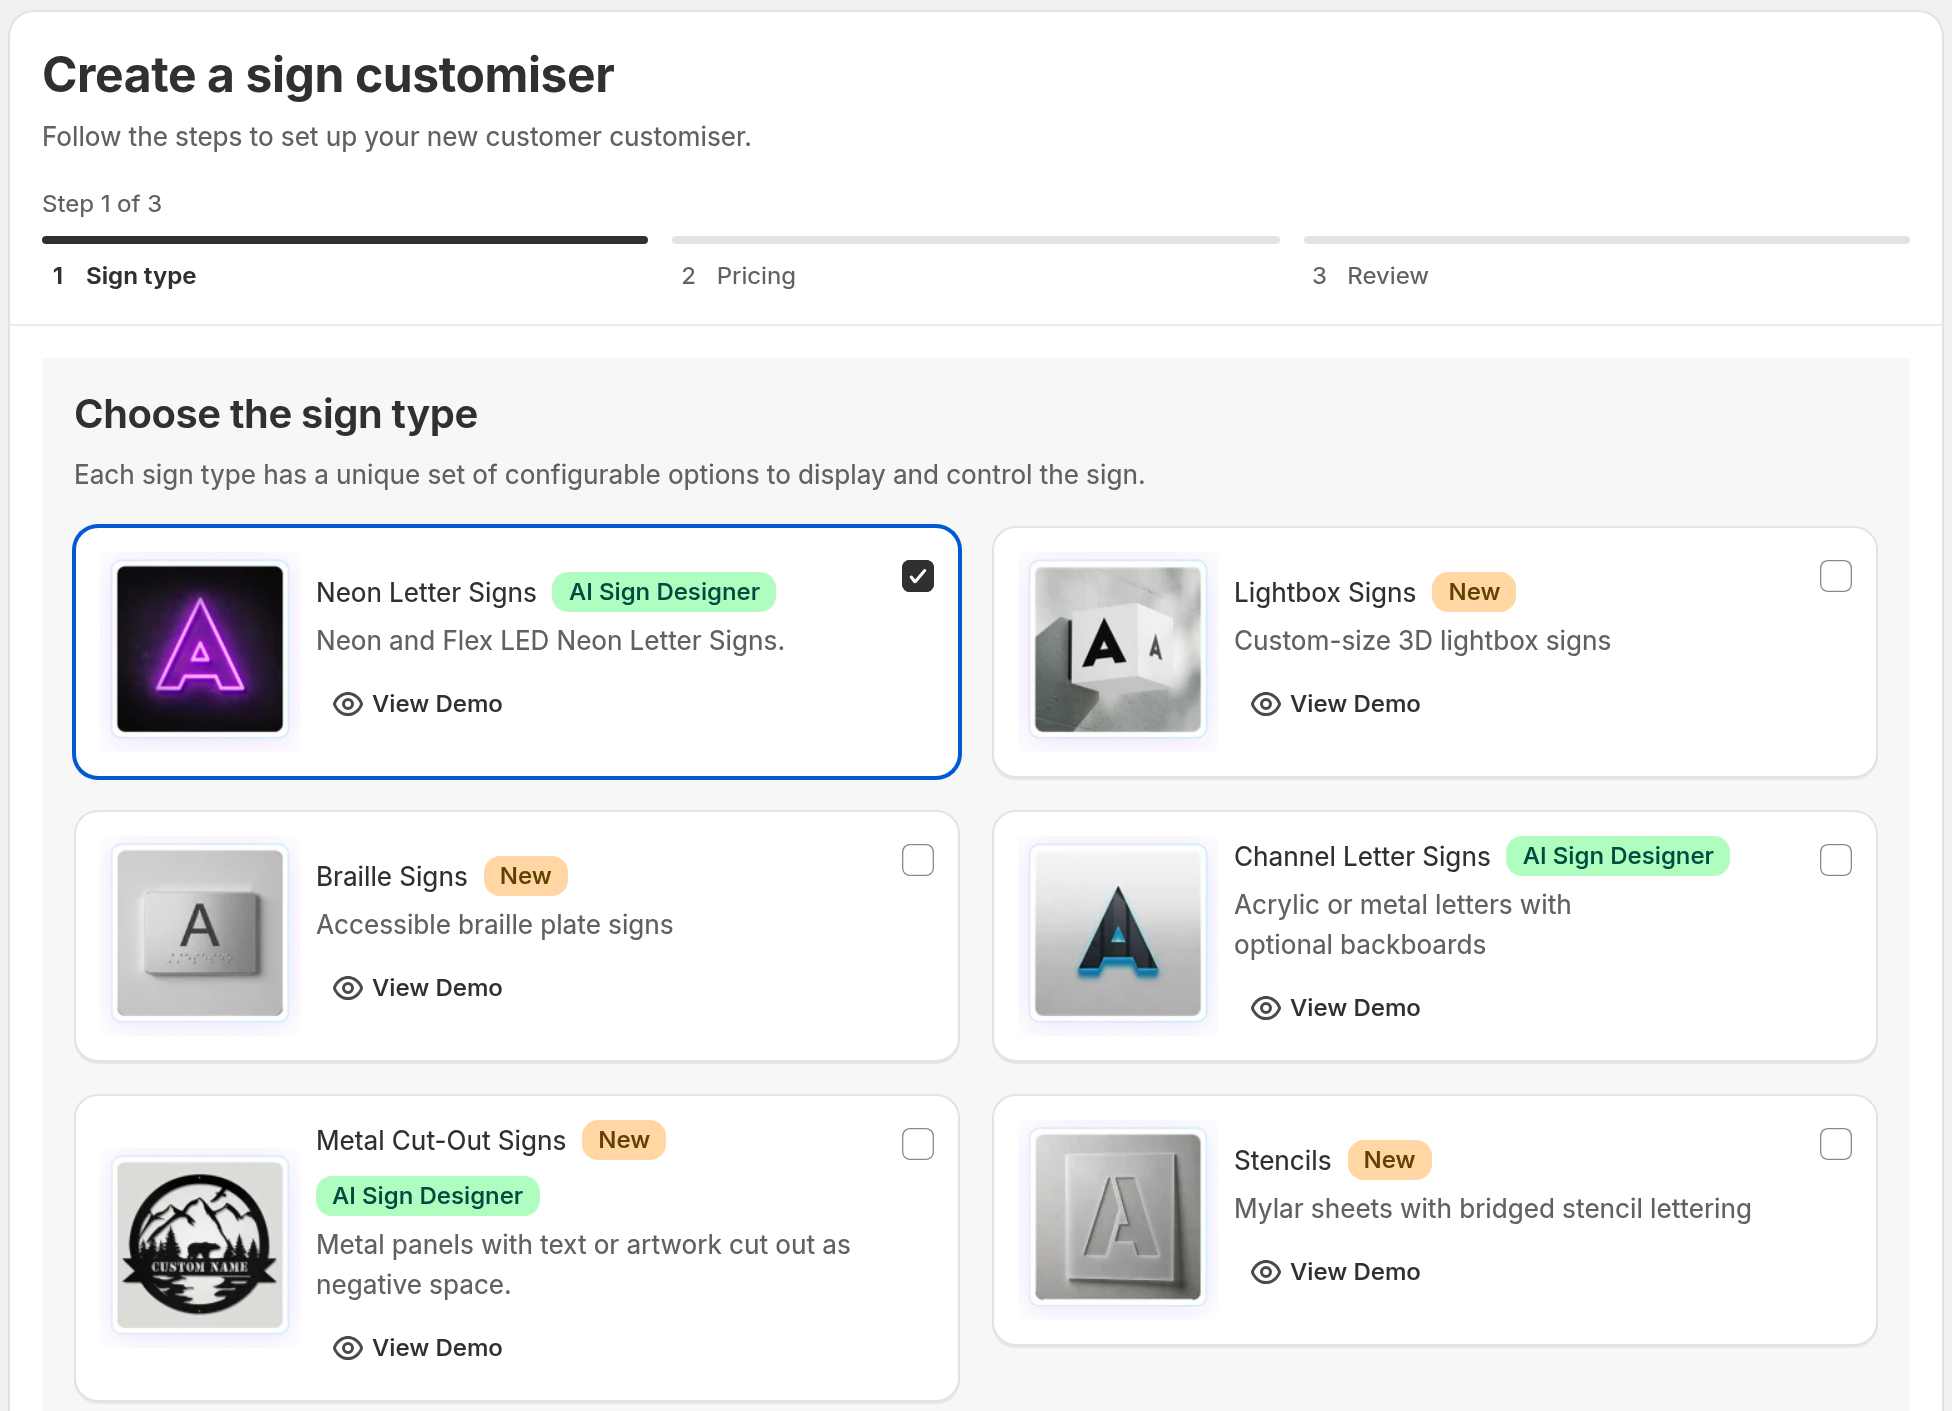
On the Choose the sign type step, select Stencils. Click Next.
- On the Review your customiser step, keep Include demo data selected if you want the starter content. Click Create.
The pricing step does not show, because stencil signs have only one pricing model.
What the demo data includes
When Include demo data is selected, the new customiser has these items:
-
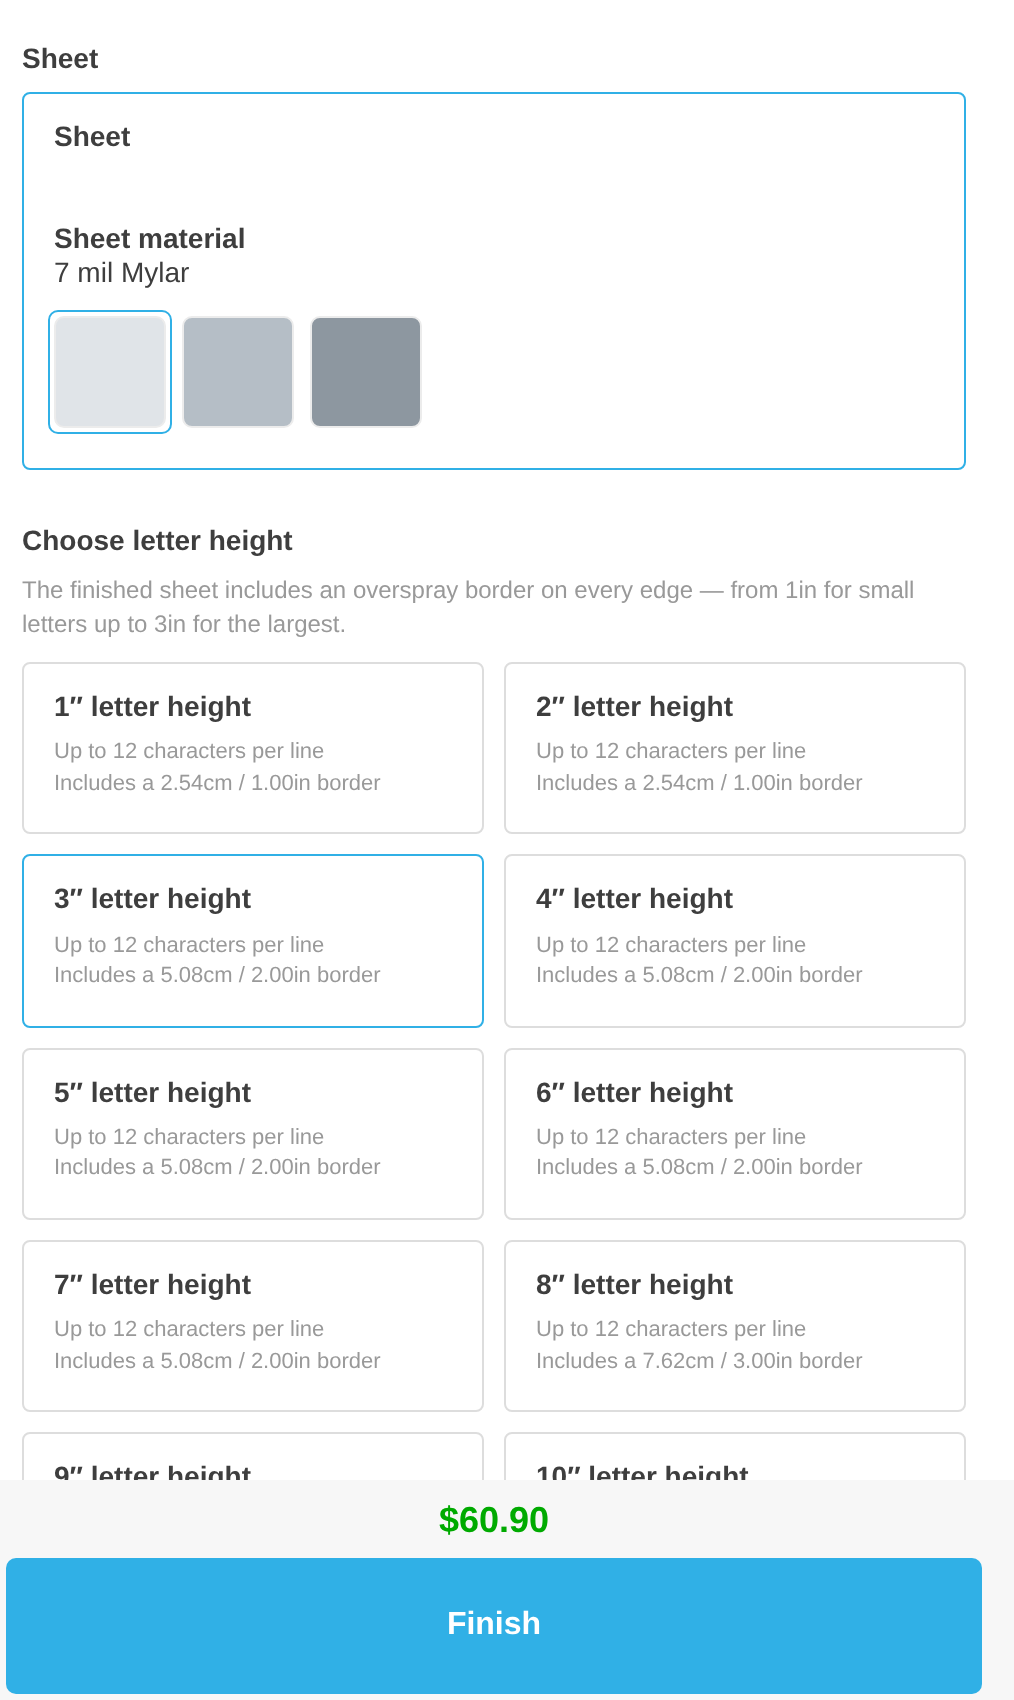
12 letter-height sizes, from 1″ letter height to 12″ letter height. Each size allows 12 characters on each line and 2 lines.
-
A border on each size. The border is 1 inch for letters of 1 and 2 inches, 2 inches for letters of 3 to 7 inches, and 3 inches for letters of 8 to 12 inches.
-
A letter price for each size, and a Sheet pricing table with 5 bands.
-
One sheet and three sheet materials: 7 mil Mylar, 10 mil Mylar and Adhesive-backed Mylar.
-
Four stencil-safe fonts: Allerta Stencil, Saira Stencil One, Stardos Stencil and Stardos Stencil Bold.
-
The exact letter height input, the letter height read-out, SVG files and DXF files. All are on.
You can change each value. Clear Include demo data if you do not want the starter content. The customiser then has no sizes, fonts, sheets or prices. It keeps the default settings.
Set the letter-height sizes
Each size is one letter height. The customer chooses a height. The width changes with the text that the customer types.
-
Open your customiser. Go to Core Setup → Sizes.
-
Click Add Size, or open an existing size.
-
In Size Strategy, choose Fixed Height - Width scales dynamically.
-
Enter the Letter height.
-
In Multi-line height measurement, choose Letter height — add the spacing between lines to the total.
-
Optional: Enter a Border per edge value. If you leave it empty, the size uses the default border.
-
Set the number of lines and the number of characters on each line.
-
Click Save.
The Letter-height sizes card at the top of the Sizes page gives a short version of these steps. With Letter height, the value is the height of the letters. The app adds the gap between lines to the total. A sign with three lines is therefore taller than three times the letter height. The customer sees the total height.
Set the border
The border is the space around the letters on the finished sheet. Painters use it to catch overspray. The border is part of the finished sheet size. The size that the customer sees, the price and the production files all include the border.
-
On the Sizes page, find Border / bleed.
-
Enter a Default border per edge. Each size that has no border of its own uses this value.
-
Click Save.
To give one size its own border, enter a Border per edge value in that size.
Let customers type an exact letter height
-
On the Sizes page, find Exact letter height.
-
Select Allow customers to enter an exact letter height.
-
Optional: Enter a Maximum letter height. If you leave it empty, the maximum is the largest size.
-
Click Save.
The customer can then type a height. If the typed height is below the font minimum or above your maximum, the height changes to that limit and a notice shows the adjusted height. The price uses the next size that is at or above the adjusted height. For example, if the font minimum is 2.5 inches, a customer who types 2 inches sees the height change to 2.5 inches and pays the price of the 3 inch size. Text in capital letters only can have a higher minimum (4 inches in the demo fonts, or 10 cm when the Store uses centimetres). The customer then pays the 4 inch price.
Set the prices
-
Go to Core Setup → Pricing.
-
Click Add Pricing.
-
Enter a Label. The customer does not see the label.
-
In Pricing for each size, enter a Base Price and a Letter Price for each size.
-
Click Save.
Then assign this pricing to each font. Use Assign a pricing in the font.
When at least one size uses Letter height, the Pricing page also shows a Sheet pricing section. Sheet pricing is a charge for the finished sheet. The app measures the sheet with the border included.
-
In Sheet pricing, click Add sheet band.
-
Enter the Maximum width and the Maximum height of the band.
-
Enter a Band price. This is a fixed price for each sheet that fits in the band.
-
Enter an Area rate. Enter 0 if the sheet has no area charge. This adds a charge for each square unit of the sheet.
-
Add more bands. Each band needs a larger maximum width and a larger maximum height than the band before it.
-
Click Save sheet pricing.
The last band applies to each sheet that is larger than the other bands. The customer pays the letter price, the band price and the area charge.
Add stencil-safe fonts
-
Go to Core Setup → Fonts.
-
Click Add Font, or open an existing font.
-
In Font Style, select Stencil-safe (bridged) font if the letters keep their centres attached.
-
Click Save.
If a font is not marked stencil-safe, the Fonts page shows the warning Fonts not marked stencil-safe. The warning lists those fonts. The customer can still choose those fonts. Examine each listed font before you cut a sheet. For more data about fonts, read Fonts - Simple Model.
Set the sheets and sheet materials
-
Go to Sign Components → Sheets.
-
In the Sheets table, click Add Sheet to add a sheet shape. The demo sheet is a plain rectangle.
-
In the Sheet Materials table, click Add Sheet Material. Enter a Label and set the colour. In Assign to a sheet, select the sheets that use this material.
-
Optional: Change the section titles that customers see in Language Options.
-
Click Save.
Do not use sheet padding to add space around the letters. A rectangular stencil sheet ignores percentage padding. Set the border on the Sizes page.
Show letter heights to customers
-
Go to Settings → General Settings.
-
In General Style Settings, set Letter height read-out to On.
-
Set Show/hide Measurements to an option that shows the height. The options for width and height, and for height only, both work.
-
Optional: Show letter height in the cart is on for a new customiser. To hide the letter height in the cart and on the order line items, clear it.
-
Click Save.
Turn on the production files
-
Go to Settings → General Settings.
-
In Generate SVG image of sign, set SVG Image to Yes.
-
If you use a CNC, laser or plasma cutter, set DXF (.dxf) to Yes.
-
Click Save.
The SVG shows the finished sheet at its real size, with the border included. The letters are cut out of the sheet outline. The app makes the DXF from the SVG, so the DXF has the same size with the border. EPS Image and AI Image are also available.
The manufacturer email for a stencil order has the subject New Stencil Order and the order number. The default email lists the Size, the Sheet and the Sheet Material. It also lists the Letter height when the order has one. It has links to the SVG file and DXF file when they exist. To edit the email, go to Email Workflows → Manufacturer Email.
What the customer sees
With the demo data, the customer sees these steps in this order. You can change the step titles.
-
Write your text. The customer sees the number of lines and characters that the size allows.
-
Choose a font.
-
Sheet and Sheet material.
-
Choose letter height. The customer chooses a size. When you turn on the exact letter height, the customer can also move a slider or type a height. A message names the size that sets the price. If Measurement Unit in General Settings is set to Both Centimeters and Inches, the customer can change between inches and centimetres.
The preview shows these items:
-
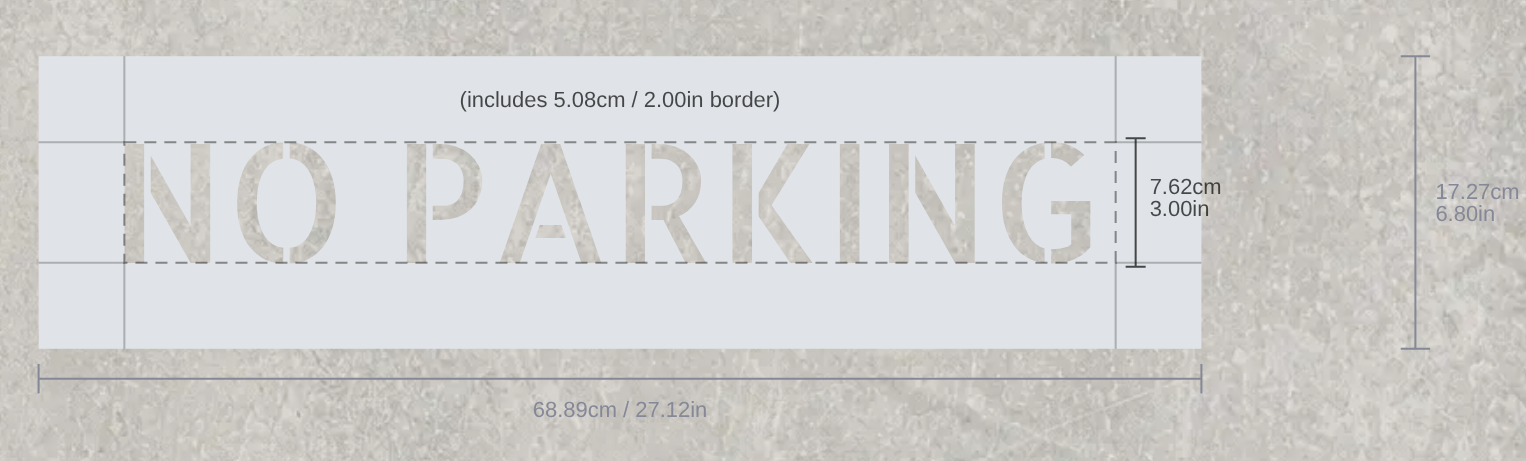
The sheet with a dashed line around the letters. The dashed line shows where the design area ends and the border starts. A label such as “(includes 2.54cm / 1.00in border)” gives the border size.
-
A height guide next to each line of text. The guide shows the real letter height.
-
Width and height rails outside the sheet. They show the full sheet size with the border included.
-
A price that changes when the customer changes the text or the size.
The review screen shows the size and a note about the border.
Limits
-
Stencil customisers use only the Simple Letter (Fixed Width) pricing model.
-
Sheet pricing and the exact letter height input need at least one size that uses Fixed Height and Letter height.
-
The dashed border guide shows only on a plain rectangular sheet that has a border larger than 0.
-
A DXF file comes only from a flat SVG that the customiser makes from typed text. The conversion can fail. If it fails, the order has an SVG file and no DXF file.
-
A font that is not marked stencil-safe gives only a warning.