
Set a real size for the built-in background and use scenes in product images
Give the built-in blue/grey background a real width so signs scale against it, and show the customer's chosen background in the cart and order product image.
Last updated:
Two settings in the Scene Editor help the sign look the correct size in the visualiser and in the cart.
-
Default background width gives the built-in blue/grey background a real width. The sign then scales against that background.
-
Use the selected background in the product image shows the background that the customer chose from your backgrounds behind the sign in the product image.
Use this article if you want customers to see a realistic picture of their sign.
Before you start
-
Both settings need Scale visualisation with size. This option must be selected. Drag, Scale, Rotate must be off. For more information, see Visually scale signs for size dimensions.
-
To turn off Drag, Scale, Rotate, click Features → Drag, Scale, Rotate. Clear Enable Dragging, Enable Scaling and Enable Rotation. Then click Save.
-
Both settings are for the new plans. On an older plan, you cannot select these options. The admin shows “You must upgrade to our new plans to use this feature.”
-
The product image setting does not work for lightbox signs.
Set a real size for the built-in background
At first, the built-in blue/grey background has no size. The sign keeps its usual fit on it. When you set a real width, the sign scales against that width. A bigger sign fills more of the background. A smaller sign fills less of the background.
-
In the admin, click Customisers.
-
Click the customiser that you want to edit.
-
In the left-hand menu, click Features → Scene Editor - Background Images.
-
In the Background Images section, select Enable Preview Images or Enable Review Screen Images.
-
Select Display default blue/gray background image.
-
In the Visualiser Scaling section, select Scale visualisation with size.
-
In the Background Images section, enter a number in Default background width.
-
If necessary, enter a number in Default background height.
-
Click Save.
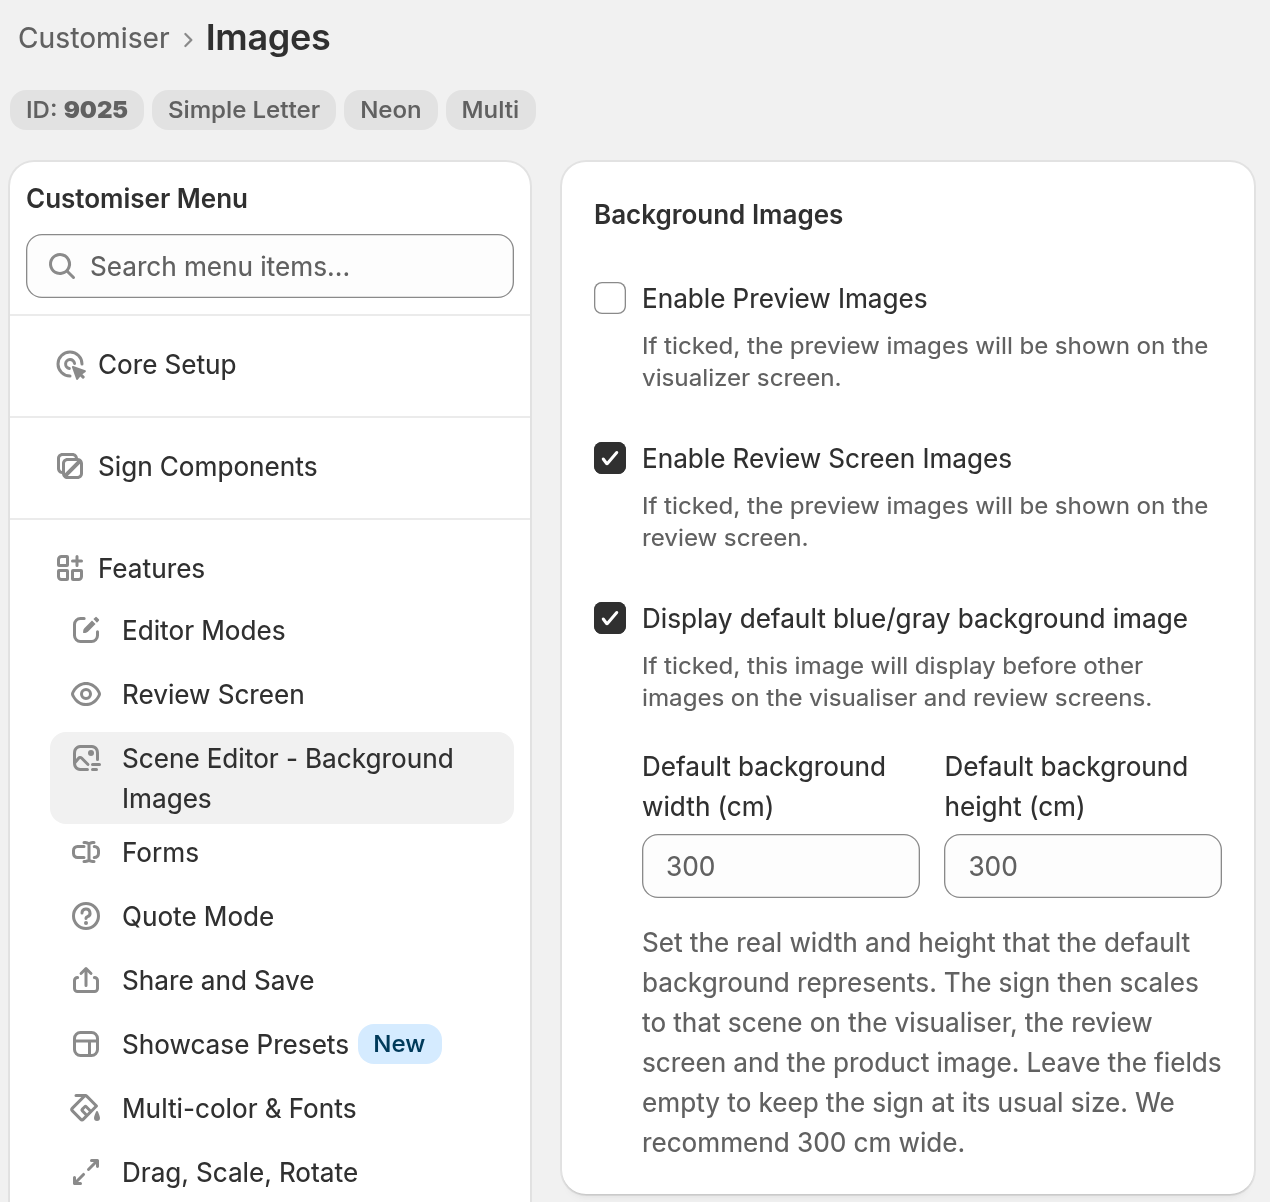
The field names show the unit of your Store. For example, the name can be Default background width (cm) or Default background width (in). Enter a number that is more than 0.
The fields are empty at first. Each field shows a placeholder number in your Store unit. For a Store that uses cm, the width placeholder is 300. For a Store that uses in, it is 118.11 (300 cm in inches). The placeholder is a suggestion only. It does not set a size. If you leave the fields empty, the sign keeps its usual fit.
The width sets the scale. The height is saved. It does not change the scale.
After you save a width, the sign scales against the built-in background on the visualiser and on the Review screen. This setting is for the built-in background only. For an image that you upload, enter its size under Manage Images. For more information, see Scene Editor.
When the fields do not show
The Default background width and Default background height fields show only when all these conditions are true:
-
Enable Preview Images or Enable Review Screen Images is selected.
-
Display default blue/gray background image is selected.
-
Scale visualisation with size is selected.
-
Drag, Scale, Rotate is off.
Use the customer’s background in the product image
By default, the product image in the cart and in the order shows your Main Product Image. If you did not add a Main Product Image, it shows a demonstration image. You can change this. The product image then shows the sign on the background that the customer chose from your backgrounds in the visualiser.
-
Click Features → Scene Editor - Background Images.
-
In the Visualiser Scaling section, make sure that Scale visualisation with size is selected.
-
Select Use the selected background in the product image.
-
Click Save.
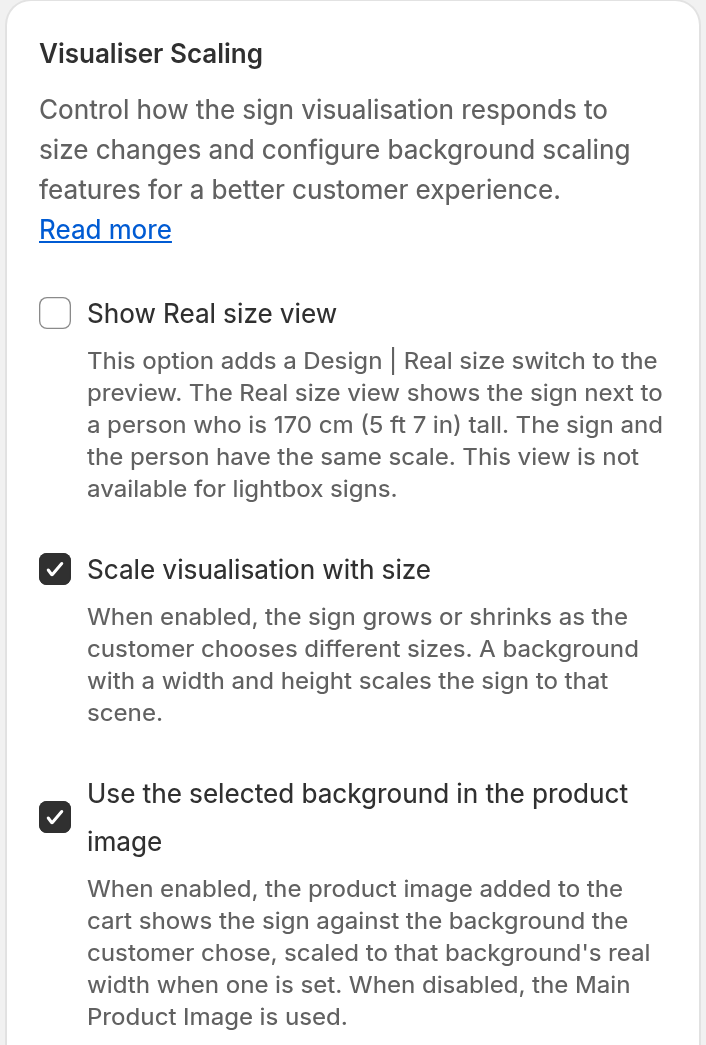
This option is off by default. Your existing customisers do not change until you select it.
The option is off until you select Scale visualisation with size. A message tells you to select Scale visualisation with size first. If Drag, Scale, Rotate is on, a different message tells you that the feature is not compatible with it.
What the customer sees
When the option is on, the product image shows the sign on the background that the customer chose from your backgrounds.
-
A background image that you uploaded. The product image shows that image. If the image has a real width, the sign scales against it. If the image has no width, the sign keeps its usual fit.
-
The built-in blue/grey background. The product image shows a flat colour. This colour is the Background colour in the Visualisation section of the Theme Colours page. If you set a width for the built-in background, the sign scales against it. If you did not set a width, the sign keeps its usual fit.
-
A background that the customer uploaded. The product image does not use this background. It shows your Main Product Image. If you did not add a Main Product Image, it shows the demonstration image.
If the background has a Sign area, the product image uses the same Sign area. For the steps to set a Sign area, see Set the Sign area for each background image. For more information, see Scene Editor.
To use your Main Product Image again, clear Use the selected background in the product image. Then click Save. You set the Main Product Image in Settings → Product. For more information, see Set the product title and main product image.
Limits
-
The product image setting does not work for lightbox signs. A lightbox sign shows the Main Product Image. If you did not add a Main Product Image, it shows the demonstration image.
-
Neither setting works when Drag, Scale, Rotate is on.
-
If you clear Scale visualisation with size, the product image does not use the customer’s background. Your choice stays saved. The product image uses the background again when you select Scale visualisation with size.
-
The default background width changes how the sign looks. It does not change the size that the customer orders. It does not change the price.