Real size view
Show the sign next to a 170 cm person at the same scale.
Last updated:
The Real size view shows the customer’s sign next to a person who is 170 cm (5 ft 7 in) tall. The sign and the person have the same scale. The customer can see how big the sign is before they order it.
The customer sees the switch only when you select Show Real size view for the customiser.
What the customer sees
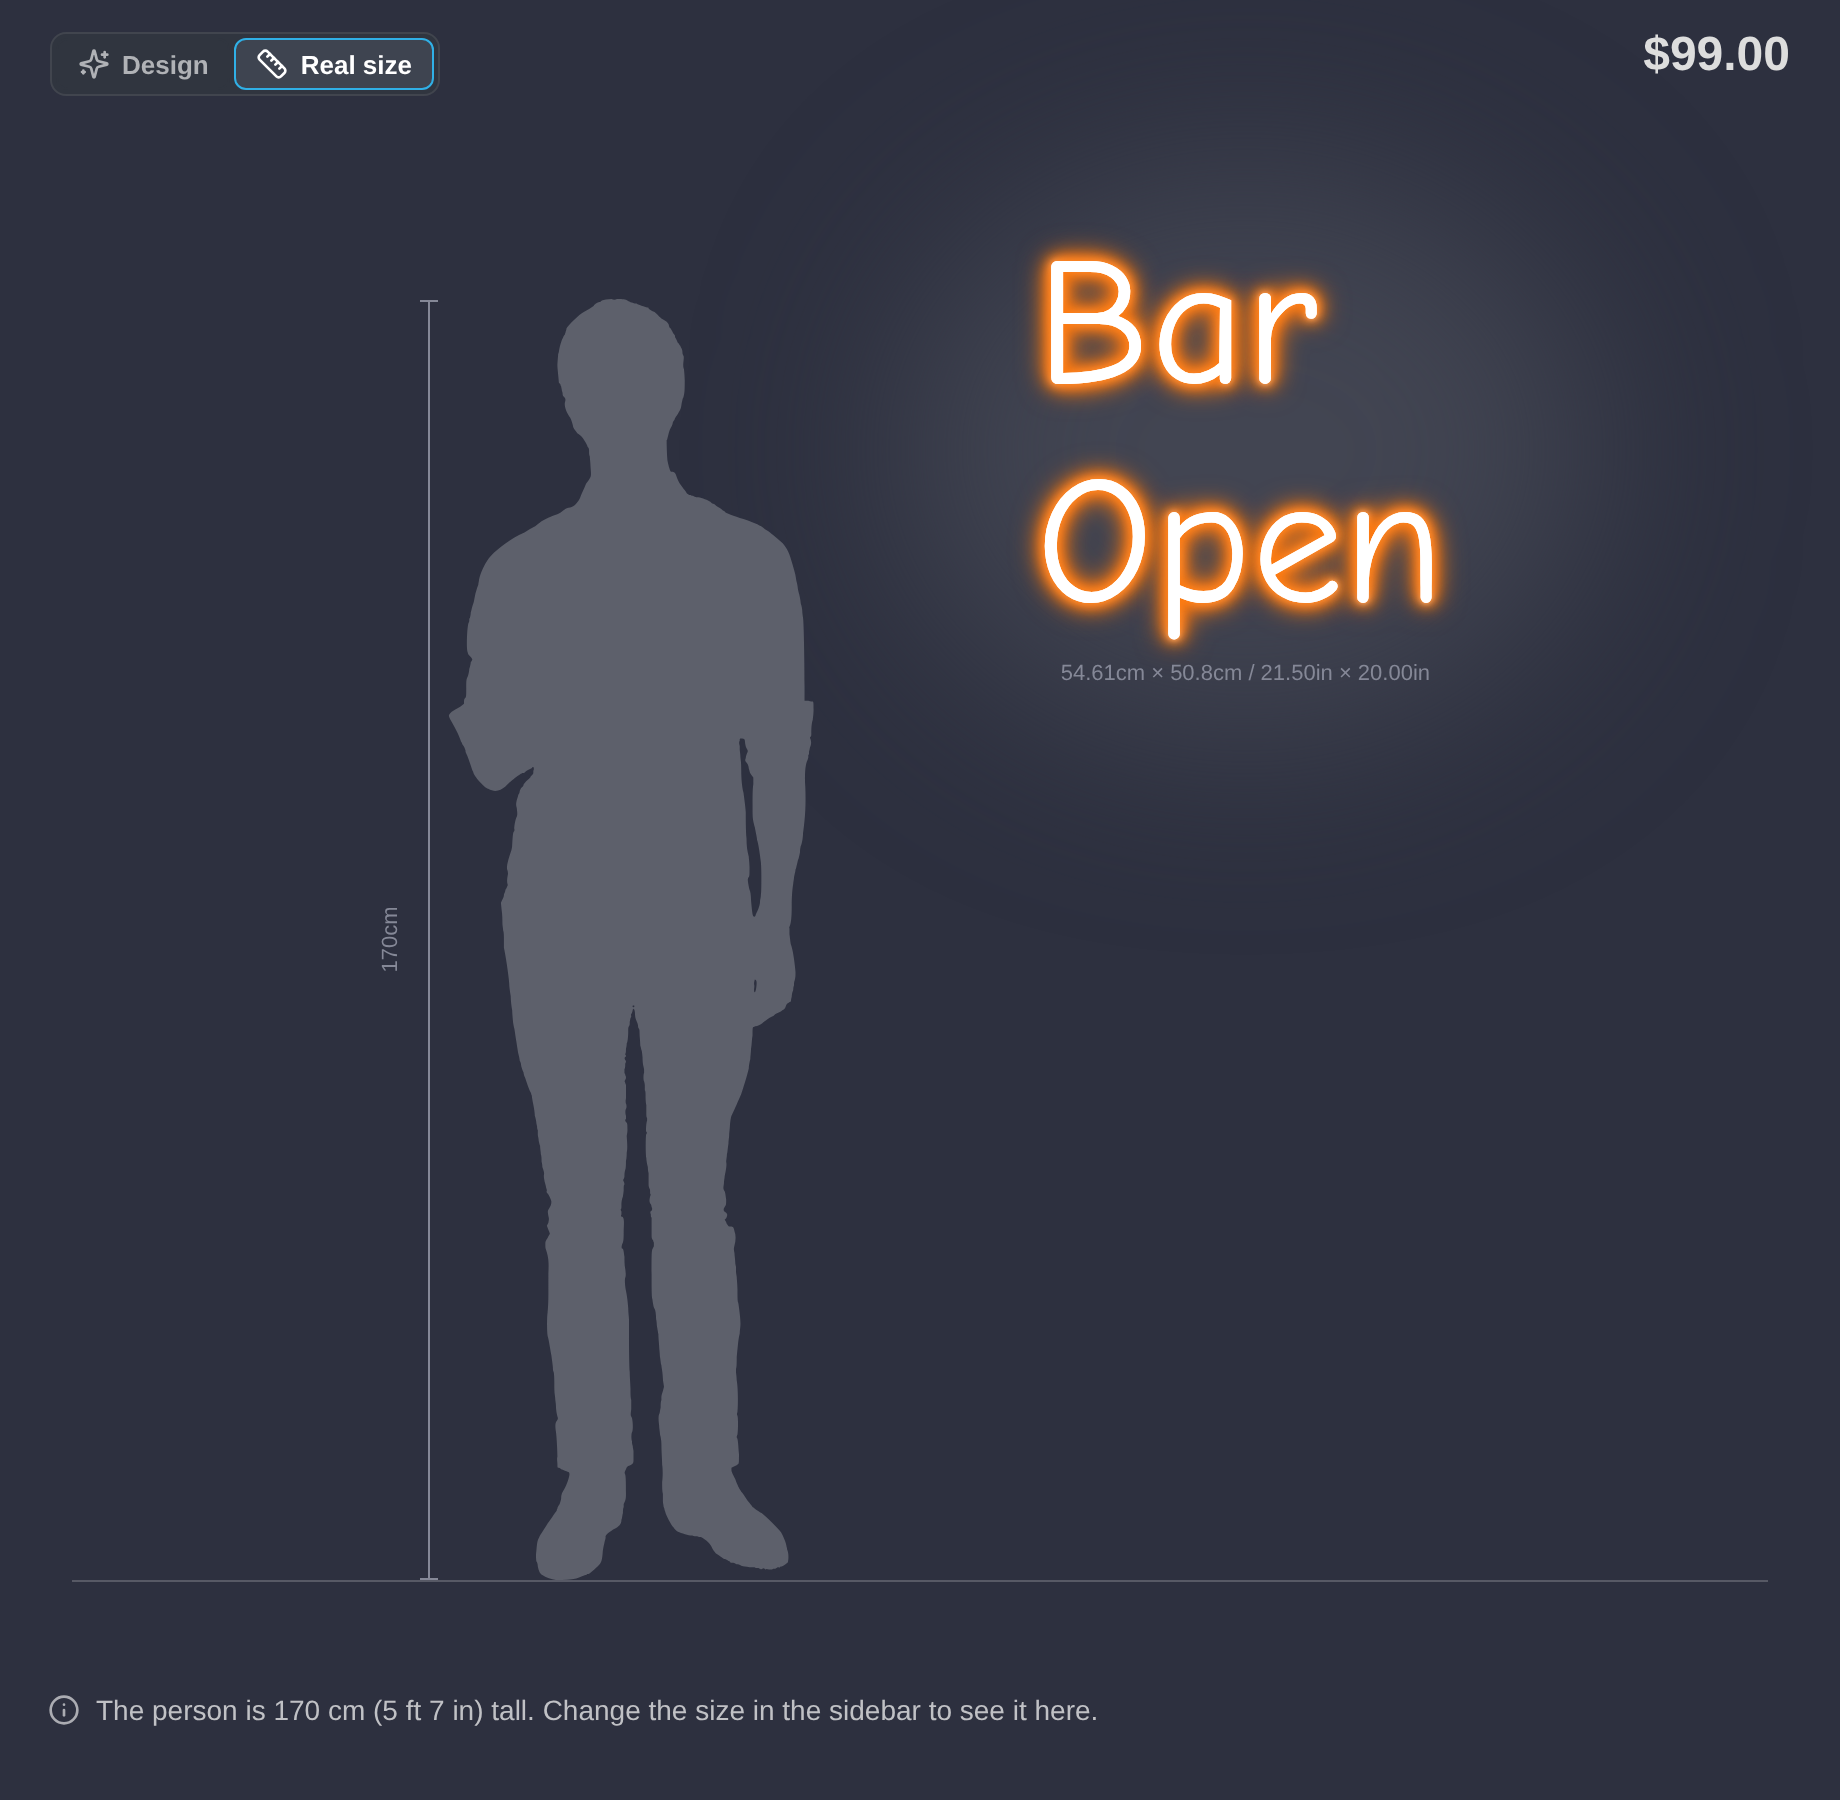
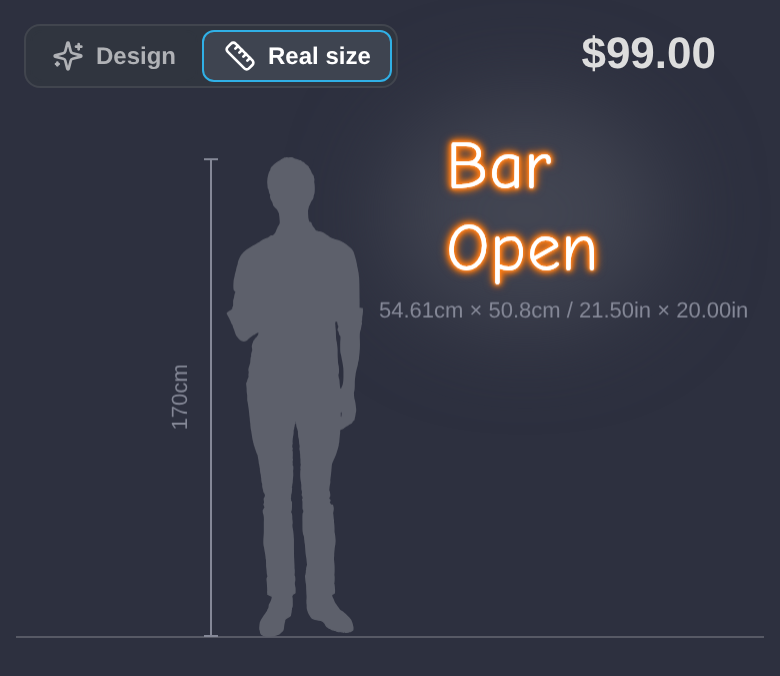
The preview has a Design | Real size switch at the top left. The customer selects Real size to open the Real size view. The customer selects Design to return to the Design view. The preview always opens in the Design view.
In the Real size view:
-
A person silhouette stands on a floor line at the left. A height rail is next to the person.
-
The sign is on the wall at the right. The centre of the sign is 150 cm above the floor.
-
If the sign is taller than 260 cm, the sign moves up. The bottom of the sign stays 20 cm above the floor.
-
A size label shows the size of the sign. Your measurement settings control this label.
-
On desktop, a caption at the bottom left gives the height of the person. The caption also tells the customer to change the size in the sidebar. On a phone, the caption does not show.
-
The view uses the plain background colour of the preview. It does not show background images, because a photo has its own scale.
-
The tool buttons, Share my design, Upload Background, the background images, the hint text and the colour note do not show.
-
The customer cannot select or move the words. The price stays at the top right.
The sidebar stays available. When the customer changes the size, text, font or design, the view shows the change.
When the customer selects Design, the preview shows the design and the background image again. The preview also puts the sign in the centre again.
Signs and screens
Note: The Real size view is not available for lightbox signs.
-
The view works for text signs and for designs from the AI sign designer.
-
For an AI design, the view is available after the AI sign designer completes the design.
-
Square, wide, tall and small signs fit in the preview on desktop and on phones.
-
The view uses the final width and height of the sign. This is the same size that the measurements on the preview show.
Show the Real size view in a customiser
Follow these steps to show the Real size view:
-
In the admin, click Customisers.
-
Click the customiser that you want to edit.
-
In the left-hand menu, click Features → Scene Editor - Background Images.
-
Go to the Visualiser Scaling section.
-
Select Show Real size view.
-
Click Save.
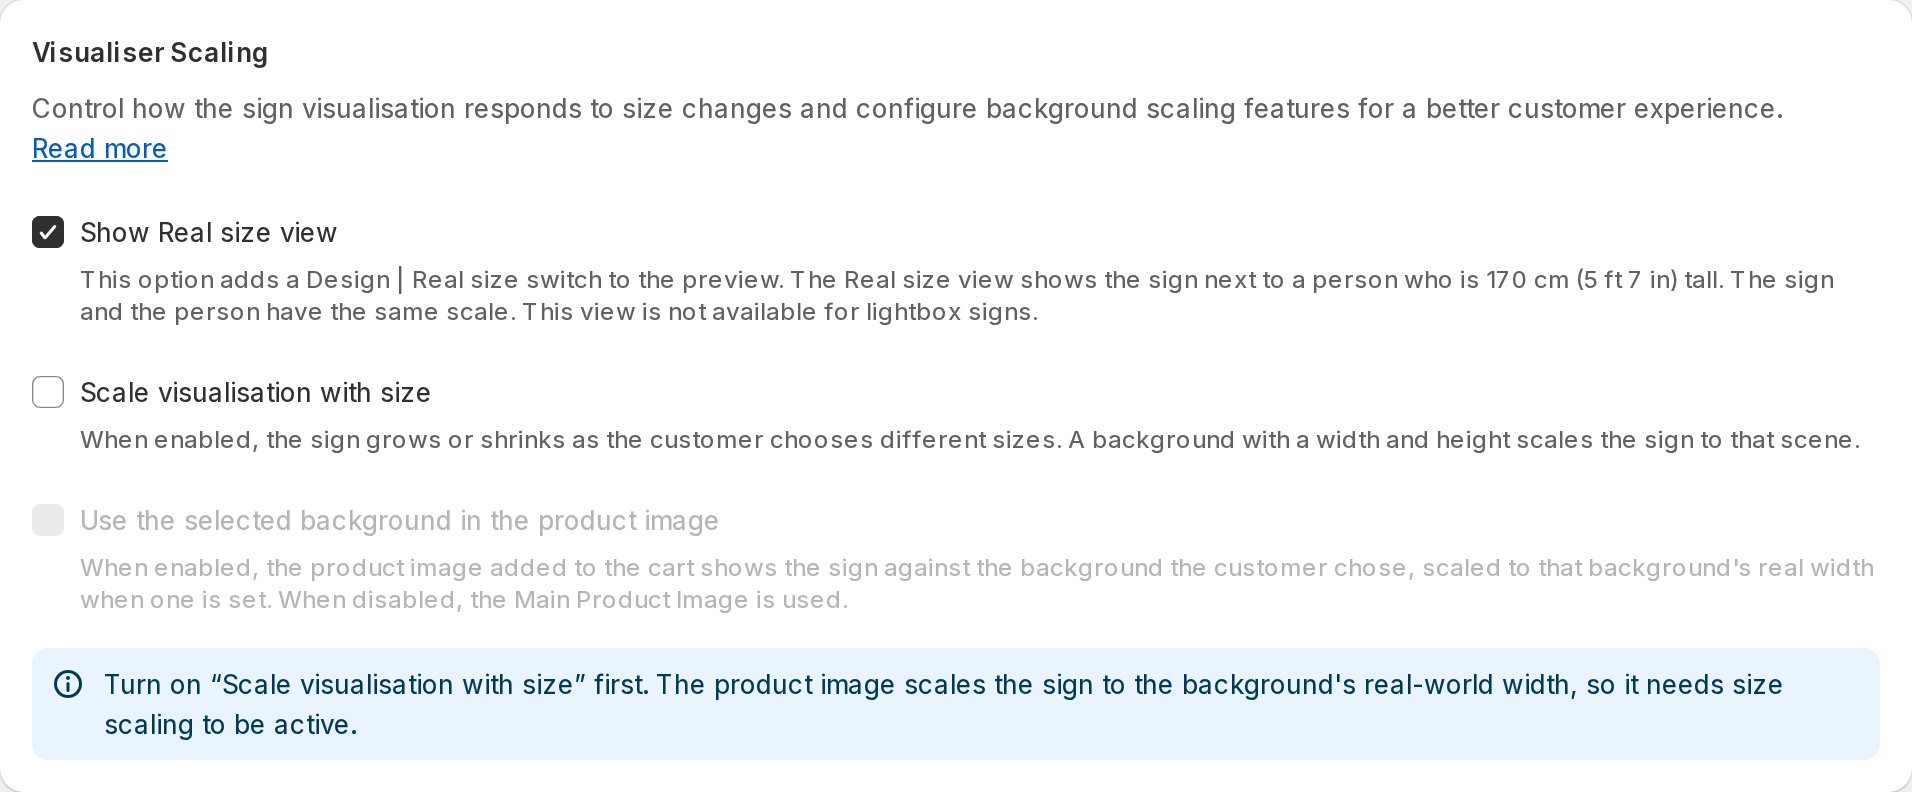
To hide the switch, clear Show Real size view. Then click Save.
-
You can use this option on every plan.
-
You can use this option together with Drag, Scale, Rotate.
-
This option does not need Scale visualisation with size.
-
For lightbox customisers, the check box does not show.
The customiser preview in the admin also shows the switch. Use this preview to examine the view before customers see it.
Default settings
-
If you created a customiser before this change, Show Real size view is not selected.
-
If you create a new customiser, Show Real size view is selected. This does not apply to lightbox customisers.
-
If you duplicate a customiser, the copy keeps the setting of the original customiser.
Measurements and units
The Measurement Unit setting in General Settings controls the height of the person in the caption and in the screen reader text:
-
Centimeters shows “170 cm”.
-
Inches shows “5 ft 7 in”.
-
Both Centimeters and Inches shows “170 cm (5 ft 7 in)”.
The height rail shows “170cm”. If Measurement Unit is Inches, the rail shows the height in inches, for example “66.93in”.
The Show/hide Measurements setting controls the size label of the sign:
-
Show both width and height shows the width and the height. For Frame Fit customisers, the name of this option is Show width and height.
-
Show Only Width shows the width.
-
Show Only Height shows the height.
-
The two Do not show measurements options show no size label. Screen readers also do not read the size of the sign.
The size label uses the Measurement Unit and Decimal Format of Measurements settings. For example, a 200 × 21 cm sign with Both Centimeters and Inches and two decimals shows “200cm × 21cm / 78.74in × 8.27in”.
The person and the height rail always show. On desktop, the caption also always shows. They give the height of the person, not the size of the sign.
When the Real size view is not available
Sometimes the customer cannot open the Real size view. When the customer clicks or taps Real size, a message below the switch gives the reason:
-
If the customer has no design, the message is “Make your design first to see its real size.” For example, this occurs when there is no text.
-
If the preview is too small for the sign and the person, the message is “Make the preview larger to see the real size.”
While the AI sign designer makes a design, the Real size view is not available.
The Real size view closes when it is no longer available. The preview then shows the Design view. For example, this occurs when the customer deletes all the text.
Change or translate the Real size text
Follow these steps to change the text of the Real size view:
-
In the admin, click Customisers.
-
Click the customiser that you want to edit.
-
In the left-hand menu, click Settings → Languages.
-
Click Edit next to the language.
-
Go to the Visualiser section.
-
Change the text in the fields.
-
Click Publish.
To keep your changes as a draft, click Save draft. Customers see only published text.
The Visualiser section has these fields for the Real size view:
-
Design view button. This is the Design option of the switch. The default text is “Design”.
-
Real size view button. This is the Real size option of the switch. The default text is “Real size”.
-
Real size view caption. This is the caption on desktop. The default text is “The person is {height} tall. Change the size in the sidebar to see it here.”
-
Real size view description. Screen readers read this text. The default text is “The sign is shown next to a person who is {height} tall.”
-
Real size view sign size. Screen readers read this text. The default text is “The sign is {size}.”
-
Real size view unavailable message. This message shows when the customer has no design. The default text is “Make your design first to see its real size.”
-
Real size view no room message. This message shows when the preview is too small. The default text is “Make the preview larger to see the real size.”
Keep {height} and {size} in your text. The customiser replaces {height} with the height of the person. It replaces {size} with the size of the sign.
If a label is too long for the space next to the price, the switch shows only its icons. The label then shows as a tooltip.
Product images, cart and shared links
The person, the height rail and the size label show only in the live preview. Product images show only the sign. This includes the product image in the cart and in the order. A shared design link opens in the Design view. The Real size view does not change the product image.
Related articles
-
Visually scale signs for size dimensions. This article is about Scale visualisation with size. This setting changes the size of the sign in the Design view when the customer selects a different size. The Real size view does not use this setting. You can use the two settings together.
-
Scene Editor. This article tells you how to add background images and set their real size.