
Set up Shopify variant links so the customiser opens on the right size
This guide explains how to link Shopify product variants to Sign Customiser sizes so the correct size is selected when a shopper opens a product page.
Last updated:
Before you start
-
A working customiser: Make sure all the settings in your customiser are configured. Follow our Quick Start guide to get started.
-
The customiser embedded in a product page template: Follow Install Sign Customiser in a Shopify theme with an app block if you need help adding the customiser to your product page.
Important: This feature only works when the customiser is embedded using the Sign Customiser app block. It will not work with iframe enabled or using Sign Customiser Modal format.
Step 1: Note your customiser’s size labels and descriptions
-
Go to the Sign Customiser Admin
-
Navigate to Shopify admin → Apps and select Sign Customiser.
-
Click on Customisers in the menu.
-
Select the customiser you want to see.
-
From the left-hand menu, go to Core Setup → Sizes.
-
Note the Label for each size, such as
Small,Medium,LargeandMassive. These labels will be used when creating your Shopify product variants.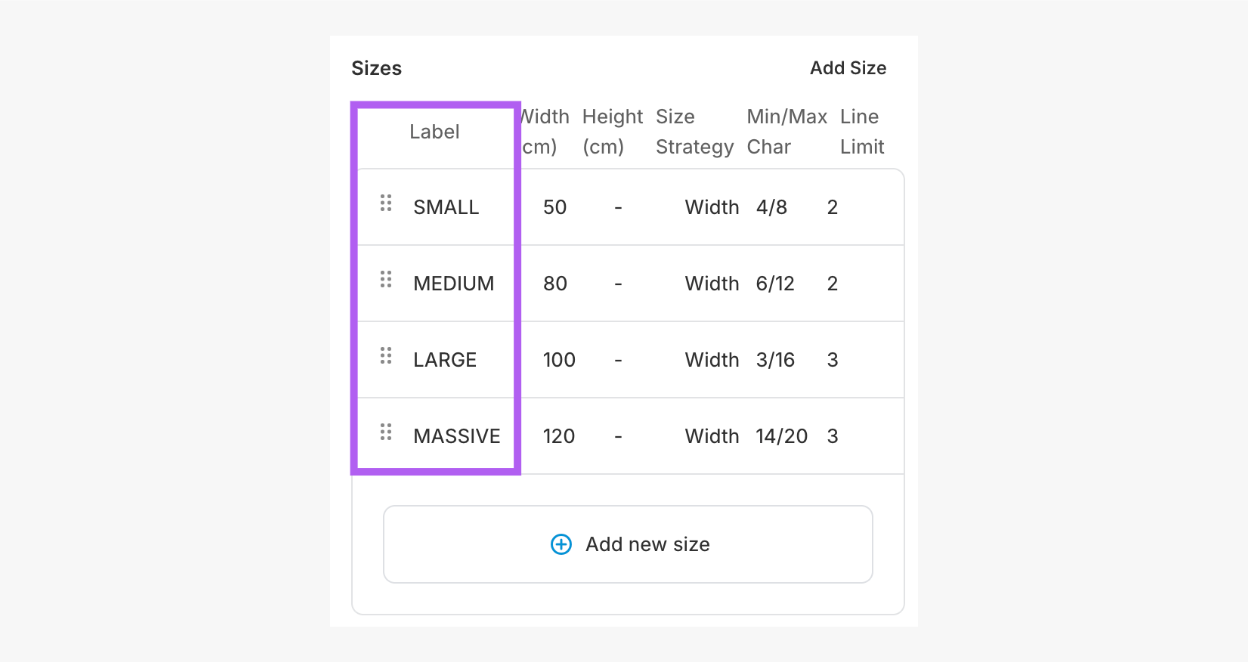
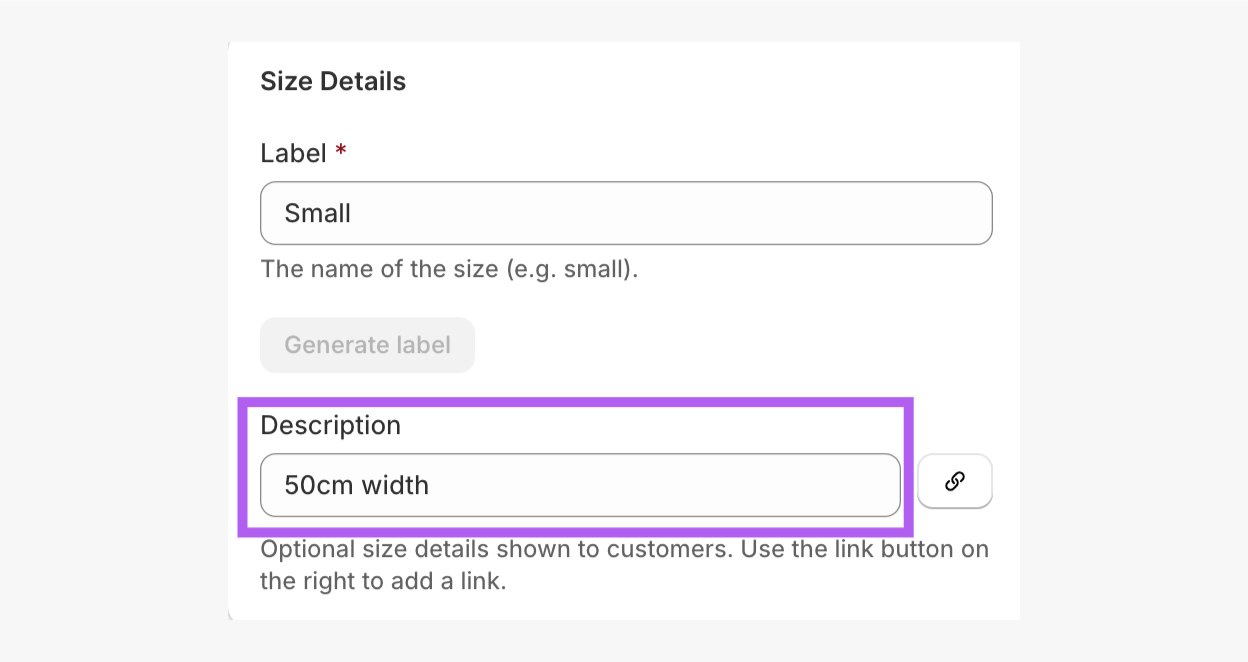
If you also want to include the size description in the Shopify variant name, note down the Description for each size.
Step 2: Check “Save sign design for next visit”
Saved designs can take priority over the size specified in a variant link. When Save sign design for next visit is enabled, the customiser may reopen a design from the shopper’s previous visit. Shared links and Presets can also take priority over the variant specified in the URL.
If you want the variant link to determine the selected size, disable the relevant features that may override it.
To turn off saved designs:
-
While still in your customiser, go to Features → Share and Save.
-
Uncheck the Save sign design for next visit box.
-
Click Save.
To turn off preset designs:
-
In Shopify admin, go to Online Store → Themes.
-
Click Customise to open the theme editor.
-
Edit the product template that holds your customiser.
-
Click on the Sign Customiser app block.
-
Check that the Preset Code field is empty.
Step 3: Set up the Shopify product
-
In Shopify admin, go to Products and open an existing product, or create a new one.
-
Add an option called Size. Shopify creates a variant for each value. Follow Shopify’s guide: Adding variants.
-
Each value must match the corresponding size label in Sign Customiser exactly, including the wording. Capitalisation and extra spaces do not matter. Each value must match only one size. For example:
Small,Medium,LargeandMassive. If you want to include the size description, add it in brackets after the label. For example:Small (50cm width).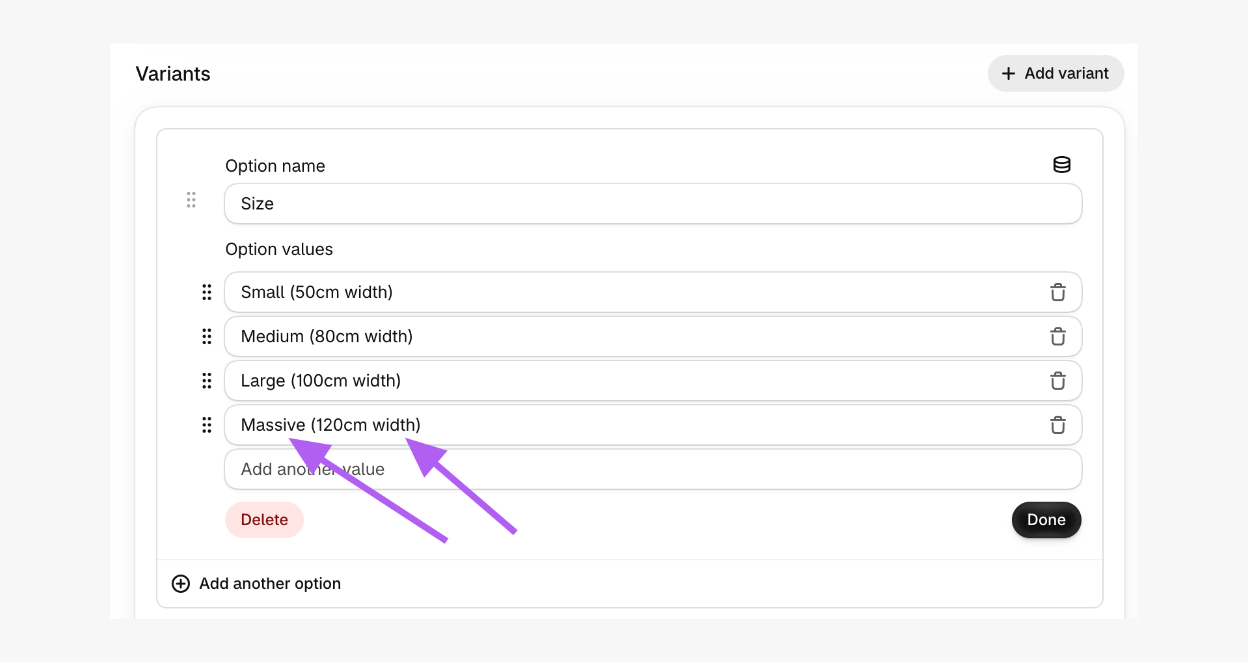
-
Select Save and set the product status to Active.
Step 4: Test every size
Test each variant to make sure the correct size is selected when a shopper opens the product page using its variant link.
-
In Shopify admin, open the product and select a variant to access its details.
-
Find the variant ID in the browser’s address bar. It is the number after /variants/. For example, in this URL:
https://admin.shopify.com/store/my-store/products/11278288453975/variants/55420538126679The variant ID is55420538126679.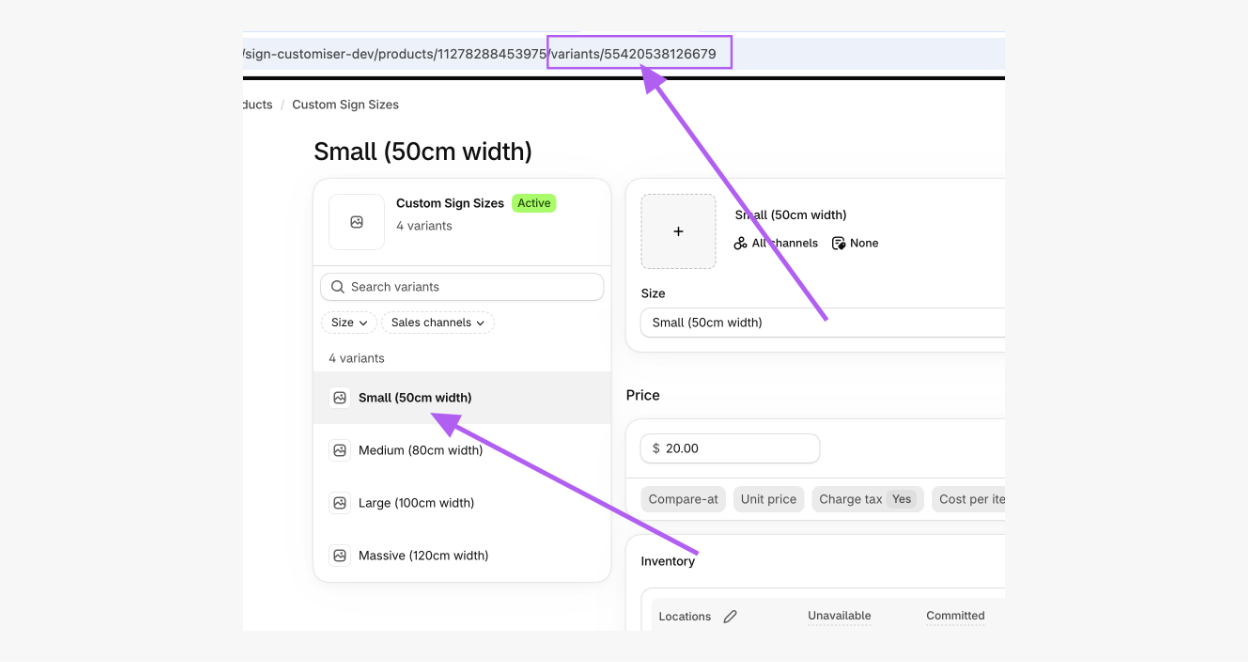
-
Open your storefront product page. You can also open it in preview mode to prevent saved designs from showing.
-
Add
?variant=followed by the variant ID at the end of the product URL. For example: https://store.myshopify.com/products/custom-sign?variant=55420538126679 -
Press Enter to load the page.
-
Check that the expected size is selected in the customiser.
-
Repeat the test for every variant.
-
Finally, open the product page without a
?variant=parameter. Shopify selects a default variant, so check that the customiser displays the expected size for that variant as well.