
Open the correct size from a Shopify variant link
Use a Shopify product link with?variant= to open the customiser with the matching size already selected.
Last updated:
A Shopify product link can end with ?variant= and the ID of a variant. When a shopper opens the link, the customer customiser selects the size that matches the variant. The shopper does not look for the size again.
This article is for Shopify merchants. It applies when the customiser shows on a product page through the Sign Customiser app block.
Before you start
-
Add the customiser to the product page with the Sign Customiser app block. See Install Sign Customiser in a Shopify theme with an app block.
-
Create one Shopify variant for each size that you sell.
-
Turn off Use iframe (experimental) in the block settings. The iframe version does not read the variant.
How the match works
The customiser compares each option value of the Shopify variant with each size in your customiser. An option value matches a size when it is the same as one of these:
-
The size Label, for example
30 inch. -
The size Label, then the size Description in brackets, for example
30 inch (75 cm).
Capital letters and extra spaces do not change the result. The type of inch mark does not change the result. For example, 30″ matches 30".
The customiser uses the Label and Description that you set for each size. If you publish a translation of a size, the customiser uses the translated Label and Description for that language. The option value of the variant must then be the same as the translated text.
Set up matching sizes
-
Open the Sign Customiser admin. In Shopify admin, go to Settings > Apps, then open the app. In the Universal admin, go to Home.
-
Select Customisers in the menu.
-
Open your customiser.
-
Under Core Setup, select Sizes.
-
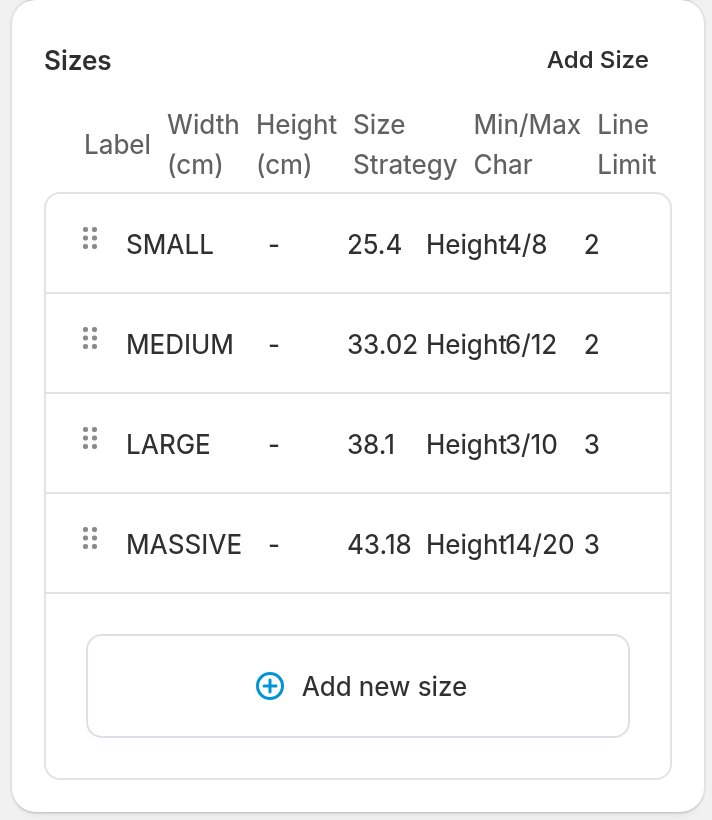
In the Sizes list, read the Label of each size.
-
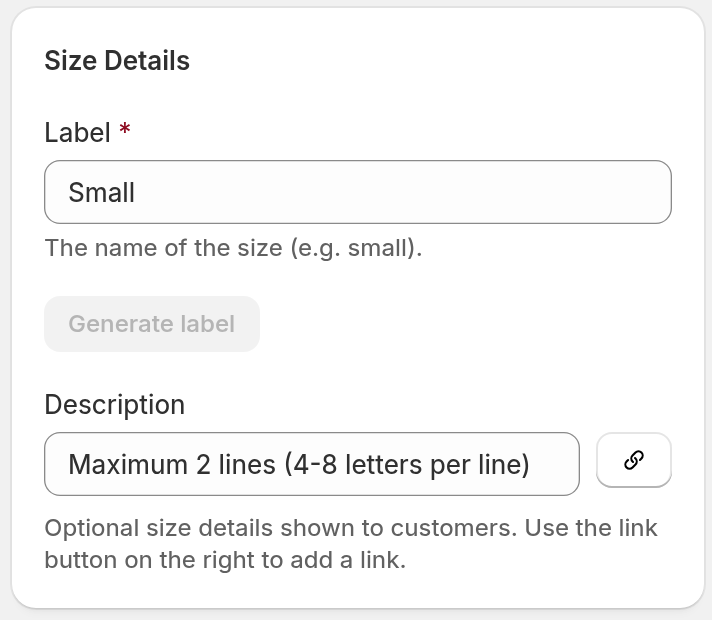
Select a size to read its Description. The Description field does not show for every customiser. If you cannot see it, use only the Label.
-
In Shopify admin, open the product and edit its variants.
-
Make sure that each variant has one option value that is the same as the Label of its size. Optionally, add the Description in brackets after the Label. For the steps to enter option values, see Add variants to a product in the Shopify Help Center.
-
Make sure that the option values of each variant match only one size.
What the shopper sees
-
The shopper opens a product link with
?variant=. -
The customiser opens with the size of that variant selected. The size heading is Choose a size, unless you changed the Title on the Sizes page.
-
The customiser shows the price for that size.
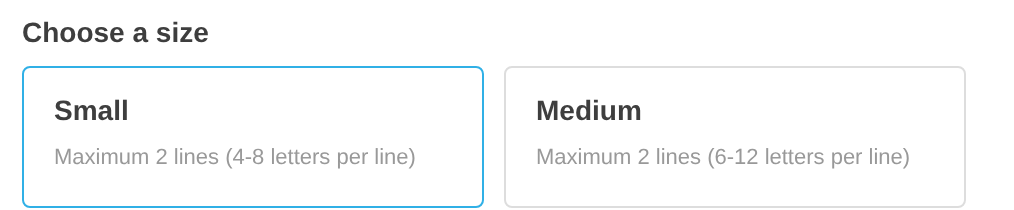
The picture shows the Choose a size section. The first size is selected because this preview does not have a variant link.
Limits
-
If no size matches the variant, the customiser selects the first size.
-
If more than one size matches, the customiser selects the first size. Give each size a Label that is different from every other size Label. Capital letters, extra spaces and the type of inch mark do not make a Label different. Do not make a Label the same as the Label and Description of another size, with the Description in brackets.
-
A saved design has priority over the variant. A ShareLink and a preset also have priority.
-
A saved design from a previous visit shows only if Save sign design for next visit is on. To turn it on, go to Features > Share and Save in your customiser.
-
Only the Sign Customiser app block reads the variant. The Sign Customiser Modal block and the Sign Customiser - Embed app embed do not read it.