

Size a lightbox sign to the customer image
Let a lightbox sign take the proportions of the image a customer uploads, within your minimum and maximum sizes.
Last updated:
A customer can upload an image to the face of a lightbox sign. If Custom Sizing is on, the sign then takes the proportions of that image. The customer does not need to calculate a width and a height. Use this article if you sell lightbox signs and you want the size to follow the artwork.
Before you start
Your lightbox customiser must have these two settings:
-
Enable Custom Sizing is selected in Core Setup → Sizes.
-
Allow image uploads is selected for the Face part in Sign Components → Lightbox Types.
If Custom Sizing is off, the sign does not change size when the customer uploads an image. The customer crops the image to the current face shape. To switch Custom Sizing on, read Sizing - Frame Fit Model.
Set up the customiser
Allow image uploads on the face
-
Open the Sign Customiser admin for your Store.
-
Click Customisers.
-
Click your lightbox customiser.
-
In the left-hand menu, go to Sign Components → Lightbox Types.
-
Under Lightbox Types, click the lightbox type that you sell.
-
Under that lightbox type, click the Face part.
-
In the Visualiser Settings card, select Allow image uploads.
-
Click Save.
If the lightbox has Left and Right parts, you can allow uploads on the Back, Left and Right parts in the same way. Only the Face upload changes the size of the sign. For more information, read Customer uploaded images for lightboxes.
Turn on Custom Sizing and set the limits
-
In the left-hand menu, go to Core Setup → Sizes.
-
In the Custom Sizing card, select Enable Custom Sizing.
-
In the Custom Size Settings card, enter the values that follow.
-
Initial Sign Width, Initial Sign Height and Initial Sign Depth. These values give the starting size. The image is first fitted into this box.
-
Minimum Sign Width, Minimum Sign Height and Minimum Sign Depth. The sign is not smaller than these values.
-
Maximum Sign Width, Maximum Sign Height and Maximum Sign Depth. Select Width limit, Height limit or Depth limit, then enter a value. The sign is not larger than these values. An upload does not apply the Depth limit, so keep Initial Sign Depth at or below the Depth limit. If you select the unlimited option, there is no maximum.
-
-
Click Save.
Optional: if you do not want preset sizes, select Only show custom size under Hide the other sizes. Size matching works with preset sizes on or off.
What the customer sees
-
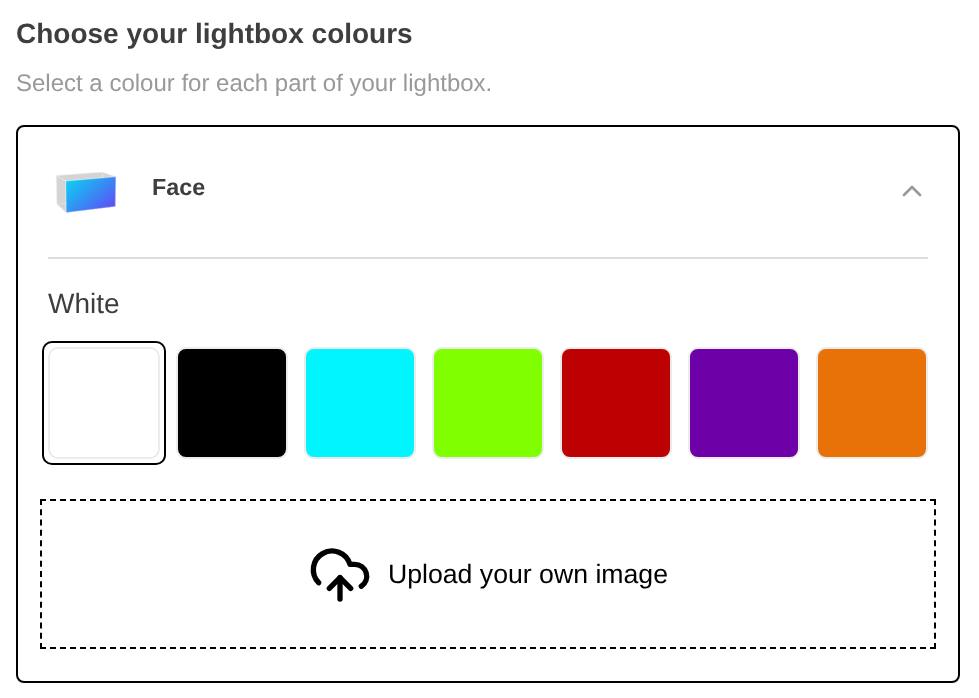
The customer opens the Choose your lightbox colours step. The Face card is open by default.
-
The customer clicks Upload your own image and selects a file. The file must be smaller than 2 MB.
-
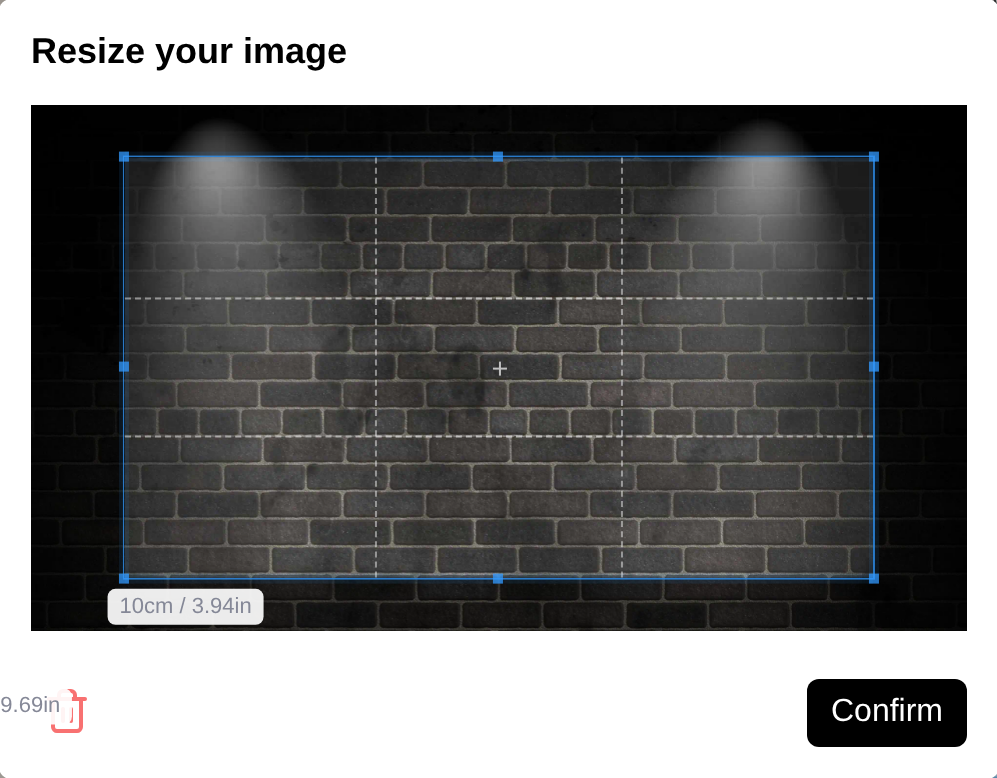
The Resize your image window opens. If Custom Sizing is on, the customer drags the crop box to any shape. The shape does not need to be square or to match the current face. If Custom Sizing is off, the crop box keeps the current face shape.
-
The customer clicks Confirm.
The sign then changes to match the image:
-
The size selection changes to Custom. If you changed the custom size label, the customer sees your label.
-
Width and Height change. The sign has the same proportions as the cropped image.
-
The image does not change Length by itself. Length is the depth of the sign. If the customer has not changed the size, the upload sets Length to your Initial Sign Depth.
-
The price and the preview show the new size.
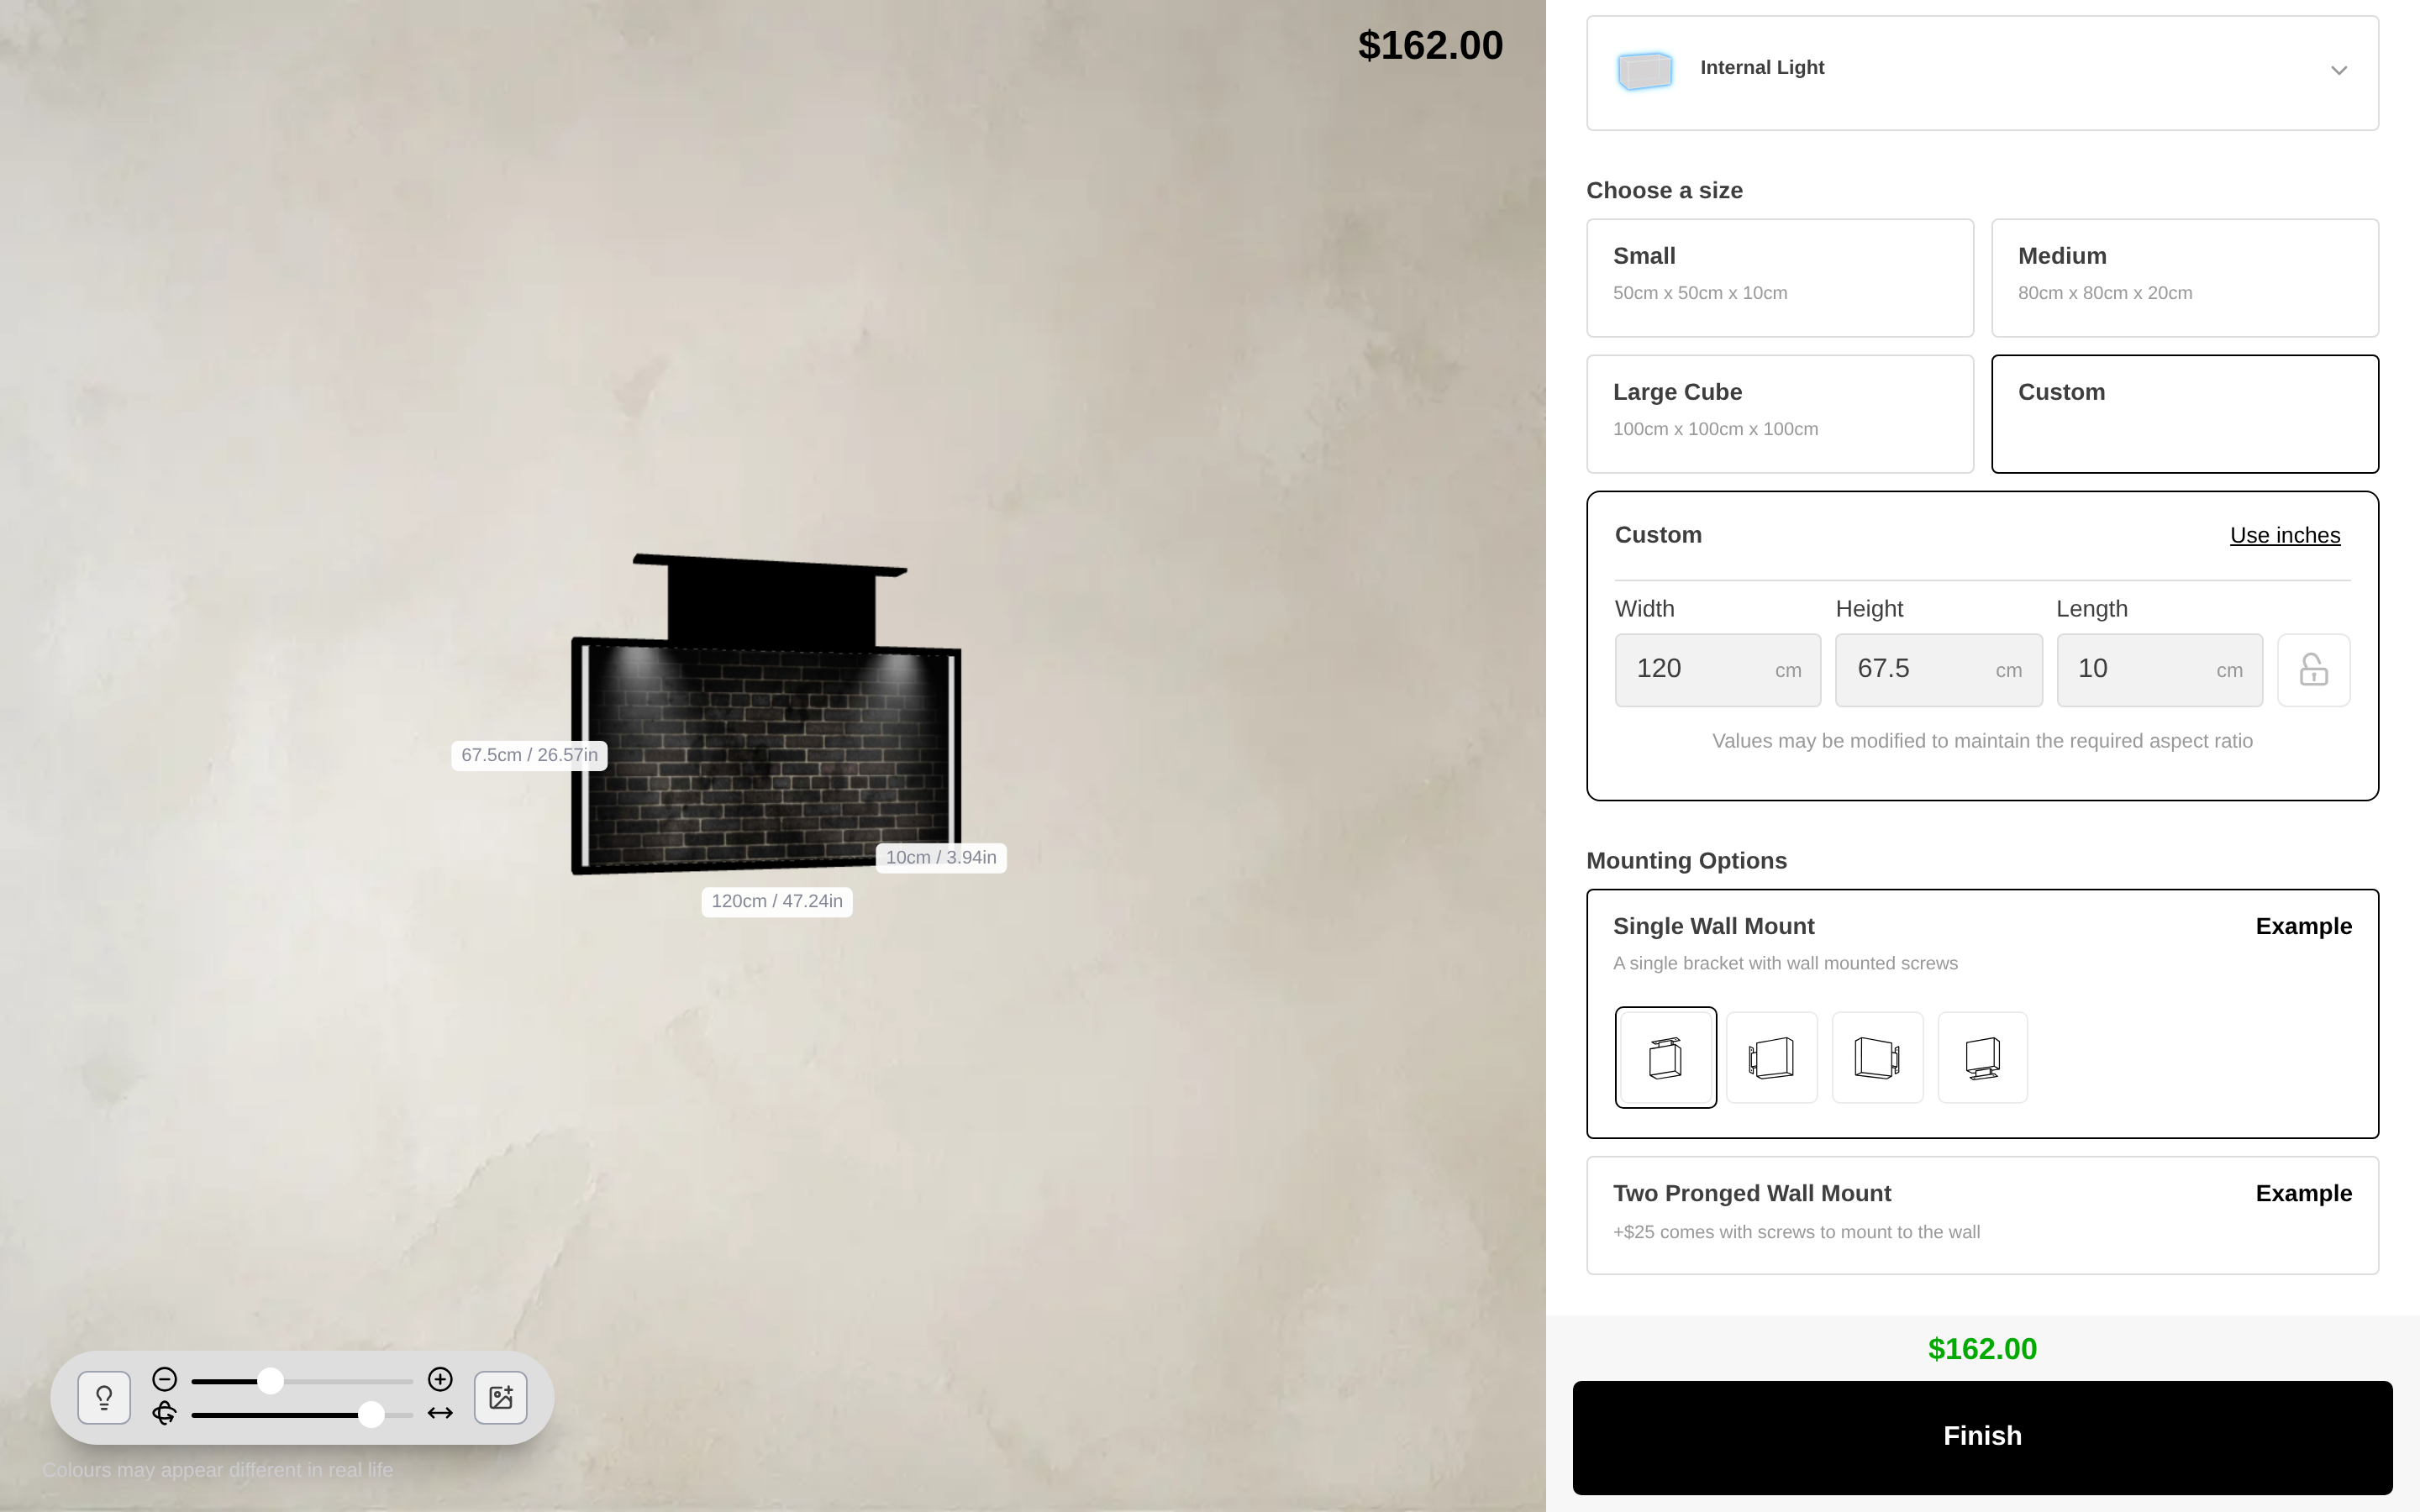
The customer can still change the size. If the customer types a new Width or Height, Sign Customiser can change both values. This keeps the proportions of the image. The size screen shows this message: “Values may be modified to maintain the required aspect ratio”.
When Custom Sizing is on and the customer changes the size, the uploaded image stays. When the customer removes the image, the size stays the same.
How the size is calculated
-
The image is fitted inside a box. At first, the box is your Initial Sign Width and Initial Sign Height. After the customer types a size, the box is that size.
-
The sign does not grow to your maximum size. This prevents a sudden large price increase.
-
The sign keeps the proportions of the image inside the box.
-
The result then stays between your minimum and maximum width and height. A very wide or very tall image can raise the sign to your minimum size.
-
Only the Face image changes the size. A Back, Left or Right image does not change the size.
-
A new crop of the Face image calculates the size again.
Limits
-
Size matching runs only for lightbox customisers that have Custom Sizing on. Customisers that have preset sizes only do not change. For these customisers, the image is cropped to the current face shape. The image is removed when the customer changes the size.
-
If no size can hold the image between your minimum and maximum, the sign keeps its current size. Sign Customiser fits the whole image inside the face of the sign.
-
The image file must be smaller than 2 MB. For a larger file, the customer sees this message: “Maximum upload size 2mb”.
-
A new lightbox customiser that you make with Include demo data selected starts with Custom Sizing on. It shows only the custom size and has no preset sizes. The sizes depend on the measurement unit of your Store. All sizes are width x height x depth.
-
For a Store that measures in centimetres, the starting size is 120 x 180 x 10 cm. The minimum size is 50 x 32 x 10 cm. The maximum size is 300 x 300 x 100 cm.
-
For a Store that measures in inches, the starting size is 48 x 72 x 4 in. The minimum size is 20 x 12 x 4 in. The maximum size is 120 x 120 x 40 in.
-
-
Existing customisers keep their current sizes and their Custom Sizing setting. The demo values apply to customisers that you make with Include demo data selected. They also apply to a lightbox that the public API or an AI agent creates from a prototype. If an existing lightbox customiser has Custom Sizing on, it uses size matching. You can add preset sizes at any time in Core Setup → Sizes.